April 2017
6-3
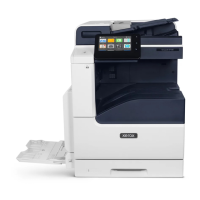
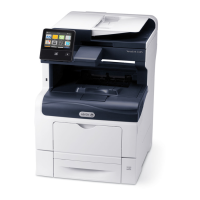
Xerox® VersaLink® B7025/B7030/B7035 Multifunction Printer
GP 1
General Procedures and Information
Launch Issue
GP 1 Diagnostics Entry
Purpose
This procedure describes how to enter and exit diagnostics and the available service routines.
NOTE: A video of this procedure is available on the EDOC. The video is accessible from the
Library menu on the Service Interface.
How to Enter Diagnostics
1. If necessary, switch on the machine, GP 10.
NOTE: Log out of system administration tools and delete all print jobs in the queue before
entering diagnostics.
2. When the machine is ready, press and hold the Home button for 5 seconds. Release the
home button.
3. When the passcode screen opens, enter the passcode, 6789. Touch OK. If the UI dis-
plays a message requesting a maintenance password, touch Next.
NOTE: The system administrator can set an extra level of diagnostics password protection.
Security sensitive customers may have this feature enabled. If this feature is enabled, obtain
the maintenance password from the customer.
4. If required, enter the maintenance password, touch OK. If the maintenance password is
unavailable, refer to Administrator Password Not Available.
5. Touch Diagnostics.
6. Select the relevant diagnostics routine:
• dC118 Jam Counter
• dC120 Failure Counter
• dC122 Shutdown History
• dC125 Active Faults
• dC126 System Registration Adjustment
• dC131 NVM Read/Write
• dC132 Device ID and Billing Data
• dC135 HFSI Counter
• dC140 Analog Component Monitoring
• dC301 Initialize NVM
• dC305 Panel Diagnostics
• dC330 Component Control
• dC355 Hard Disk Diagnostics
• dC500 Blank Page Threshold Value
• dC527 DADF Independent Operation
• dC612 Print Test Pattern
• dC945 IIT Calibration
• dC980 Altitude Adjustment
• dC991 Toner Density Adjustment
• dC1010 Signals Sending Test (see NOTE)
• dC1011 Relay On/Off Test (see NOTE)
NOTE: For information only. Do not use this routine.
How to Exit Diagnostics
1. Touch Exit. Select either Clear Error Log History or Keep Error Log History.
2. Touch Service.
3. Touch Log Out.
Administrator Password Not Available
If the maintenance passcode is unavailable, perform the steps that follow:
1. From the Embedded Web Server Home screen, select Log In, then Admin.
2. Enter the password ‘1111’ (default setting). Select Log In. If the administrator password is
unknown, perform GP 29 System Administrator Password Reset.
3. Select System, Security.
4. Select Customer Service Engineer Access Restriction. If this option is not displayed,
select SSL/TSL Settings, then enable HTTP-SSL/TLS Communication. Then select
OK, then Restart Now. After the restart, select System, then Security, then Customer
Service Engineer Access Restriction.
5. Disable the feature, select OK, then Restart Now.
6. Enter diagnostics normally.

 Loading...


