April 2017
4-189
Xerox® VersaLink® B7025/B7030/B7035 Multifunction Printer
REP 80.13
Repairs and Adjustments
Launch Issue
REP 80.13 STM PWB
Parts List on PL 70.28
Removal
WARNING
Switch off the electricity to the machine. Refer to GP 10. Disconnect the power cord
from the customer supply while performing tasks that do not need electricity. Electricity
can cause death or injury. Moving parts can cause injury.
Figure 1 ESD Symbol
CAUTION
Observe ESD procedures during this procedure.
NOTE: The instructions for recording the NVM value specified in this procedure are also
included with the new STM PWB.
1. Enter dC131. Record the value of NVM location 742-003.
2. Remove the rear cover, Figure 2:
a. Remove the docking screw (1).
b. Remove the docking bracket (2).
c. Remove two screws (3).
d. Remove the rear cover (4).
Figure 2 Rear cover removal
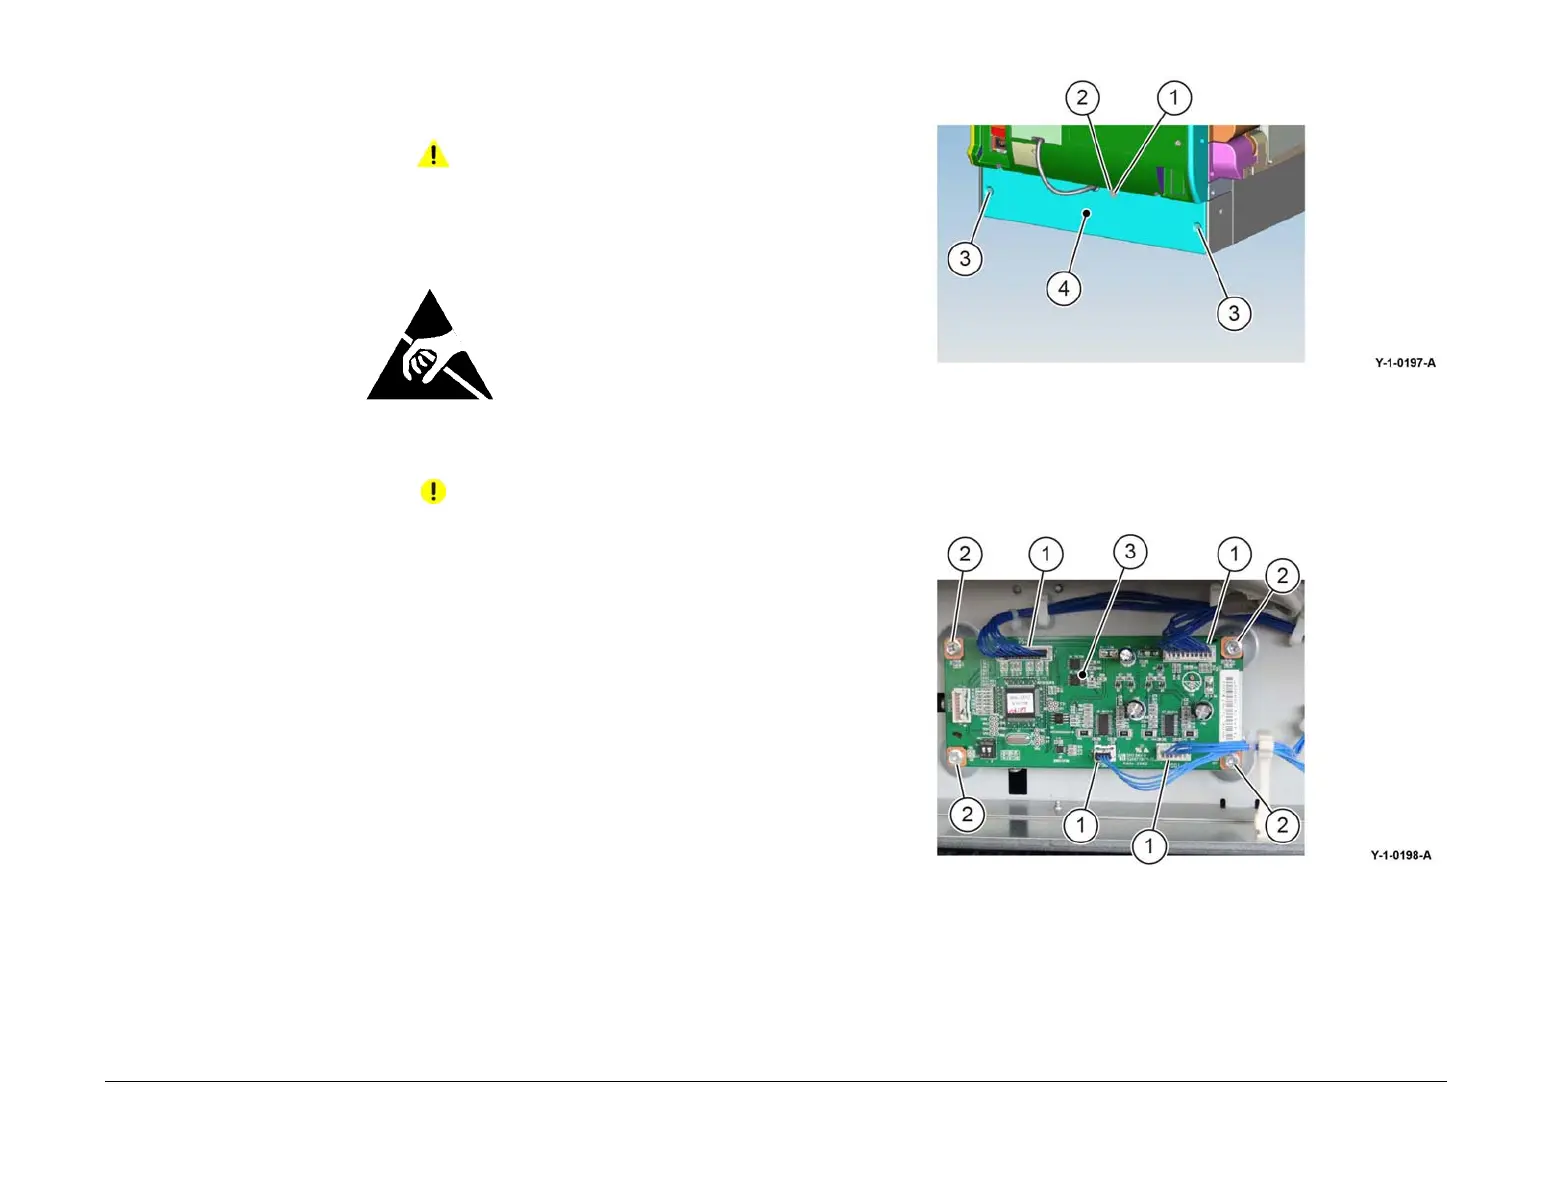
3. Remove the STM PWB, Figure 3:
a. Disconnect four connectors (1).
b. Remove four screws (2).
c. Remove the STM PWB (3).
Figure 3 STM PWB Removal
Replacement
1. The replacement is the reverse of the removal procedure.
2. If a new STM PWB is installed, change the value of NVM ID 742-205 to 6.
3. If a new STM PWB is installed, enter dC131. Change the value of NVM location 742-003
to the value recorded at the beginning of this procedure.

 Loading...


