April 2017
4-219
Xerox® VersaLink® B7025/B7030/B7035 Multifunction Printer
REP 90.1
Repairs and Adjustments
Launch Issue
REP 90.1 Dispenser Pipe Unit
Parts List on PL 90.05
Removal
WARNING
Switch off the electricity to the machine. Refer to GP 10. Disconnect the power cord
from the customer supply while performing tasks that do not need electricity. Electricity
can cause death or injury. Moving parts can cause injury.
1. Remove the drum cartridge, REP 90.4.
2. Remove the front cover, REP 28.1.
3. Remove the inner cover, REP 28.2.
4. Remove the print head assembly, REP 60.8.
5. Remove the AC housing assembly, REP 90.6.
6. Remove the bracket assembly, Figure 1:
a. Remove two screws (1).
b. Remove the bracket assembly (2).
Figure 1 Bracket assembly removal
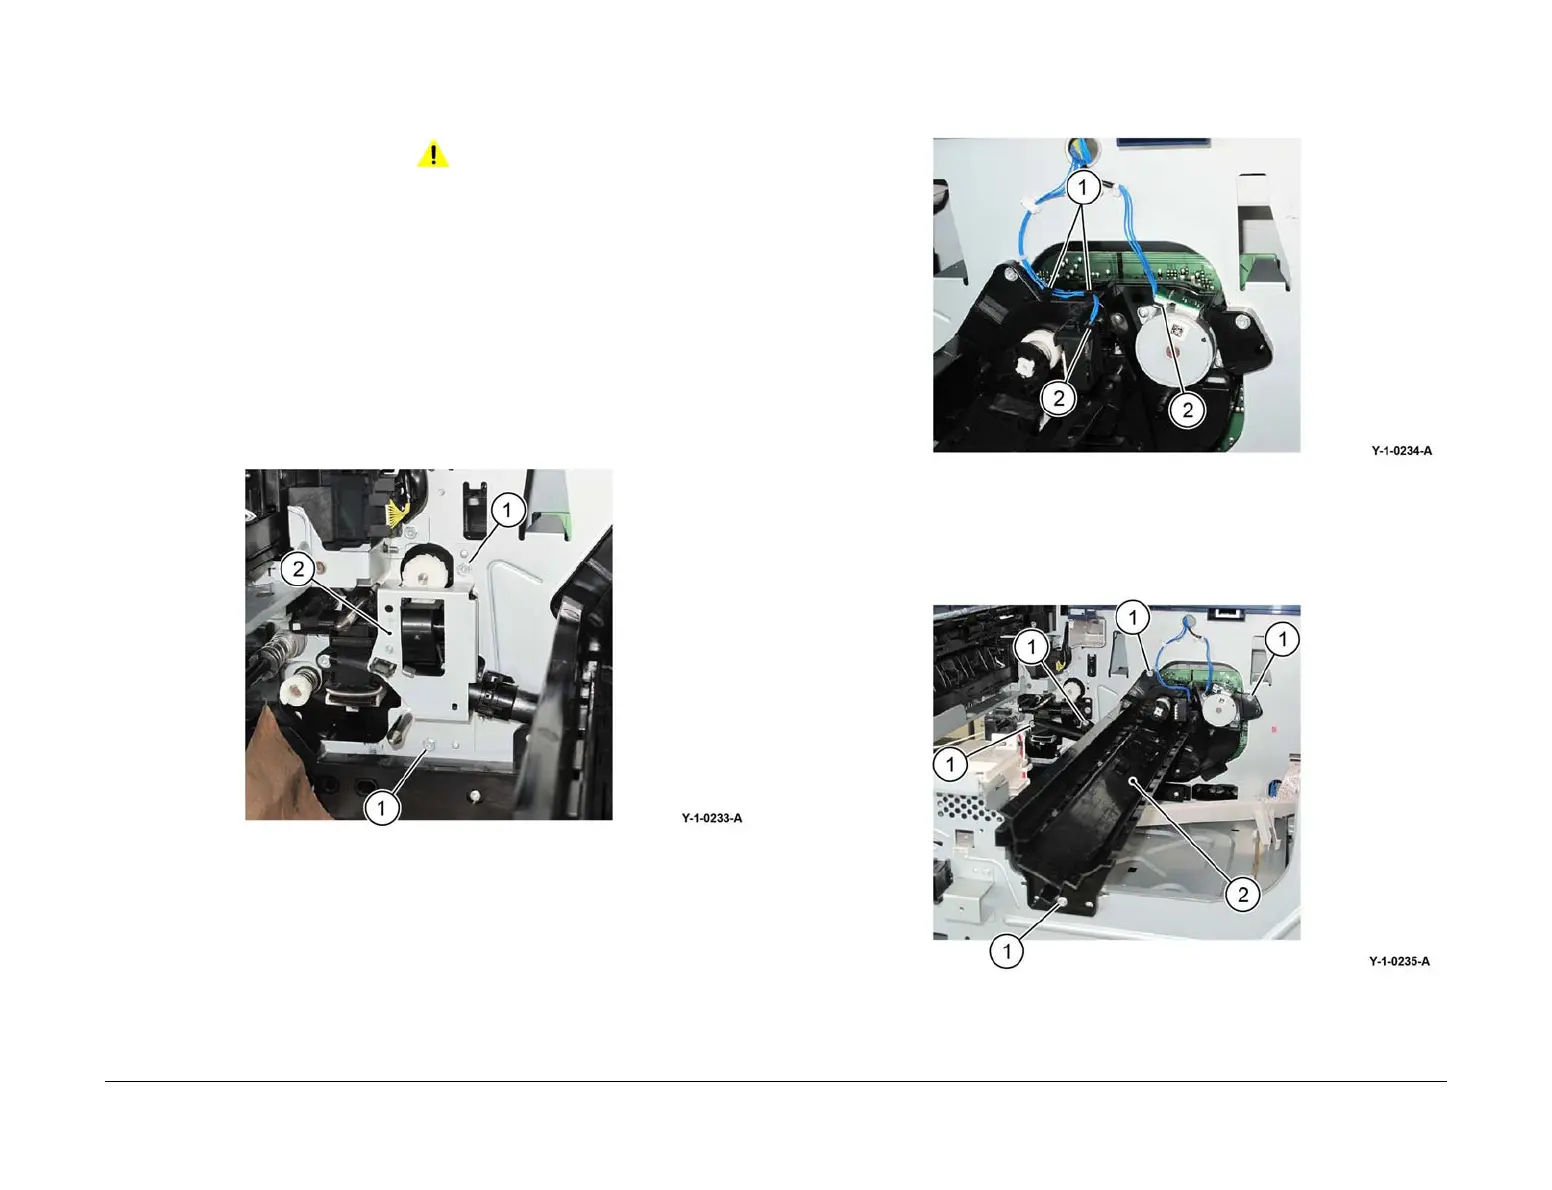
7. Prepare to remove the dispenser pipe unit, Figure 2:
a. Release the wire harness (1).
b. Disconnect the connectors (2).
Figure 2 Preparation
8. Remove the dispenser pipe unit, Figure 3.
a. Remove five screws (1).
b. Remove the dispenser pipe unit (2).
Figure 3 Dispenser pipe unit removal
Replacement
The replacement is the reverse of the removal procedure.

 Loading...


