April 2017
4-135
Xerox® VersaLink® B7025/B7030/B7035 Multifunction Printer
REP 28.1, REP 28.2
Repairs and Adjustments
Launch Issue
REP 28.1 Front Cover
Parts List on PL 28.05
Removal
NOTE: A video of this procedure is available on the EDOC. The video is accessible from the
Library menu on the Service Interface.
WARNING
Switch off the electricity to the machine. Refer to GP 10. Disconnect the power cord
from the customer supply while performing tasks that do not need electricity. Electricity
can cause death or injury. Moving parts can cause injury.
1. Open the front cover.
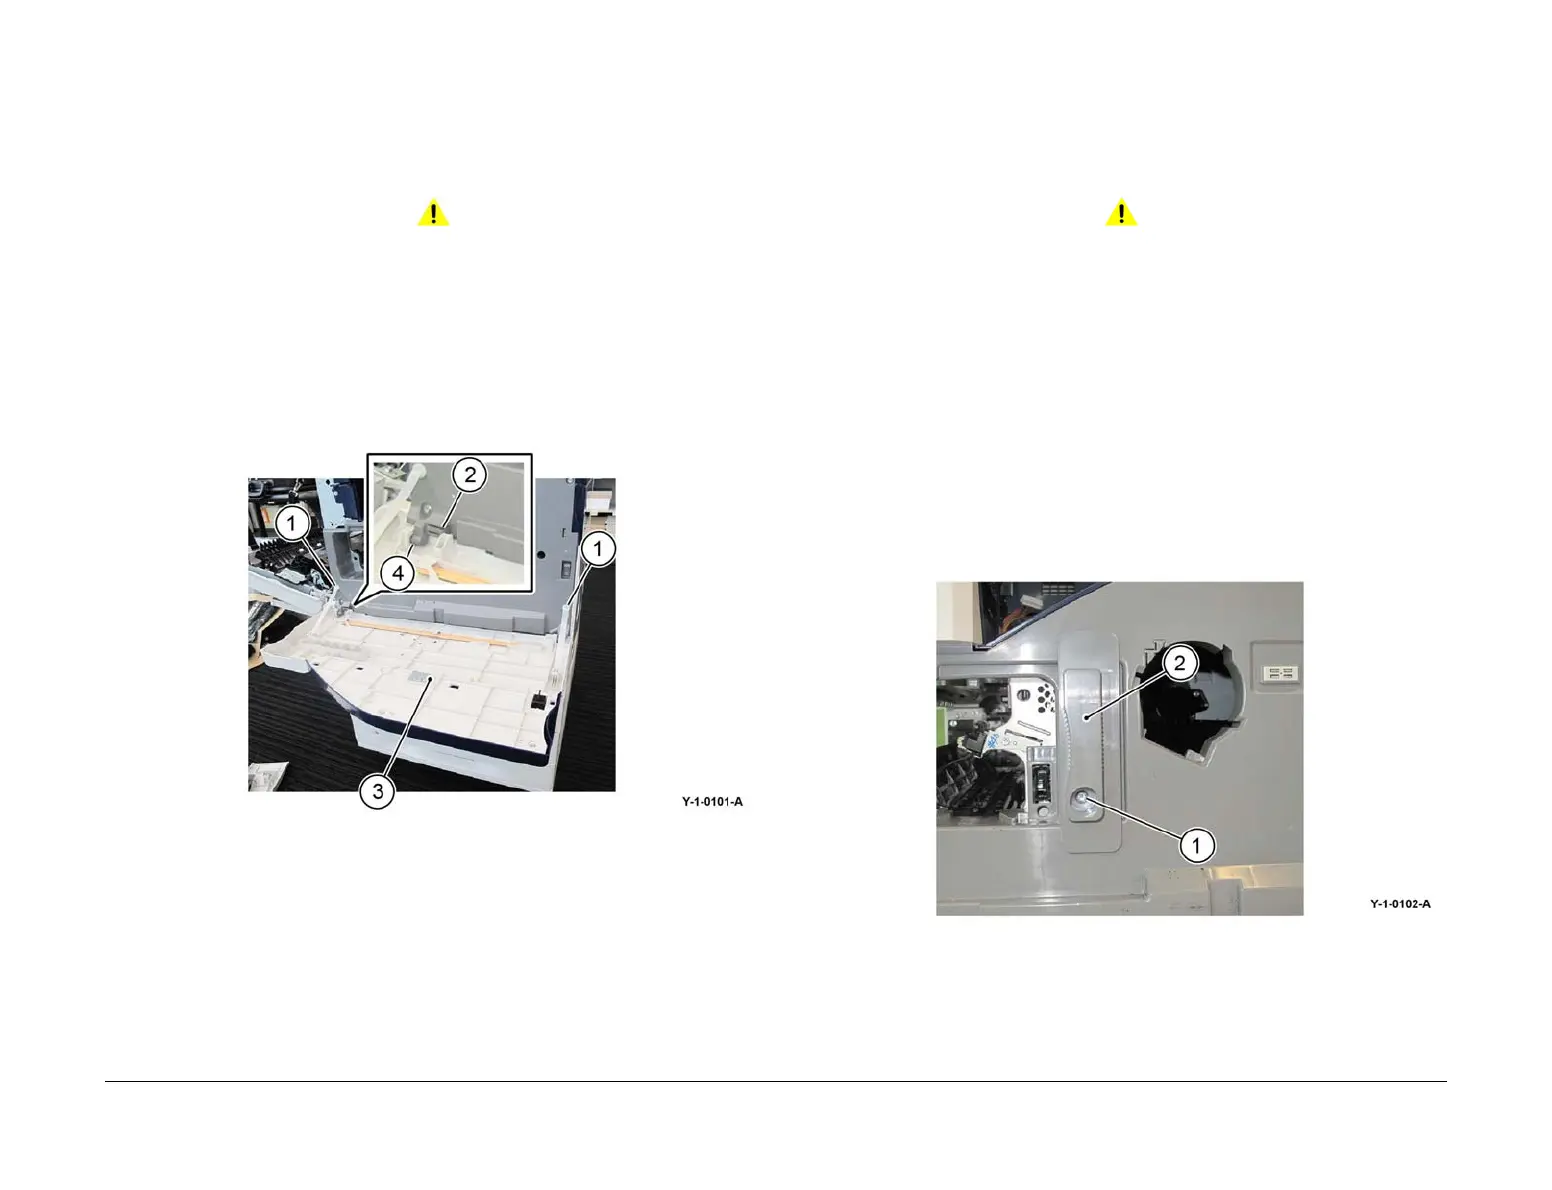
2. Remove the front cover, Figure 1:
a. Rotate the two straps (1) 90 degrees, then disconnect.
b. Press the stopper (2), then move the front cover (3) to the left. Remove the front
cover from the boss (4).
Figure 1 Front cover removal
Replacement
The replacement is the reverse of the removal procedure.
REP 28.2 Inner Cover
Parts List on PL 28.05
Removal
NOTE: A video of this procedure is available on the EDOC. The video is accessible from the
Library menu on the Service Interface.
WARNING
Switch off the electricity to the machine. Refer to GP 10. Disconnect the power cord
from the customer supply while performing tasks that do not need electricity. Electricity
can cause death or injury. Moving parts can cause injury.
1. As necessary, remove the:
• Integrated finisher, REP 12.1.
• Office finisher LX, REP 13.5.
• Horizontal transport, REP 13.1.
2. Remove the drum cartridge, REP 90.4.
3. Remove the front cover, REP 28.1.
4. Pull out, then remove the toner cartridge, PL 90.05 Item 1.
5. Remove the CRU handle and handle bearing as an assembly, Figure 1:
a. Remove the screw (1).
b. Remove the CRU handle and handle bearing (2).
Figure 1 CRU handle and bearing removal
6. Remove the top cover, REP 28.4.

 Loading...


