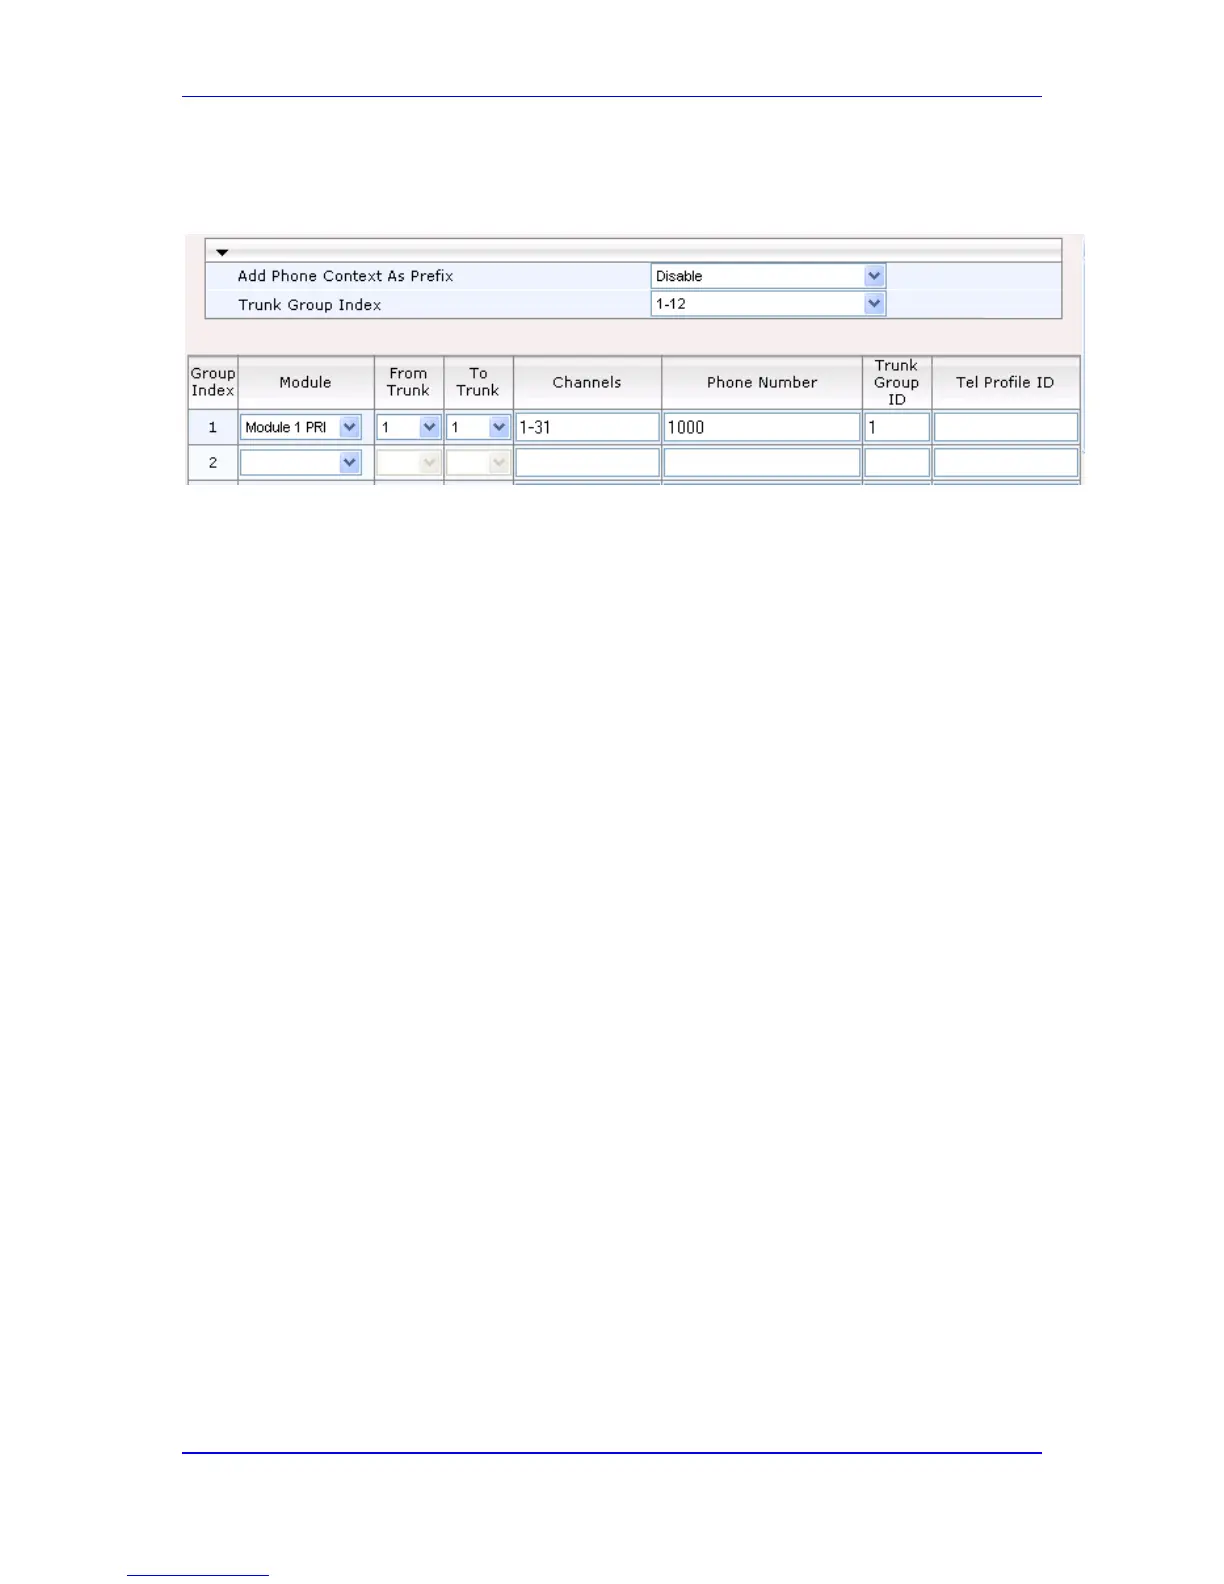
• In the 'Phone Number' field, enter any phone number (logical) for this Trunk (e.g.
1000).
• In the 'Trunk Group ID' field, enter "1" as the ID for this Trunk Group.
3. Configure the Trunk in the Trunk Settings page (Configuration tab > VoIP menu >
PSTN > Trunk Settings).
22.2.4 Step 4: Configure the Proxy Sets
The Proxy Sets represent the actual destination (IP address or FQDN) to which the call is
routed. These Proxy Sets are later assigned to IP Groups (see 'Step 5: Configure the IP
Groups' on page 269).
This step describes how to configure the following Proxy Sets:
Proxy Set ID #3 with an IP address for the IP-PBX
To configure the Proxy Sets:
1. Open the Proxy Sets Table page (Configuration tab > VoIP menu > Control
Network > Proxy Sets Table).
2. Configure Proxy Set ID #1 for ITSP-A:
a. From the 'Proxy Set ID' drop-down list, select 1.
b. In the 'Proxy Address' column, enter the FQDN of ITSP-A SIP trunk Proxy
servers (e.g., "Proxy1.ITSP-A" and "Proxy2. ITSP-A").
c. From the 'Transport Type' drop-down list corresponding to the Proxy addresses
entered above, select TLS.
d. In the 'Enable Proxy Keep Alive' drop-down list, select Using Options, and then
in the 'Proxy Load Balancing Method' drop-down list, select Round Robin.
 Loading...