2. Configure the SNMP community strings parameters according to the table below.
3. Click Submit to apply your changes.
4. To save the changes to flash memory, see 'Saving Configuration' on page 624.
To delete a community string, select the Delete check box corresponding to the community
string that you want to delete, and then click Submit.
SNMP Community String Parameters Description
Parameter Description
Community String
Read Only [SNMPReadOnlyCommunityString_x]: Up
to five read-only community strings (up to 19 characters
each). The default string is 'public'.
Read / Write [SNMPReadWriteCommunityString_x]:
Up to five read / write community strings (up to 19
characters each). The default string is 'private'.
Trap Community String
CLI: configure system > snmp trap >
community-string
[SNMPTrapCommunityString]
Community string used in traps (up to 19 characters).
The default string is 'trapuser'.
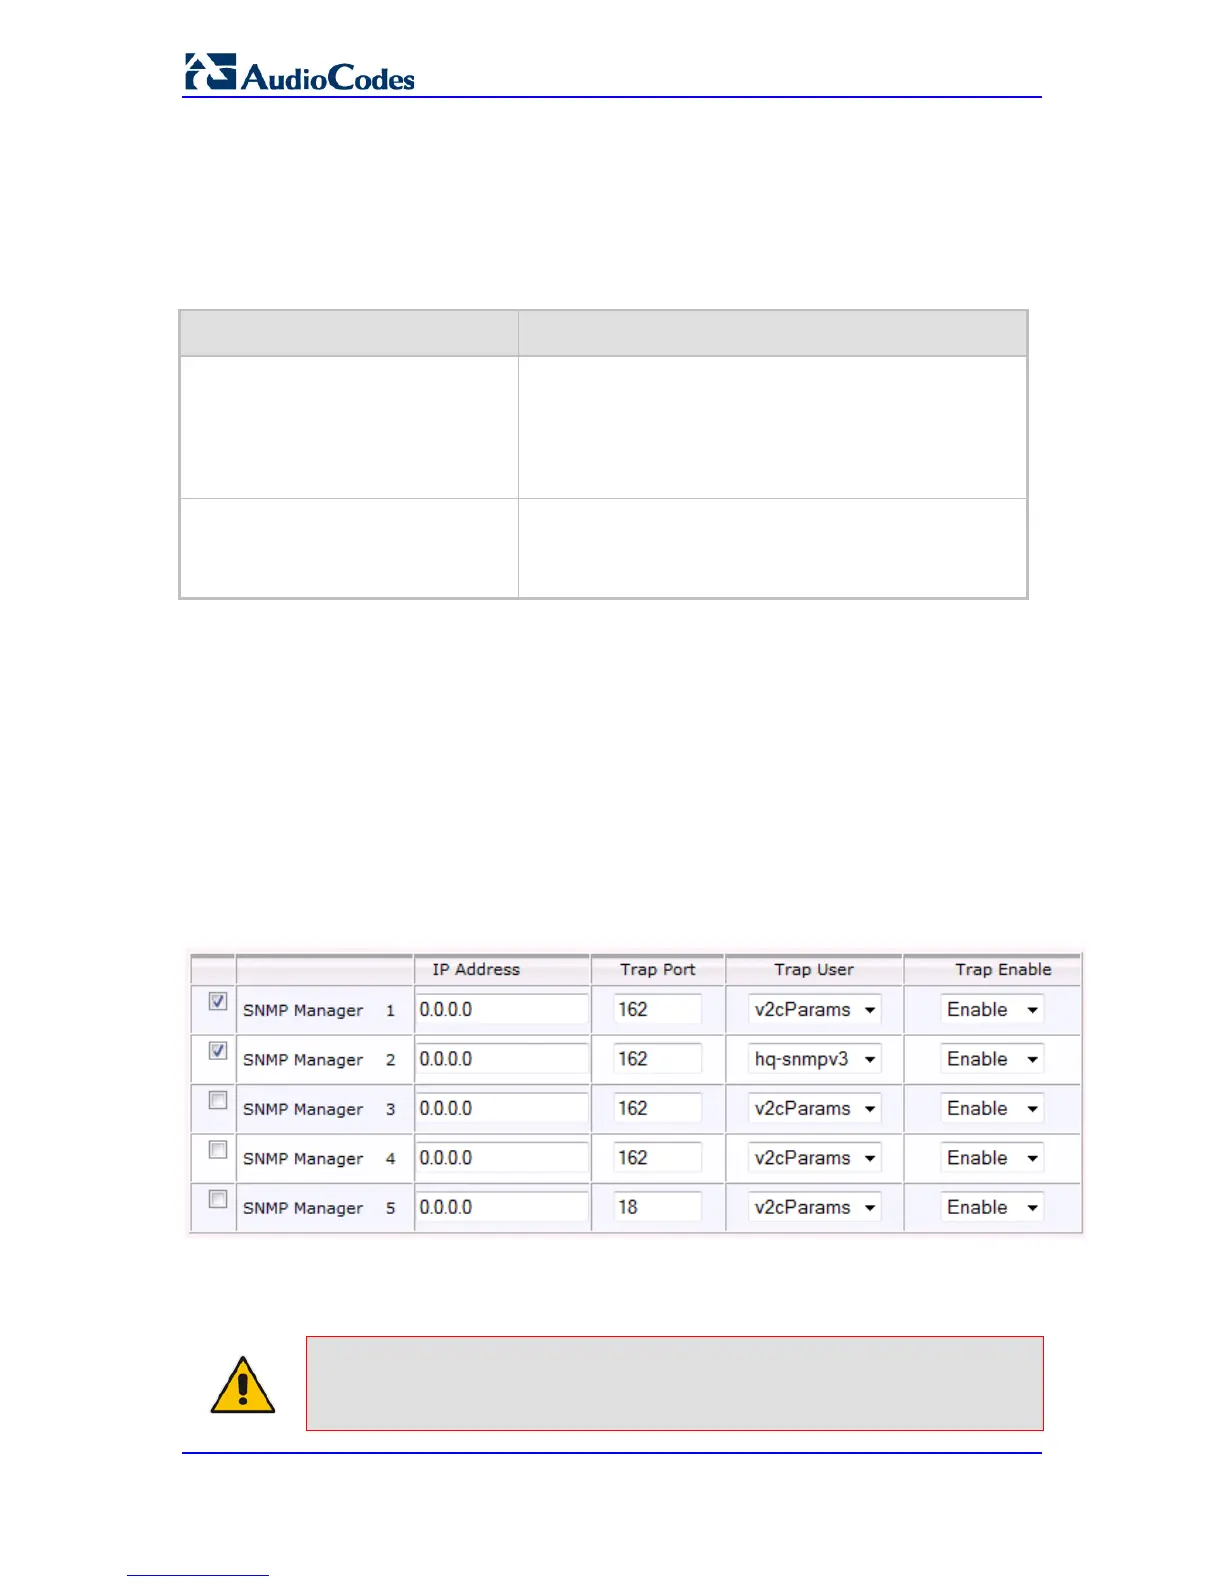
7.2 Configuring SNMP Trap Destinations
The SNMP Trap Destinations page allows you to configure up to five SNMP trap
managers. You can associate a trap destination with SNMPv2 users and specific SNMPv3
users. Associating a trap destination with SNMPv3 users sends encrypted and
authenticated traps to the SNMPv3 destination. By default, traps are sent unencrypted
using SNMPv2.
To configure SNMP trap destinations:
1. Open the SNMP Trap Destinations page (Configuration tab > System menu >
Management submenu > SNMP > SNMP Trap Destinations).
Figure 7-2: SNMP Trap Destinations Page
2. Configure the SNMP trap manager parameters according to the table below.
3. Select the check box corresponding to the SNMP Manager that you wish to enable.
4. Click Submit to apply your changes.
Note: Only row entries whose corresponding check boxes are selected are applied
when clicking Submit; otherwise, settings revert to their defaults.
 Loading...