18 HD96-24-CC-TP User Manual
Powering the system
Important Note:
Make sure your speaker system, in-ears or monitor wedges are muted until the start-up of the system has been completed.
After all system interconnections have been made, start up the system by doing the following:
Switching on the HD96-24
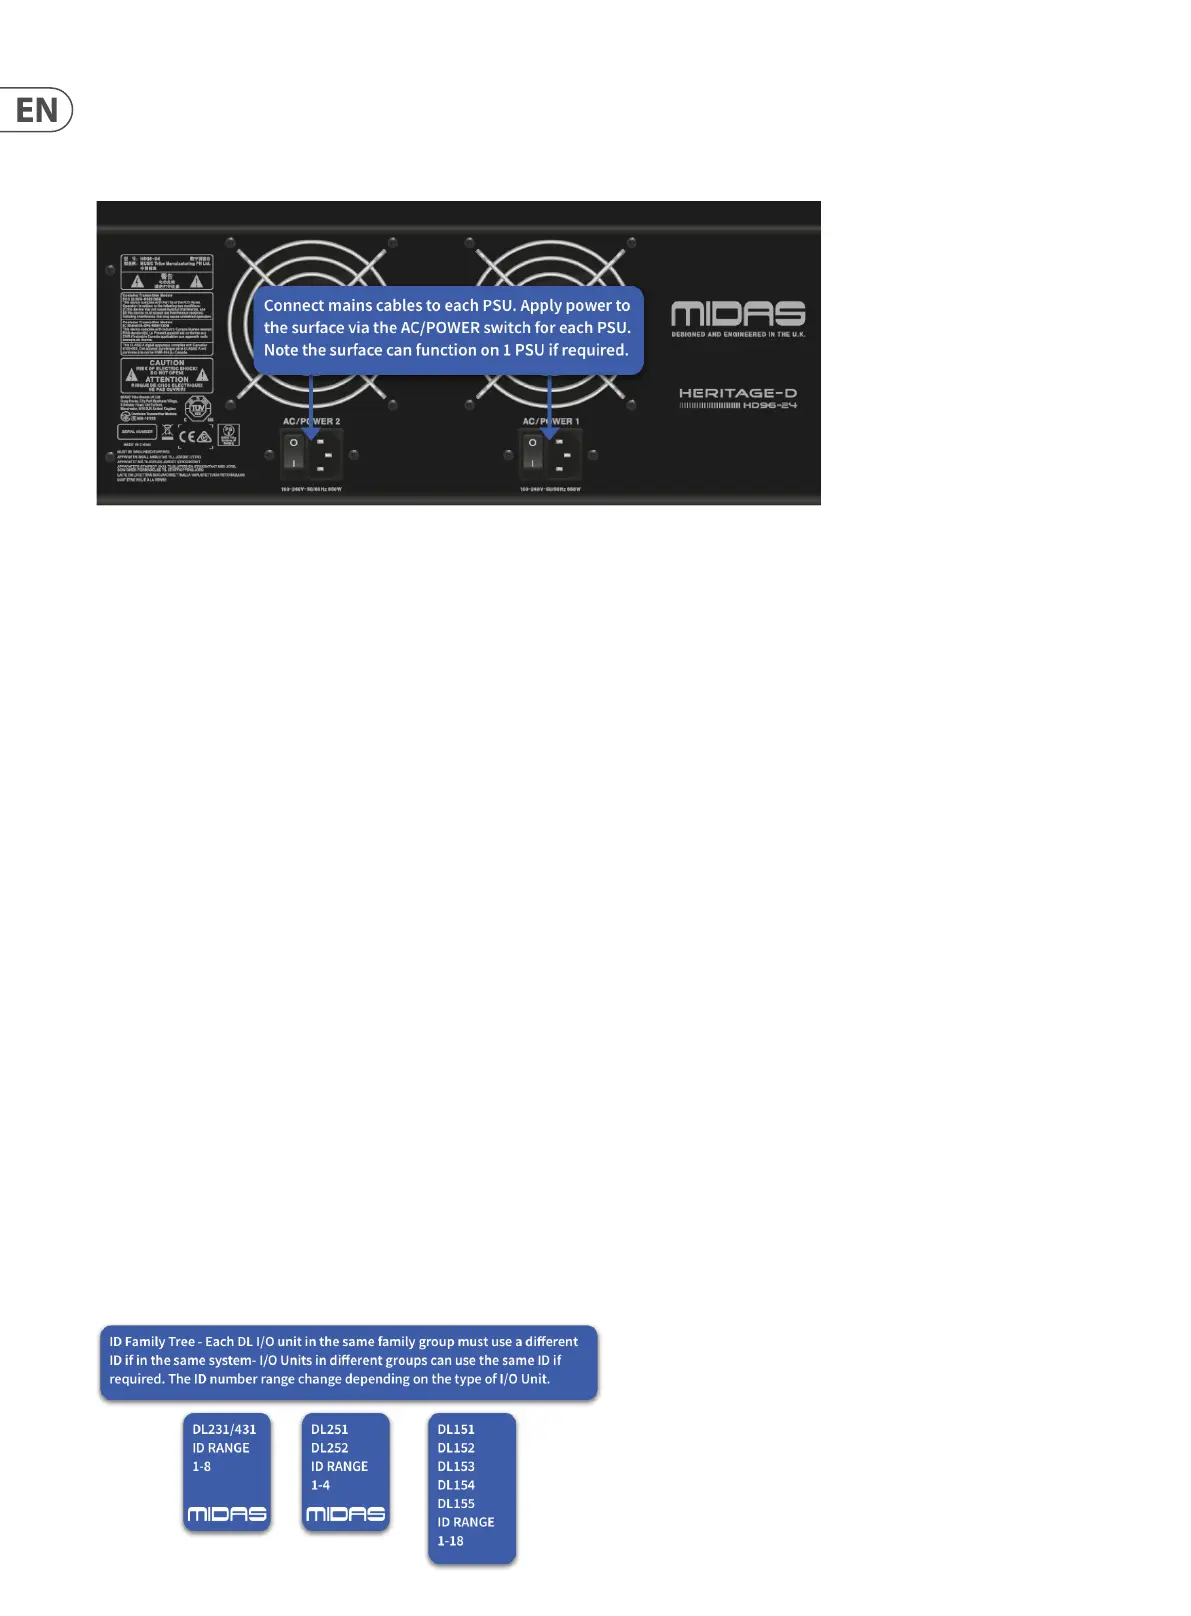
1. Plug the two mains cables into the mains power outlets. Both power supply modules should be supplying power to the HD96-24 surface for correct redundant operation.
2. Plug the connectors of the mains cables into the IEC mains sockets on the rear of the HD96-24.
3. Turn on the power to the HD96-24 surface by switching both D.C. POWER switches on. The surface will boot up. Once the default GUI screen is displayed, it is ready for use.
To switch o the HD96-24 surface
1. Make sure you have saved any shows, scenes or settings you require.
2. In the GUI, select Menu from the top bar, then press and hold the red Shutdown button at the bottom of the menu until the line traces around the outside of the
red button. The shutdown procedure will then initiate.
3. The screen will go blank, the MIDAS logo will briey be displayed, then the screen will go blank for a second time indicating the shutdown procedure has nished.
Once the system has been shut down correctly is it safe to turn o both D.C. power switches (rear of surface).
Setting up the ID of the unit(s)
After connecting up your system, you may need to set up the ID of the unit(s) in the rack, such as the DL231 I/O, DL251 I/O or DL15x I/O, as each unit within the same
family of units must have its own unique ID number.
Note: The I/O unit doesn’t have to be connected in the system for you to set up its ID, as the procedure can be carried out oine.
To set up the ID of a I/O unit
Although the programming menu of each type of I/O unit may look slightly dierent, the procedure for setting up its ID is basically very similar. For full instructions on
how to set up the ID of each particular I/O unit, refer to its operator manual.
The unit ID number is shown on the LCD screen at the end of the top row of text.
1. Press MENU and hold for approximately two seconds to enter the main menu.
2. Use the up and down arrow buttons to navigate to the set ID option.
3. Press SELECT to enter the set ID option.
4. Press MENU repeatedly to exit the main menu. (The unit will automatically exit programming mode after 20 seconds of inactivity).
 Loading...