189 HD96-24-CC-TP User Manual
Chapter 16. Talk and Mute Groups
Talk Groups
The HD96-24 has 12 Talk Groups which can be used to directly communicate with pre-determined groups of paths using the dedicated talkback input or another pre-
dened microphone input. Both inputs and outputs can utilise the Talk Group system. For example, when using in ear monitors have a talk group for the backline techs
and another for the band for independent communication.
Tip: Talk In can be used for your local talk microphone. The Talkback input can be used to send a microphone from another person or console, for example, a Front of
House (FOH) engineer’s microphone can be feed into the Talkback input of the monitor engineer’s console which allows both the Monitor engineer and FOH engineer
to talk to the stage.
For more complex talkback set ups the shout mixer may help (see Chapter 13 Shout Conguration).
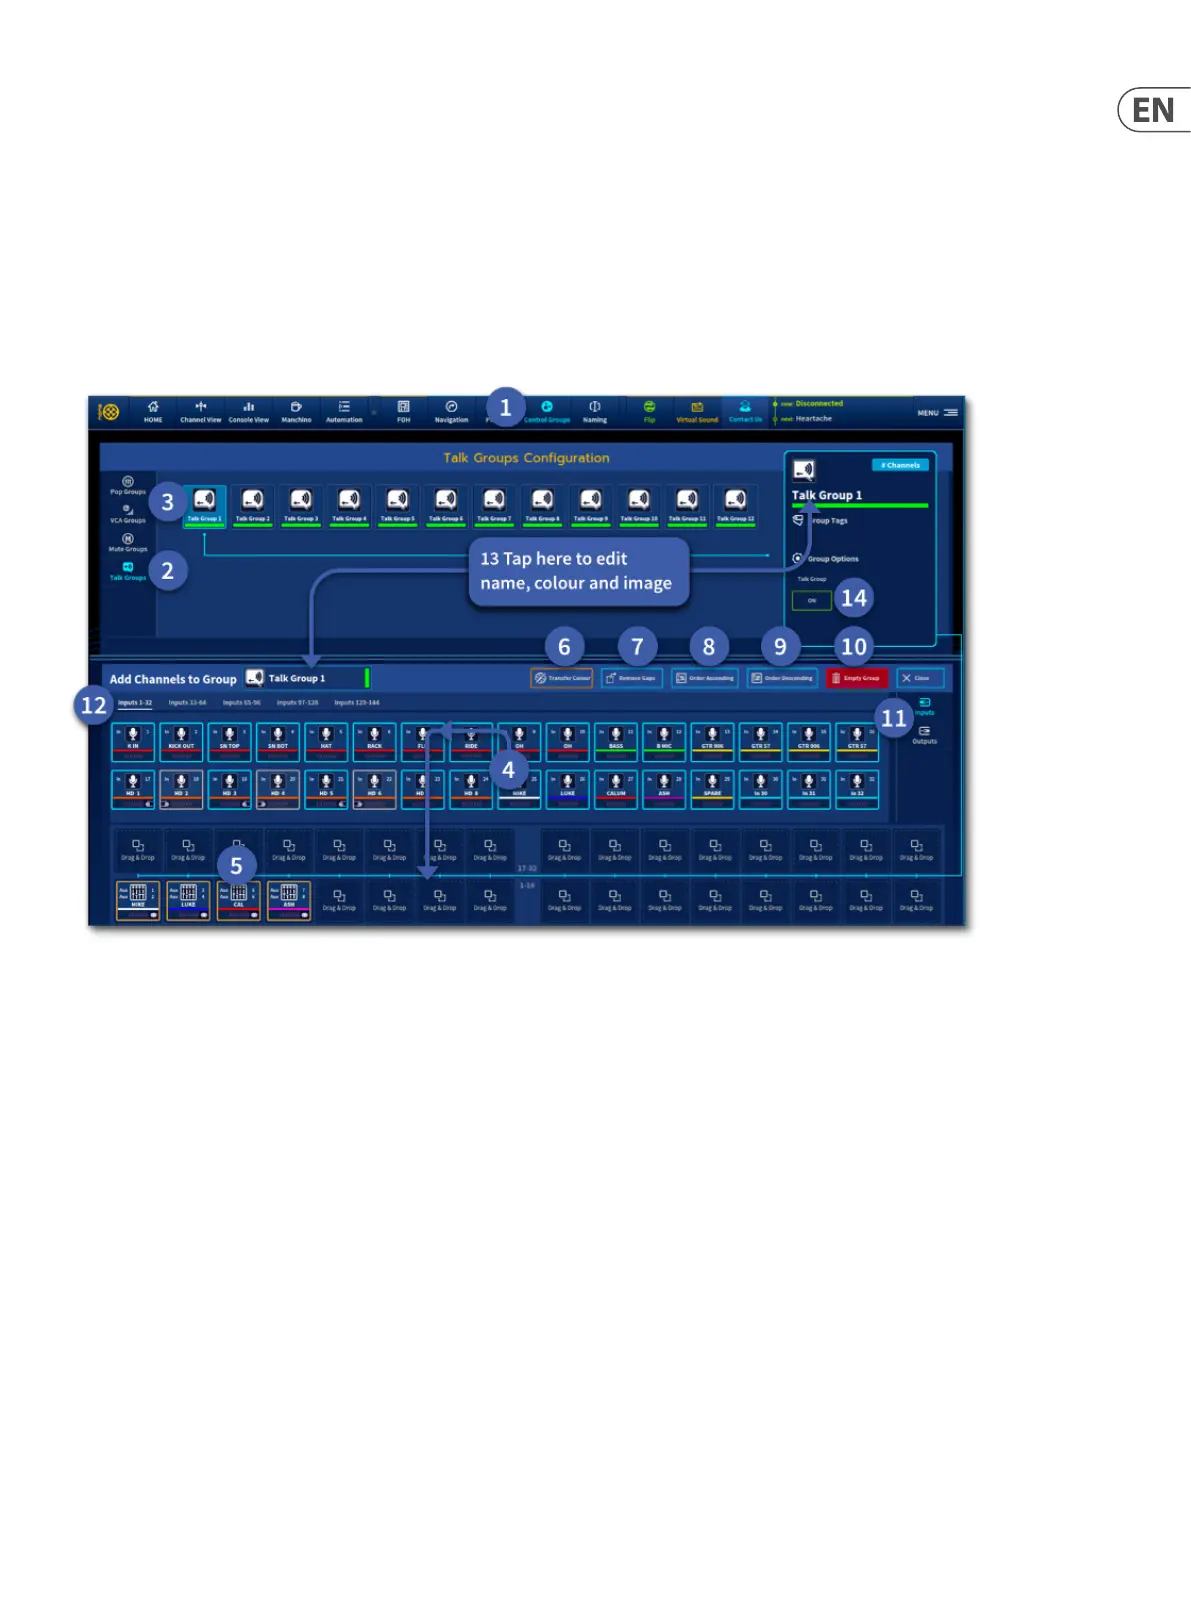
To set up Talk Groups:
1. Select the Groups icon from the top or side bar menu.
2. Press the Talk icon in the left-side to open the Talk Groups Selection page.
3. Select the Talk group you wish to edit. It now can be named, coloured and given a dierent icon if required by pressing on the large icon on the right-hand side of
the page. There is an option to Transfer colour to channels if desired and also the ability to follow tags (any channels added with the same tag will automatically
be added to the talk group).
4. Touch the channels you wish to add to the Talk Group. To the right are tabs for input and output page selection. A maximum number of 32 inputs and outputs can
be displayed at once in a Talk Group, swipe right to view channels 33 onwards.
5. To remove a channel from a Talk Group simply hold onto the desired icon until it wiggles and drag it away from the Drag & Drop area, or tap the icon used to
initially assign it to the group.
6. Transfer the colour of the talk group to the channels within it.
7. Remove Gaps If there are blank channels in the selected talk group subsequent channels will be moved down to ll the gaps.
8. Order Ascending re-orders talk group to be in numerical order (lowest channel rst).
9. Order Descending re-orders the talk group in reverse numerical order (highest channel rst).
10. Pressing and hold the Empty Group button for a short time until the line completely traces around the outside of the button to clear a talk group.
11. Select Inputs or Outputs.
12. Tabbed selection of input or outputs.
13. The name, tags and icon of the Talk Group can be edited in two places.
14. Turn the selected Talk Group on if needed.
 Loading...