Version 6.2 135 February 2011
SIP User's Manual 3. Web-Based Management
Parameter Description
Web/EMS: Number of
Digits to Leave
The number of digits that you want to retain from the right of the phone
number.
Web: Presentation
EMS: Is Presentation
Restricted
Determines whether Caller ID is permitted:
Not Configured = Privacy is determined according to the Caller ID
table (see ''Configuring Caller Display Information'' on page 155).
[0] Allowed = Sends Caller ID information when a call is made using
these destination/source prefixes.
[1] Restricted = Restricts Caller ID information for these prefixes.
Note: If 'Presentation' is set to 'Restricted' and the AssertedIdMode
parameter is set to 'P-Asserted', then the From header in the INVITE
message includes the following: From: 'anonymous' <sip:
anonymous@anonymous.invalid> and 'privacy: id' header.
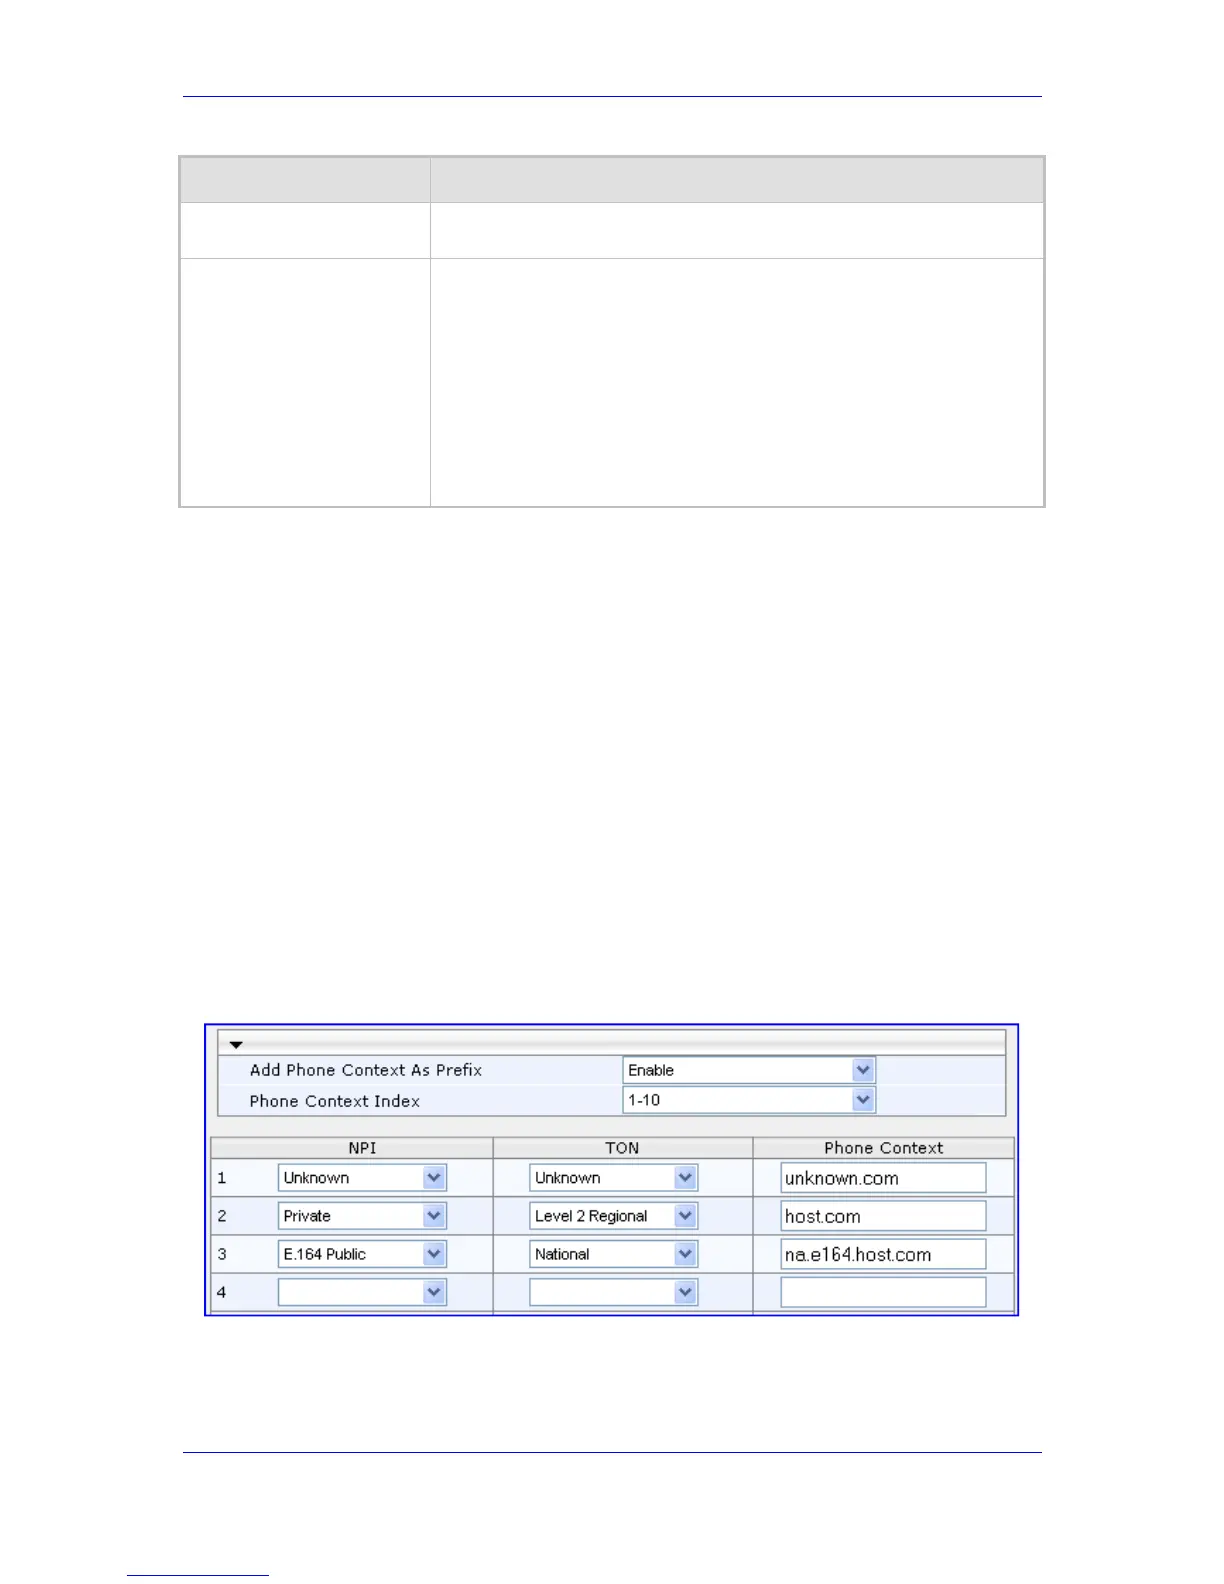
3.3.2.8.2.4 Mapping NPI/TON to SIP Phone-Context
The 'Phone-Context Table' page allows you to map Numbering Plan Indication (NPI) and
Type of Number (TON) to the SIP Phone-Context parameter. When a call is received from
the Tel, the NPI and TON are compared against the table and the matching Phone-Context
value is used in the outgoing SIP INVITE message. The same mapping occurs when an
INVITE with a Phone-Context attribute is received. The Phone-Context parameter appears
in the standard SIP headers where a phone number is used (Request-URI, To, From,
Diversion).
For example, for a Tel-to-IP call with NPI/TON set as E164 National (values 1/2), the
device sends the outgoing SIP INVITE URI with the following settings:
“sip:12365432;phone-context= na.e.164.nt.com“. This is configured for entry 3 in the figure
below. In the opposite direction (IP-to-Tel call), if the incoming INVITE contains this Phone-
Context (e.g. "phone-context= na.e.164.nt.com"), the NPI/TON of the called number in the
outgoing SETUP message is changed to E164 National.
¾ To configure the Phone-Context tables:
1. Open the 'Phone Context Table' page (Configuration tab > VoIP menu > GW and IP
to IP submenu > Manipulations submenu > Phone Context).
Figure 3-84: Phone Context Table Page
2. Configure the Phone Context table according to the table below.
3. Click the Submit button to save your changes.
4. To save the changes to flash memory, see ''Saving Configuration'' on page 169.

 Loading...