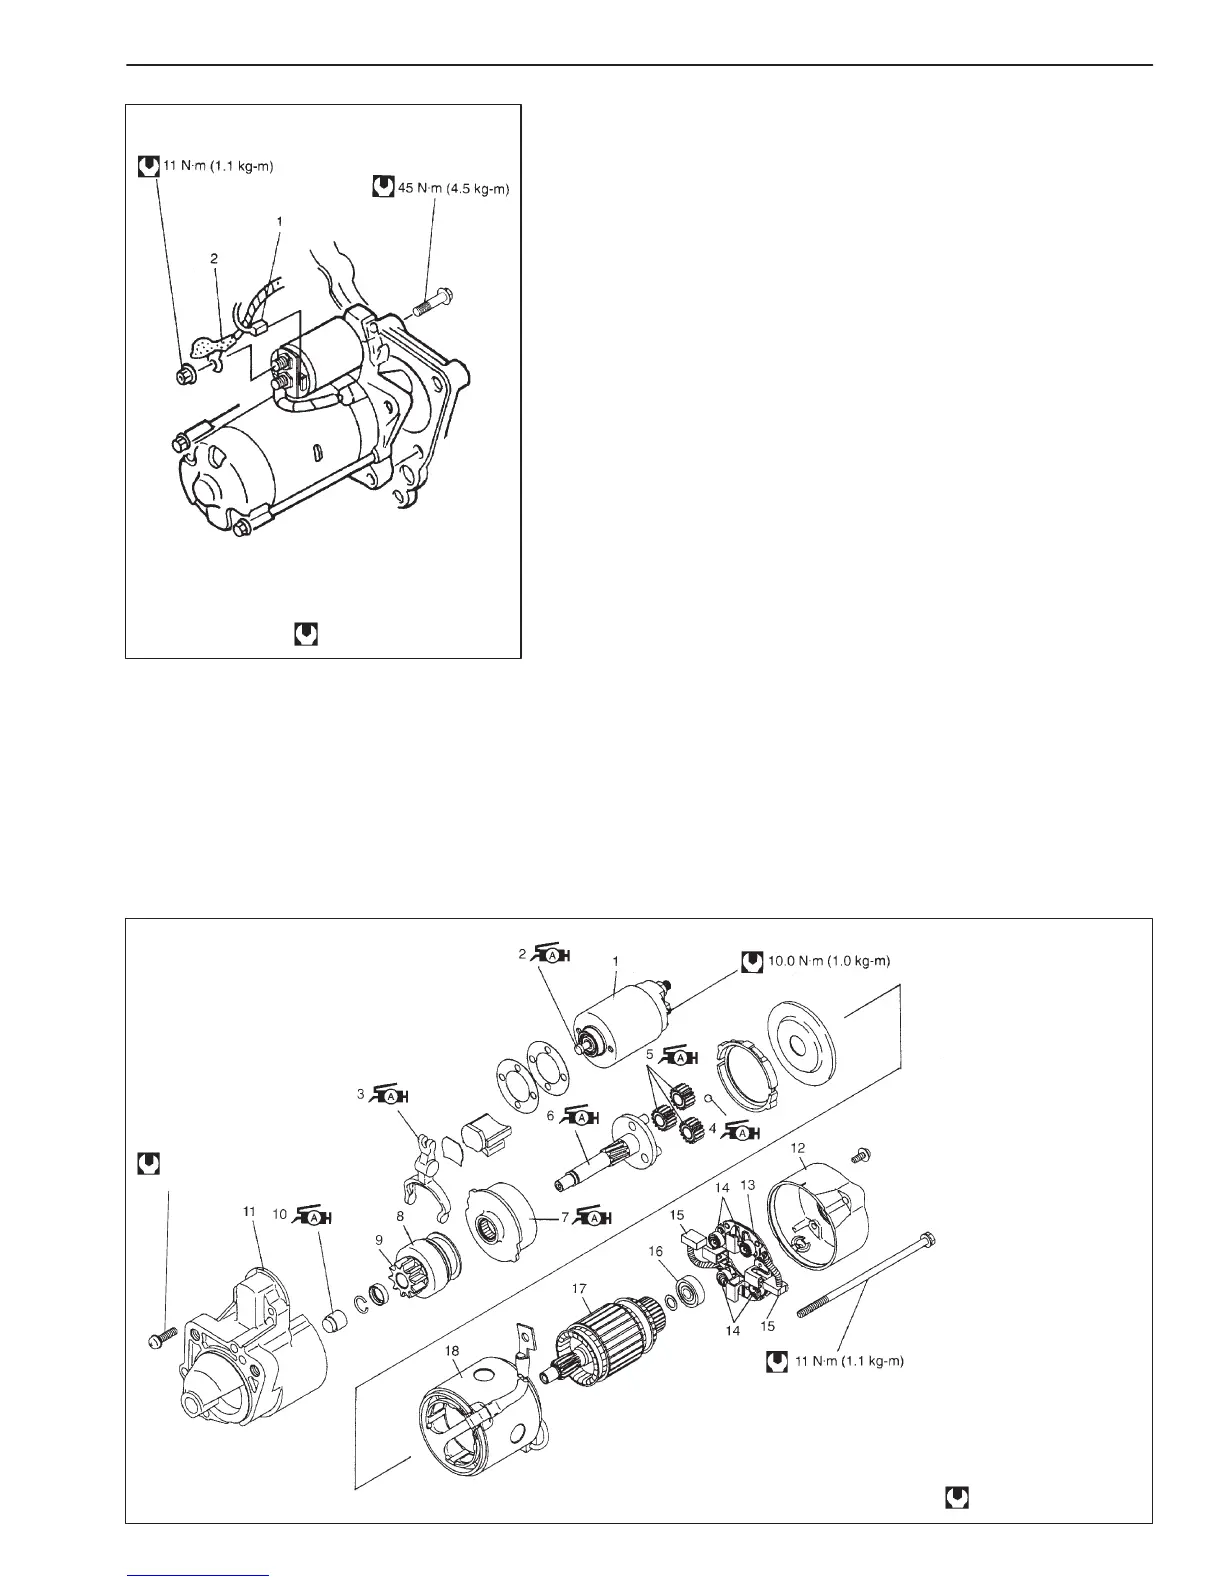
1. Magnetic switch lead wire
2. Battery cable
: Tightening torque
: Tightening torque
1. Magnetic switch
2. Plunger
3. Lever
4. Ball
5. Planetary gear
6. Planetary carrier shaft
7. Internal gear
8. Over-running clutch
9. Pinion gear
10. Bush
11. Front housing
12. Rear bracket
13. Brush holder
14. Brush spring
15. Brush
16. Bearing
17. Armature
18. Yoke
7.0 N
.
m
(0.7 kg-m)
CRANKING SYSTEM 6G-5
UNIT REPAIR OVERHAUL
DISMOUNTING AND REMOUNTING
1) Disconnect negative cable at battery.
2) Disconnect magnetic switch lead wire (“S” terminal) and battery
cable from starting motor terminal (“B” terminal).
3) Remove strut tower bar.
4) Drain coolant.
5) Hoist vehicle.
6) Remove water outlet pipe mounting bolts from left side engine
mounting.
7) Disconnect radiator outlet hose No.1 from water outlet box.
8) Remove starting motor mount bolts and remove starting motor.
9) To install, reverse the above procedure.
DISASSEMBLY AND REASSEMBLY
NOTE:
D Disassemble in order shown in figure.
D For reassembly, reverse disassembly procedure.
DTighten bolt and nut to specified torque.
D Upon completion of reassembly, carry out “Performance
Test” later in this section.

 Loading...