Starting System: 1I-4
Starter Motor Removal and Installation
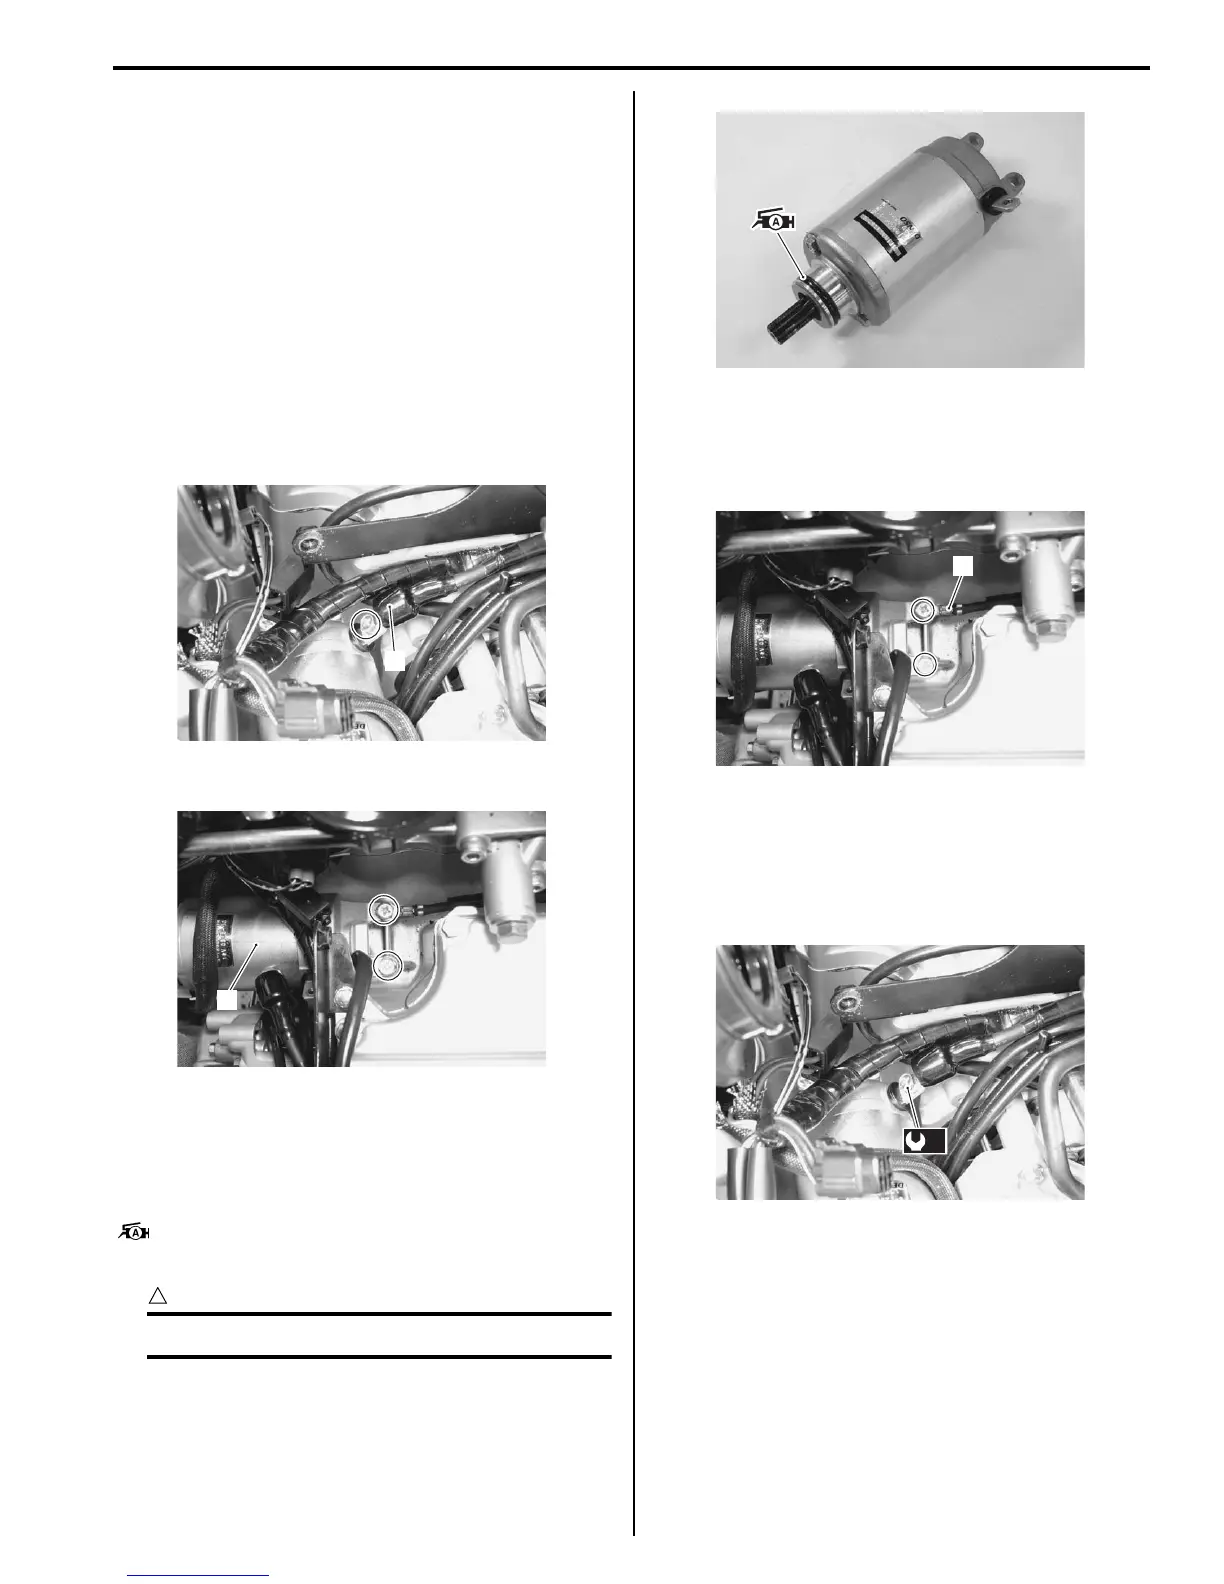
B817H21906002
Refer to “Electrical Components Location in Section 0A
(Page 0A-10)”.
Removal
1) Turn the ignition switch OFF position and disconnect
the battery (–) lead wire. Refer to “Battery Removal
and Installation in Section 1J (Page 1J-12)”.
2) Remove the throttle body. Refer to “Throttle Body
Removal and Installation in Section 1D (Page 1D-
10)”.
3) Remove the regulator/rectifier. Refer to “Regulator /
Rectifier Inspection in Section 1J (Page 1J-8)”.
4) Disconnect the starter motor lead wire (1).
5) Remove the starter motor (2).
Installation
Install the starter motor in the reverse order of removal.
Pay attention to the following points:
• Apply grease to the starter motor O-ring.
: Grease 99000–25010 (SUZUKI SUPER
GREASE A or equivalent)
CAUTION
!
Replace the O-ring with a new one.
• Tighten the starter motor mounting bolt with the
battery (–) lead wire (1). Refer to“Wiring Harness
Routing Diagram (GSF650/S/A/SAK7) in Section 9A
(Page 9A-8)” .
• Tighten the starter motor lead wire to the specified
torque.
Tightening torque
Starter motor lead wire mounting nut (a): 5 N·m (
0.5 kgf-m, 3.5 lbf-ft)
Starter Motor Disassembly and Assembly
B817H21906003
Refer to “Starter Motor Removal and Installation
(Page 1I-4)”.
Disassembly
Disassemble the starter motor as shown in the starter
motor components diagram. Refer to “Starter Motor
Components (Page 1I-3)”.
1
I717H1190001-01
2
I717H1190002-01
I717H1190003-01
1
I717H1190005-01
(a)
I717H1190004-01
 Loading...