a. Place the shorter plastic piece in the bottom of the tray so that it fits along the right side of the tray and
into the corner, to the right of the envelope bracket that you installed.
b. Place the magnet at the end of the piece into the corner of the tray and facing down.
Ensure that the raised portion of the piece at the other end is facing up and on top of the cork pad on the
tray bottom.
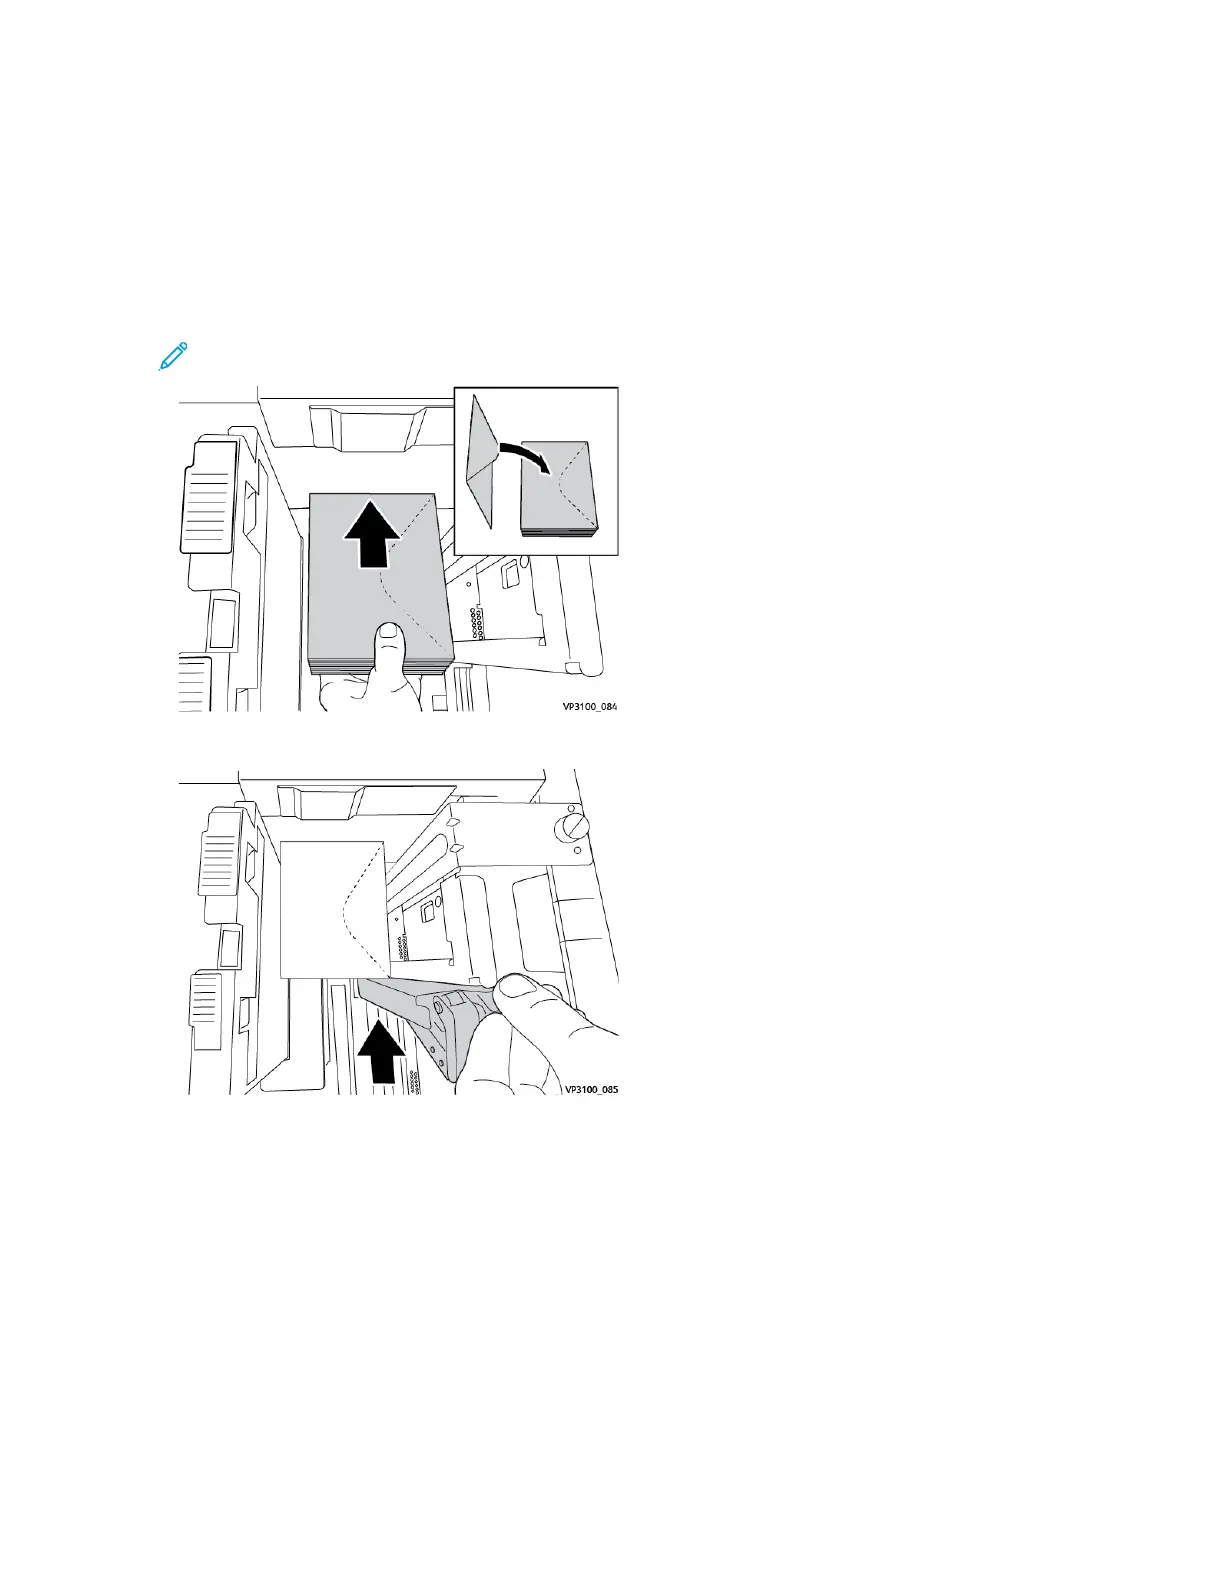
7. Load the envelopes SEF on top of the plastic inserts, with the flaps closed and facing down.
Note: Always ensure that the flaps are down and positioned along the front of the tray.
8. Adjust the paper guides against the stock.
9. Close the paper tray and confirm the new settings at the print server.
10. Run your print job.
11. Upon completion of your print job, remove the envelope stock and the Envelope Support Kit components from
the tray.
12. Place the Envelope Support Kit components into storage.
13. Store the remaining envelopes in their original packaging.
Loading Envelopes in Tray 5 (Bypass)
Load envelopes in Tray 5 in the short edge feed (SEF) or long edge feed (LEF) direction.
316
Xerox
®
PrimeLink
®
B9100/B9110/B9125/B9136 Copier/Printer User Guide
Oversized High Capacity Feeder
 Loading...
