3 - 7
Operation panel
Main unit
Assembly
6
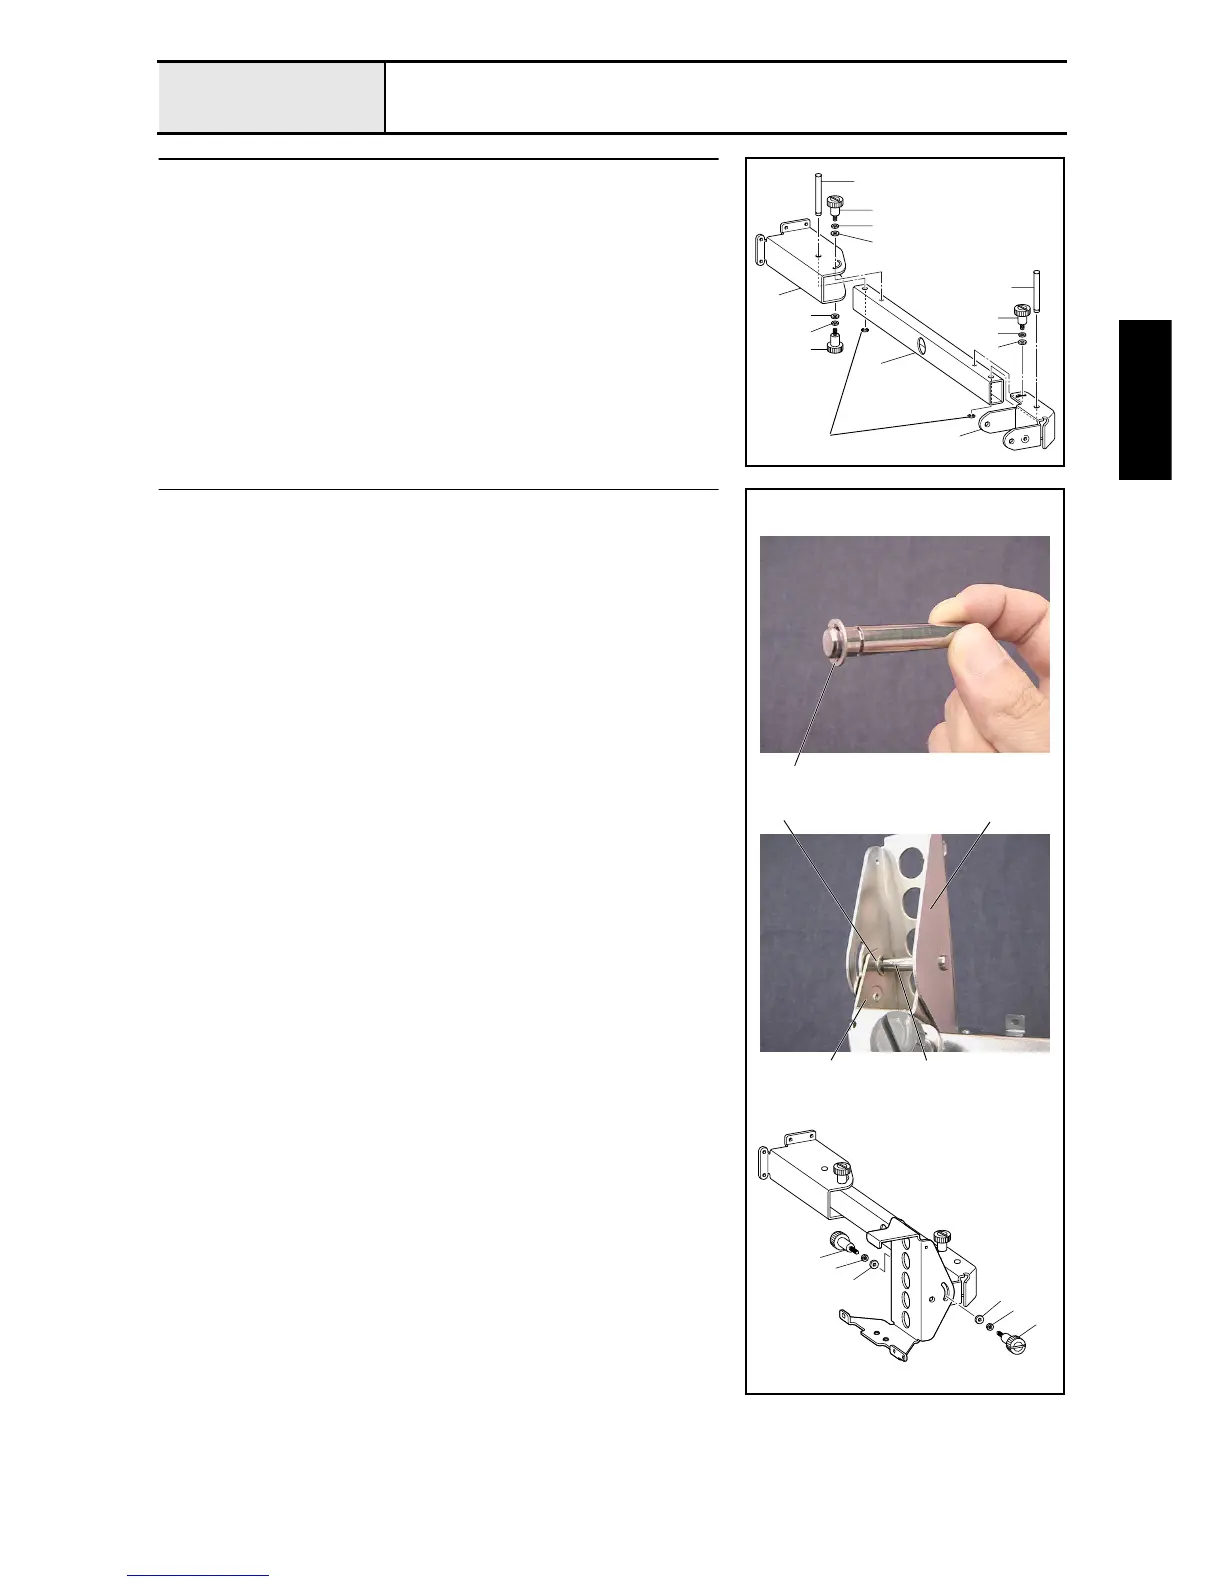
Operation panel lever assembly (Step 1)
1. Align operation panel lever B 2 with operation panel lever C 1, thread
the operation panel level shaft 3 through them, and then attach the
retaining ring E6.
2. Align operation panel lever B 2 with operation panel lever A 4, thread
the operation panel level shaft 3 through them, and then attach the
retaining ring E6.
3. Tighten the thumb bolt (M4 L) 5, spring washer (2-4) 6, and plain
washer (M4) 7. (3 locations)
3
5
6
7
1
2
3
5
5
6
7
4
6
7
Retaining ring E6
7
Operation panel lever assembly (Step 2)
1. Attach the retaining ring E6 to the operation panel holder shaft.
2. Align the operation panel holder 2 with operation panel lever A 1, thread
the operation panel holder shaft 3 through them, and then attach the
retaining ring E6 from the inside of operation panel lever A.
3. Tighten the thumb bolt (M4 L) 4, spring washer (2-4) 5, and plain
washer (M4) 6. (2 locations)
6
5
4
6
5
4
Retaining ring E6
Retaining ring E6
2
1 3

 Loading...


