4 - 24
Adjustment Needle bar top dead center adjustment
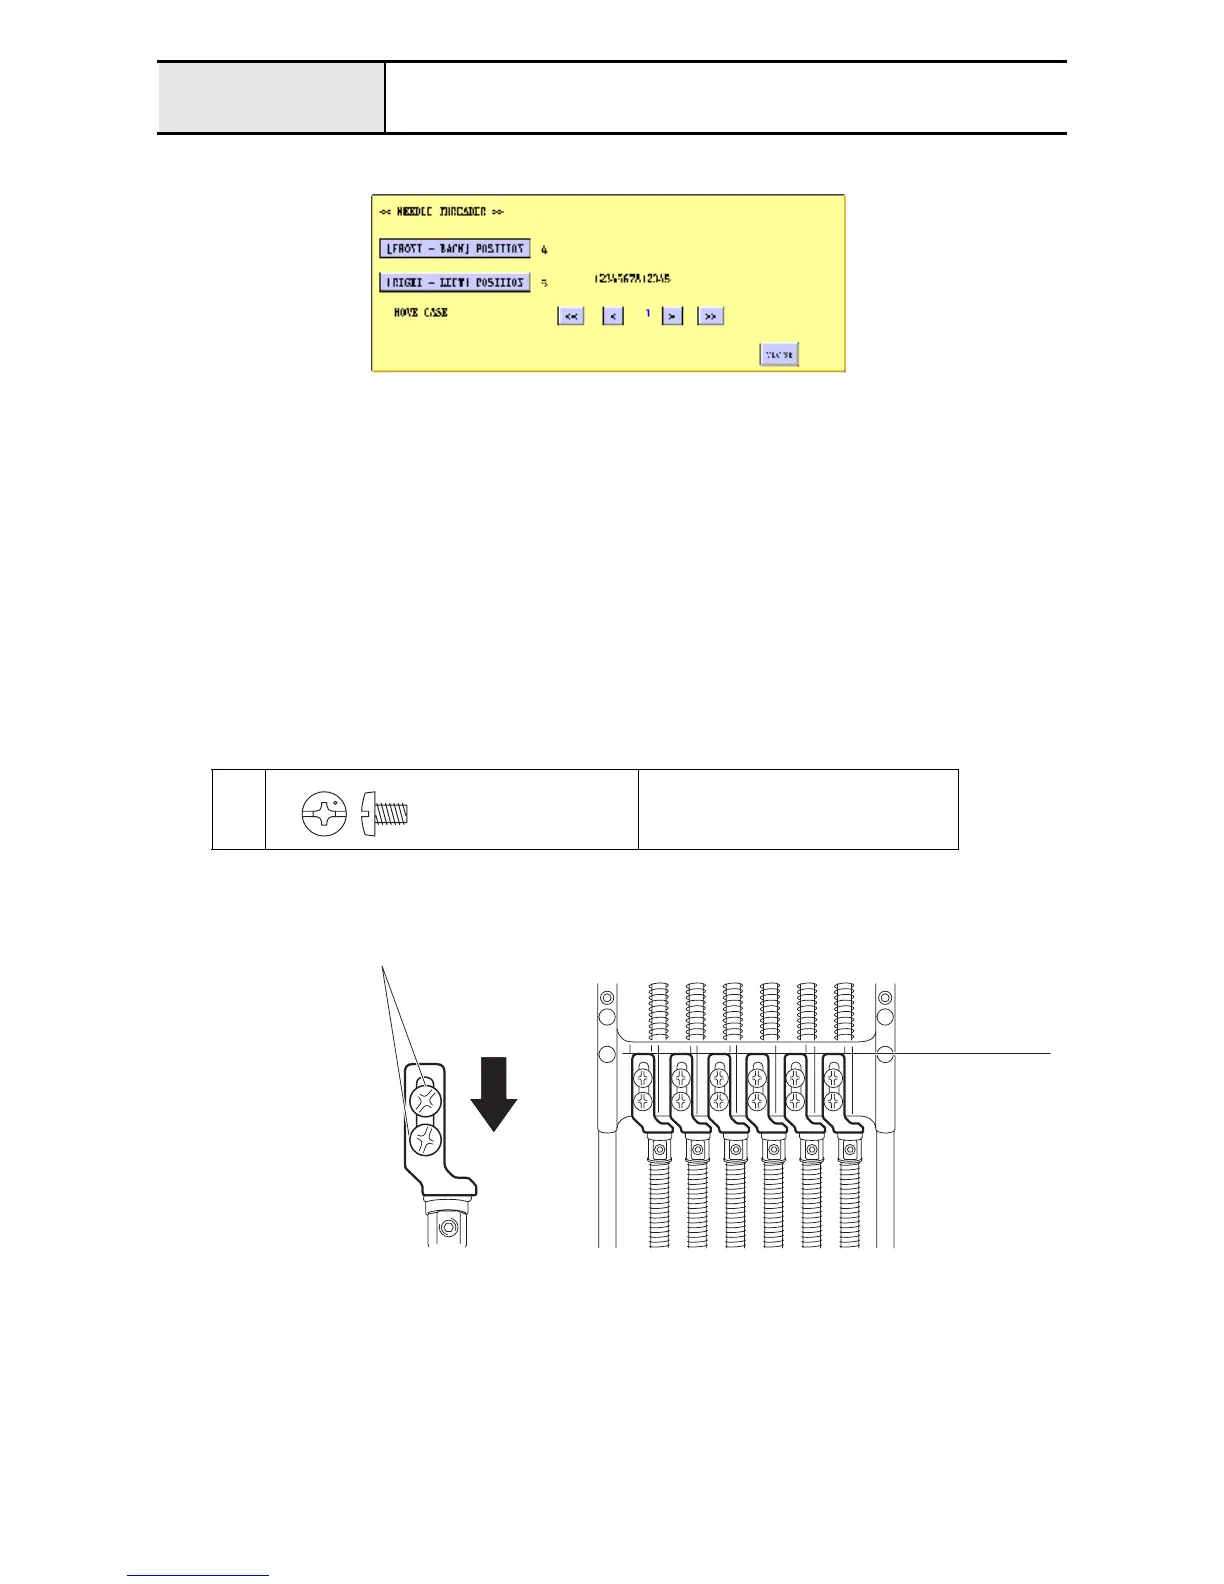
1. Enter the test mode, and press [MAIN BOARD TEST MODE] and then [NEEDLE THREADER].
2. Press [[RIGHT - LEFT] POSITION]]. The reference needle bar for needle threader right/left position adjustment
is selected and the needle bar case final assembly moves.
3. Rotate the pulley manually to move the needle bar to the top point.
*Key point
• In order to connect the needle bar clamp and the J vertical set assembly correctly, rotate the pulley 360
degrees counterclockwise, and then move the needle bar to the adjustment position.
4. Loosen the screw
1
.
5. Push the top dead center plate towards the needle bar (downward) so that the cushion rubber is compressed
slightly (approx. 0.3 mm), and tighten the screw
1
.
6. Adjust the needle thread unit to the height of the selected needle bar.
7. For the top dead center plate of the other 5 needle bars, secure the plate at the position the upper surface of the
needle thread hook is aligned with the top end of the needle hole (position the needle thread hook enters the
needle hole)..
1
Torque
1.18 - 1.57 N-m
Screw, Bind
M4X6
Color; Silver
same height
1

 Loading...


