EasyManuals Logo

Brother PR600 Service Manual

Brother PR600
272 pages
To Next Page IconTo Next Page
To Previous Page IconTo Previous Page
Page #77 background imageLoading...
Page #77 background image
2 - 57
Power unit
Main unit
Disassembly
2
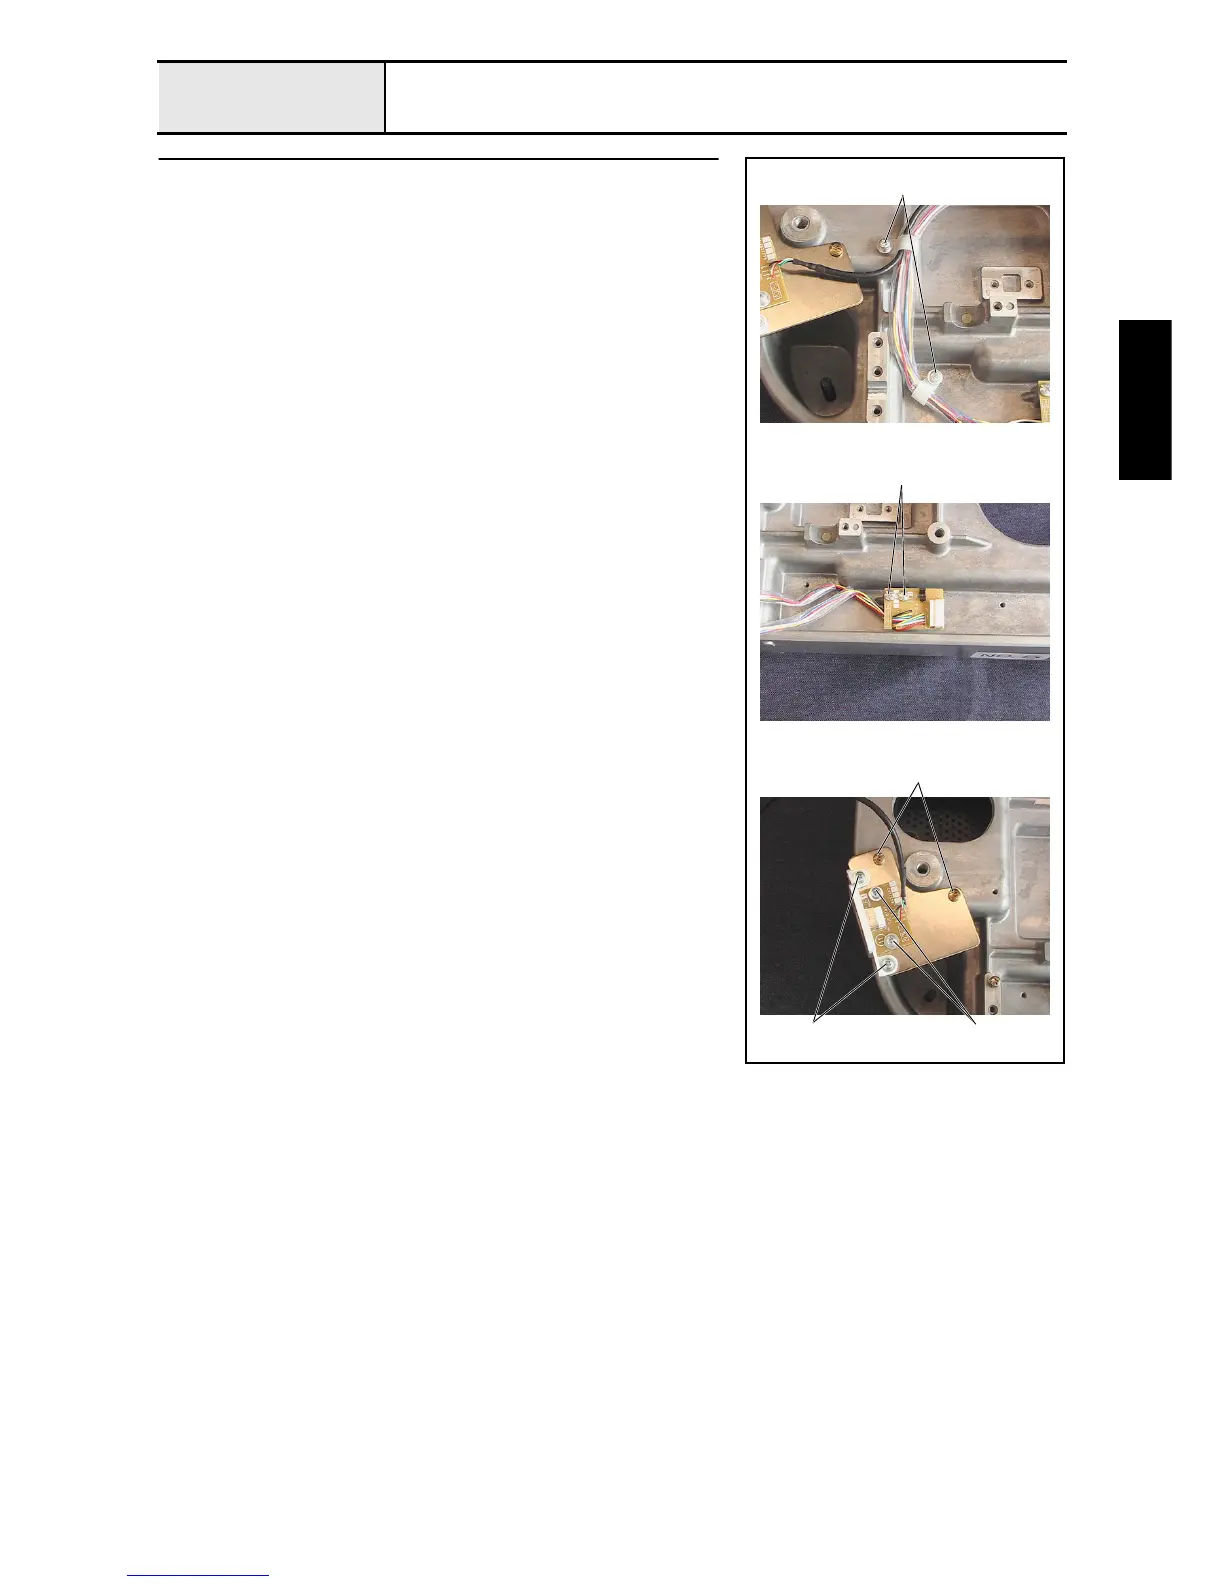
USB PCB assembly and Y-area sensor assembly removal
1. Remove the 2 screws 1 and the 2 cord clamps (NK-6N), and then remove
the USB PCB's lead wire and the Y-area sensor's lead wire from the base
frame.
2. Remove the 2 screws 2, and then remove the Y-area sensor assembly.
3. Remove the 2 screws 3, and then remove the USB PCB holder assembly.
4. Remove the 2 screws 4, and then remove the USB PCB cover from the
USB PCB holder assembly.
5. Remove the 2 screws 5, and then remove the USB PCB assembly from
the USB PCB holder.
1
2
3
45

Table of Contents

Questions and Answers:

Question and Answer IconNeed help?

Do you have a question about the Brother PR600 and is the answer not in the manual?

Brother PR600 Specifications

General IconGeneral
TypeEmbroidery machine
LCD ScreenYes
USB PortYes
Built-in MemoryYes
ConnectivityUSB
Maximum Embroidery Area200mm
Embroidery Area200mm
Needle Count6 needles

Related product manuals