3 - 18
Thread tension unit
Main unit
8
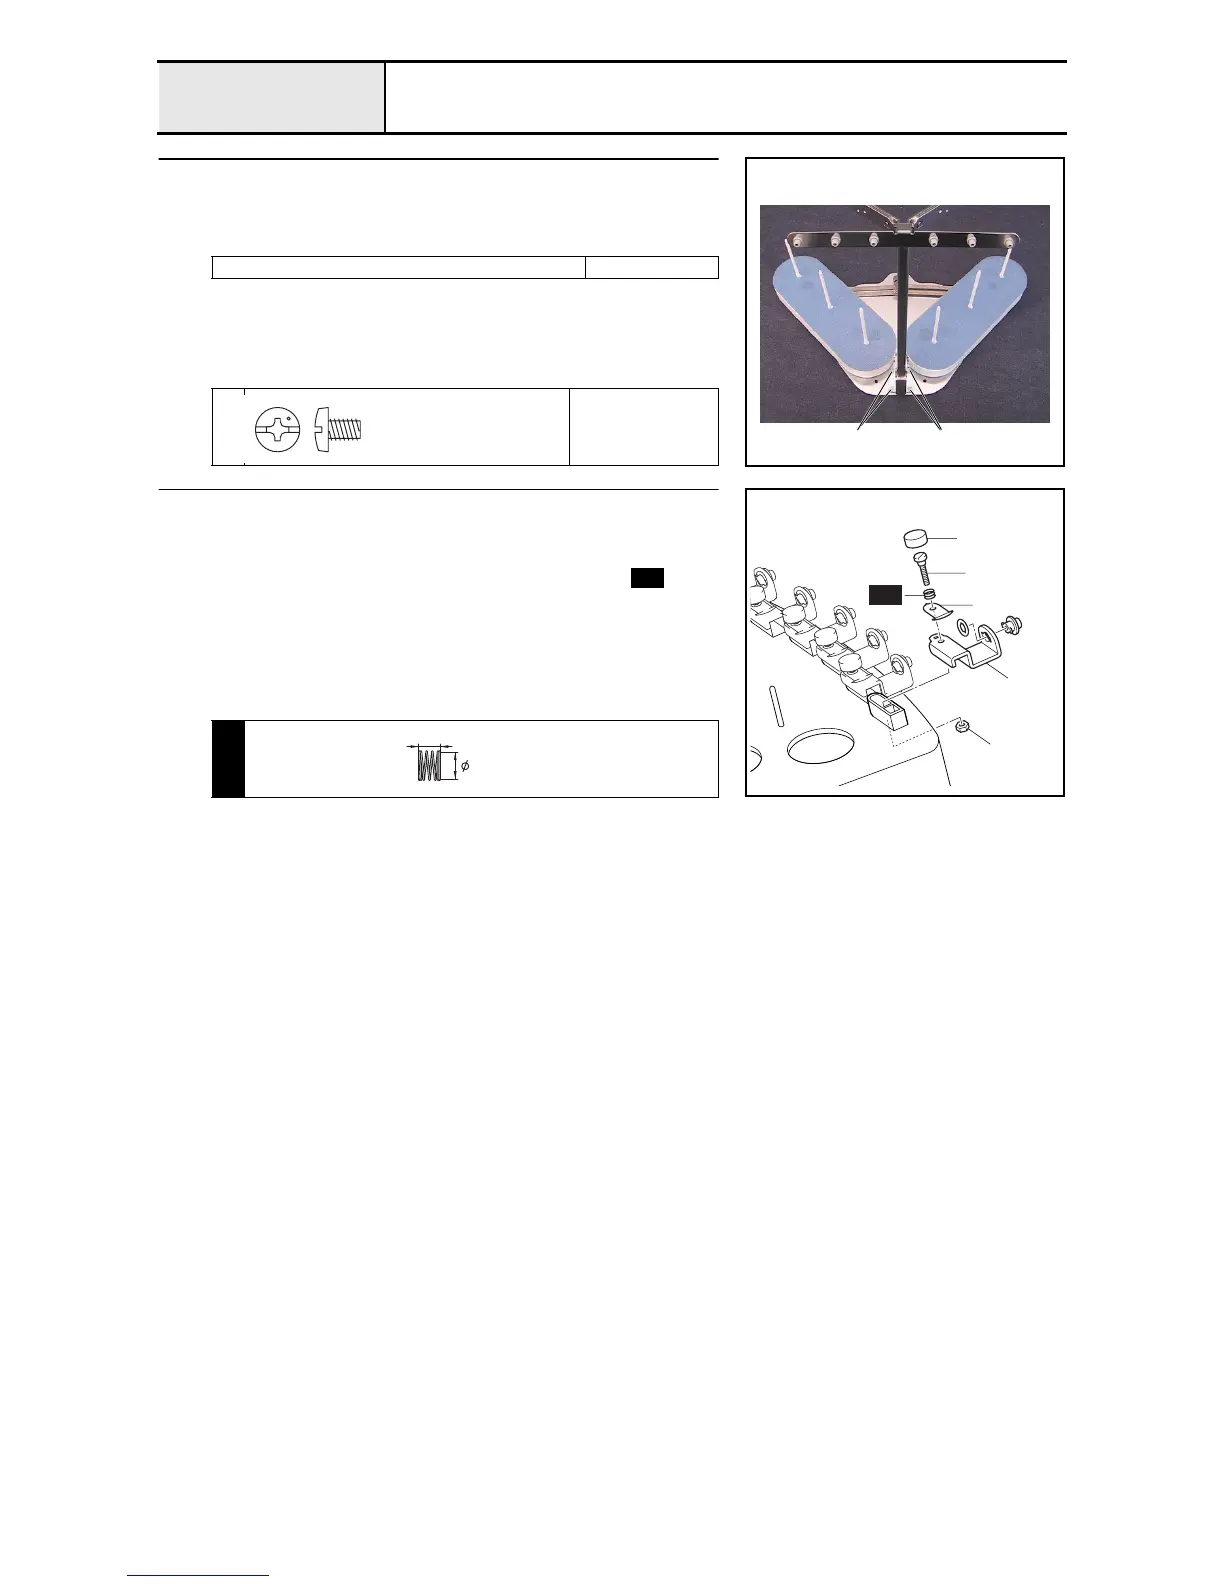
Antenna assembly attachment
1. Attach the antenna assembly to the thread stand base assembly with the 4
screws 1.
Tightening torque of thread guide tension screw 0.59
–
0.78 N-m
1
Torque
1.18 –
1.57 N-m
11
Screw, Bind
M4X6
Color; Silver
9
Upper thread eyelet base attachment
1. Attach the upper thread eyelet base 1 and the thread guide tension plate
2 to the tension base assembly. (6 locations)
2. Thread the thread guide tension screw 3 through the spring , attach
the nut (2, M3) 4 from the rear side of the tension base assembly, and then
tighten the thread guide tension screw. (6 locations)
3. Attach the tension axis cap 5 to the thread guide tension screw. (6
locations)
S53
5
3
2
1
4
S53
S53
THREAD GUIDE COMPRESSION
XC6231***
5
4.1

 Loading...


