2 - 77
Operation panel
Main unit
Disassembly
7
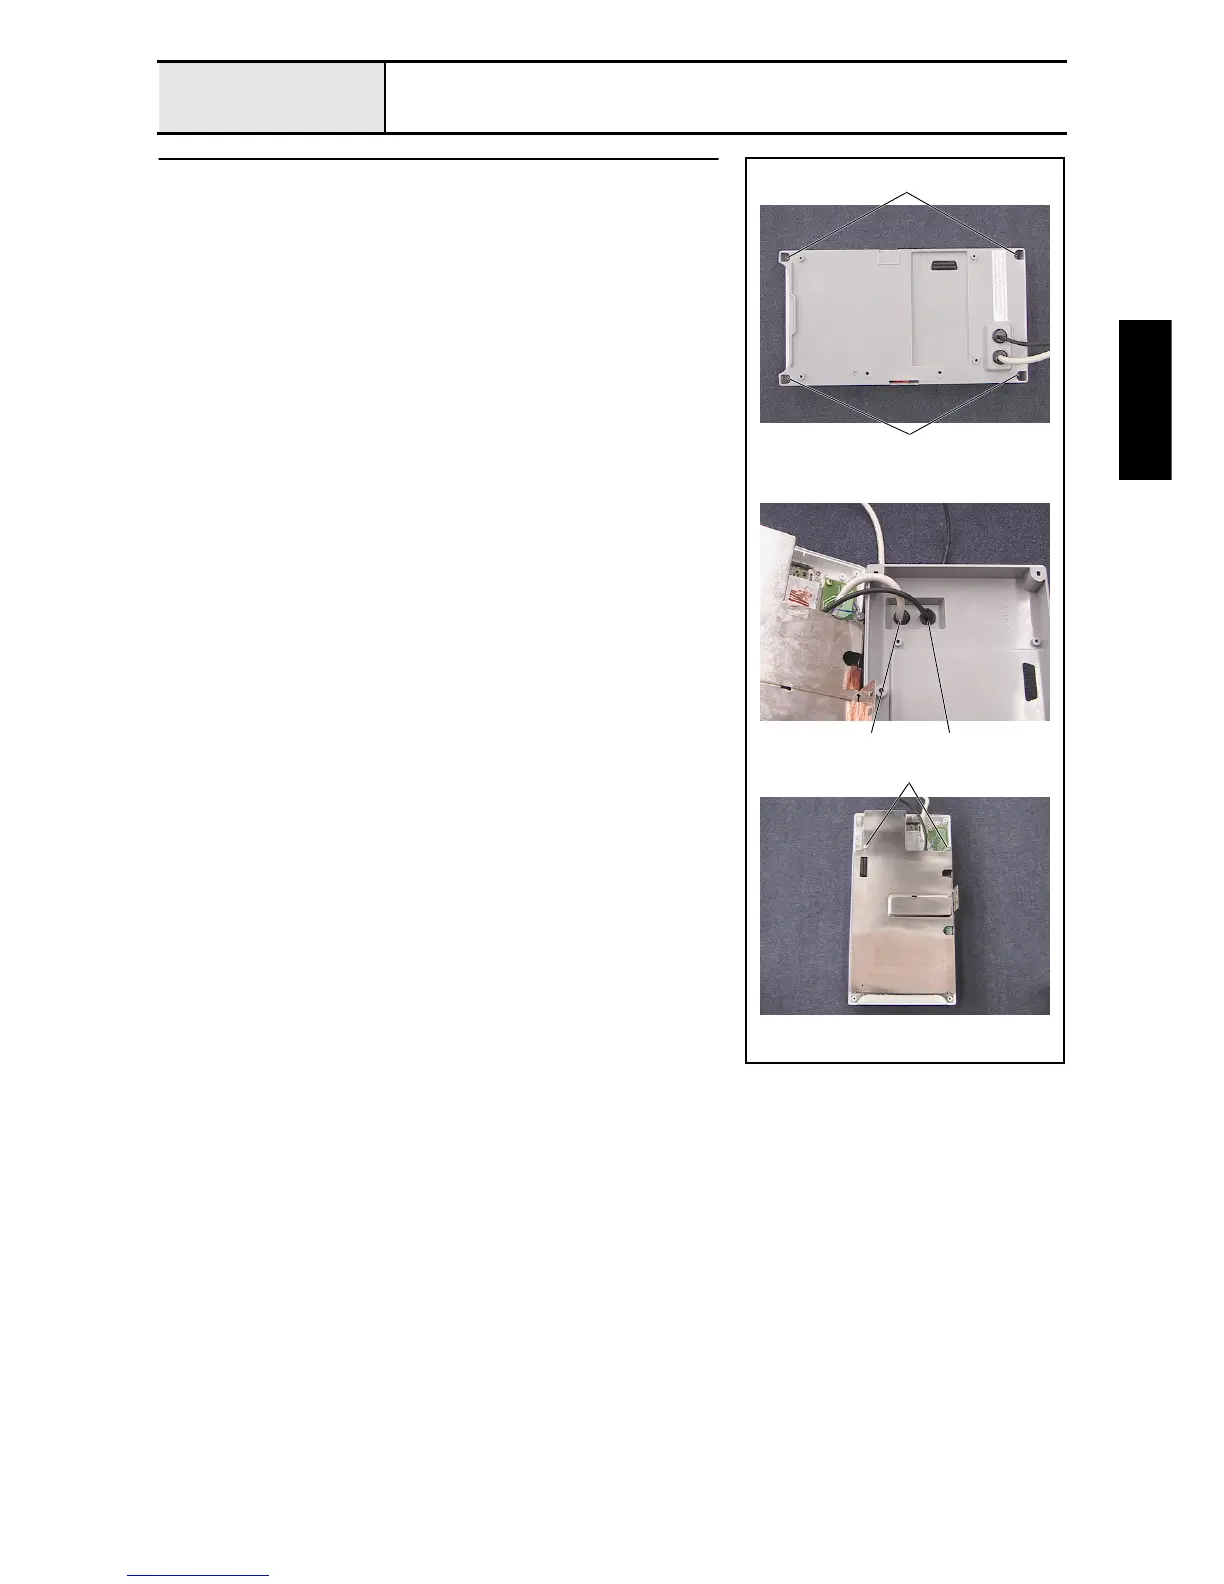
Operation panel B removal
1. Remove the 4 screws 1, and then remove the operation panel B from the
operation panel A assembly.
2. Push the panel lead wire assembly A and the cord bush (KR51) 1 from
inside the operation panel B to force them out of the operation panel B, and
then remove the cord bush (KR51) from the panel lead wire assembly A.
3. Push the USB lead wire assembly A and the cord bush (KF41) 2 from
inside the operation panel B to force them out of the operation panel B, and
then remove the cord bush (KF41) from the USB lead wire assembly A.
4. Remove the 2 screws 2, and then remove the board case B.
1
1
1
2
2

 Loading...


