3 - 45
Upper shaft unit
Main unit
Assembly
9
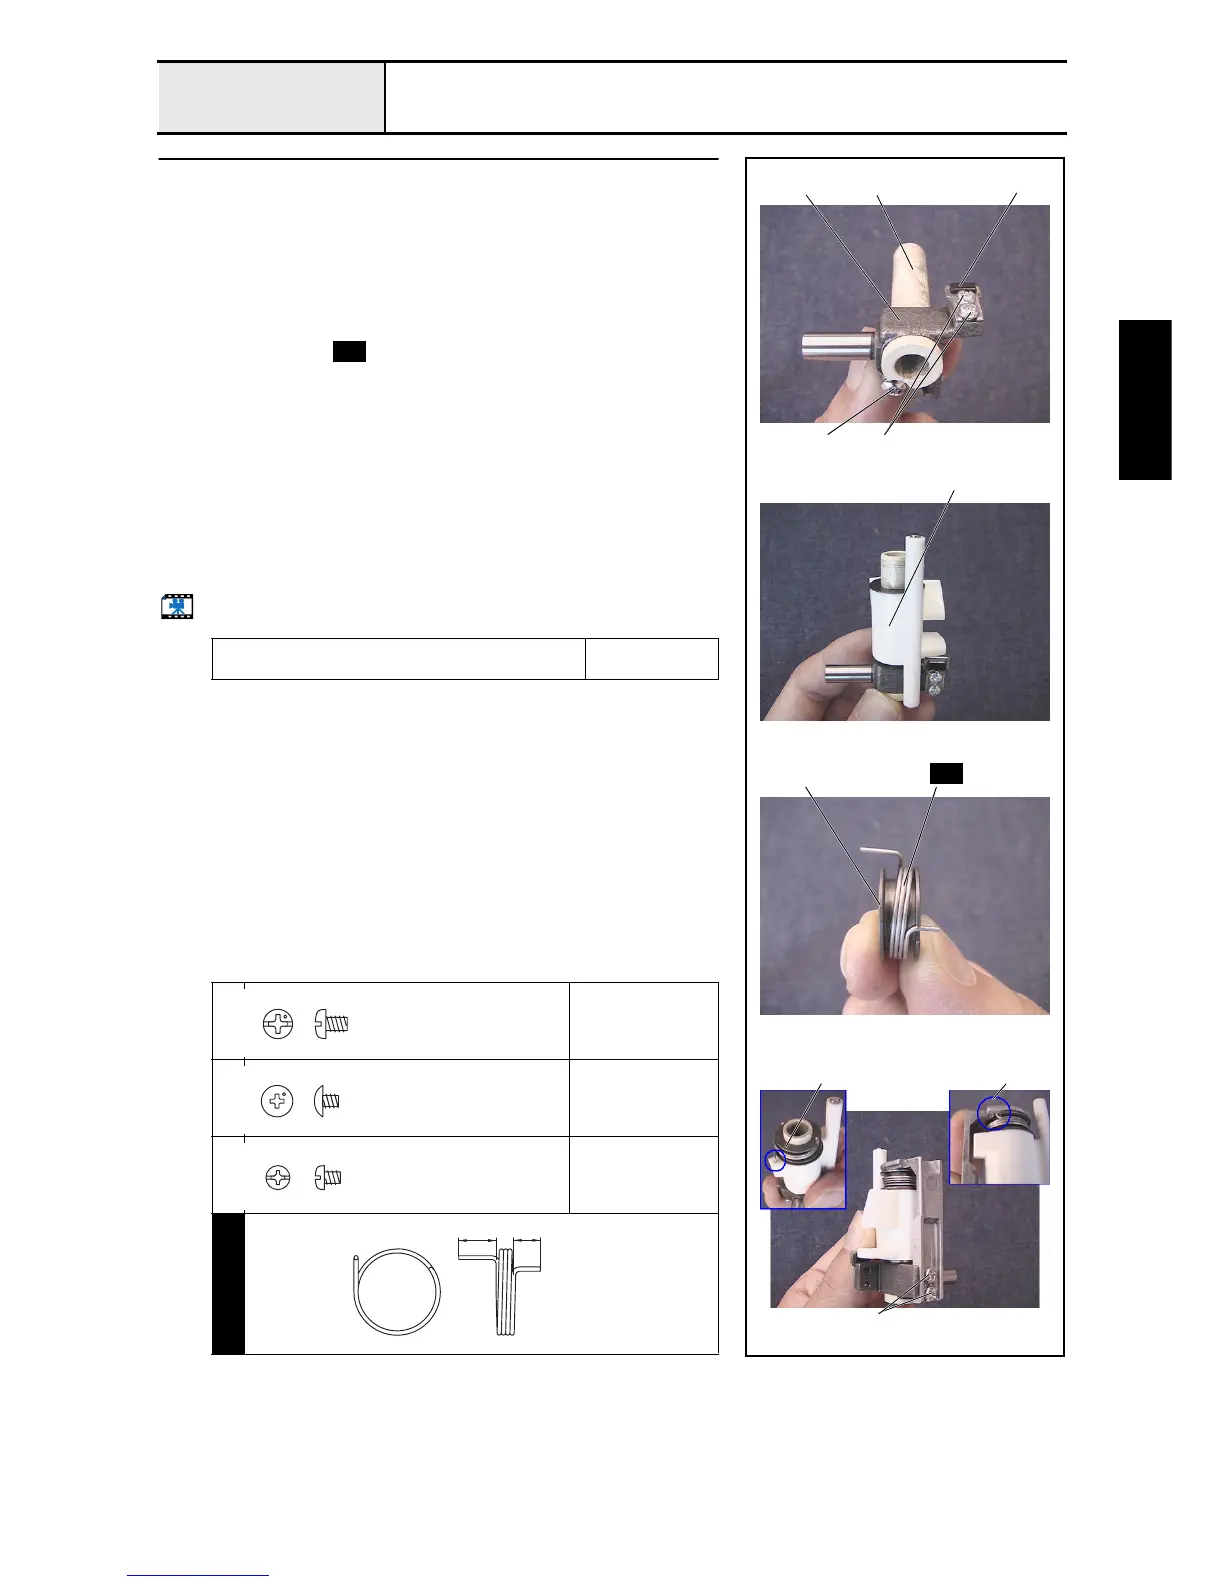
Vertical set assembly
1. Attach the J cushion base 2 to the J bracket 1 with the 2 screws 1.
2. Thread the J vertical bush 3 through the J bracket assembly, and then
tighten the screw 2.
3. Apply MOLYKOTE EM-30L grease to the circumference of the J vertical
bush.
4. Attach the thrust washer , jump bracket 4, and second thrust washer to the
J vertical bush assembly.
5. Attach the spring to the J spring collar 5.
*Key point
• Hang the shorter hook of the J spring over the notch on the J
spring collar.
6. Attach the J spring collar assembly to the J vertical bush assembly, and
insert the longer J spring hook into the hole 6 on the jump bracket.
7. Insert the shorter J spring hook into the hole 7 on the J clamp while
aligning the spring hook with the notch on the J spring collar, and then
tighten the 2 screws 3.
*Key point
• Check that there is no axial backlash in the J bracket.
Start movie clip (CD-ROM version only)
Apply MOLYKOTE EM-30L grease to the
circumference of the J vertical bush.
Size of a grain of
rice
1
Torque
0.78 –
1.18 N-m
2
Torque
0.59 –
0.78 N-m
3
Torque
0.59–
0.78 N-m
S45
3
5
4
3
S45
1 2
2 1
76
S45
Screw, Pan
M3X4
Color; Silver
Screw, Truss
M2.6X3
Color; Silver
Screw, Pan
M2.6X3
Color; Silver
J SPRING
XC5617***
7
5

 Loading...


