2 - 76
Operation panel
Main unit
5
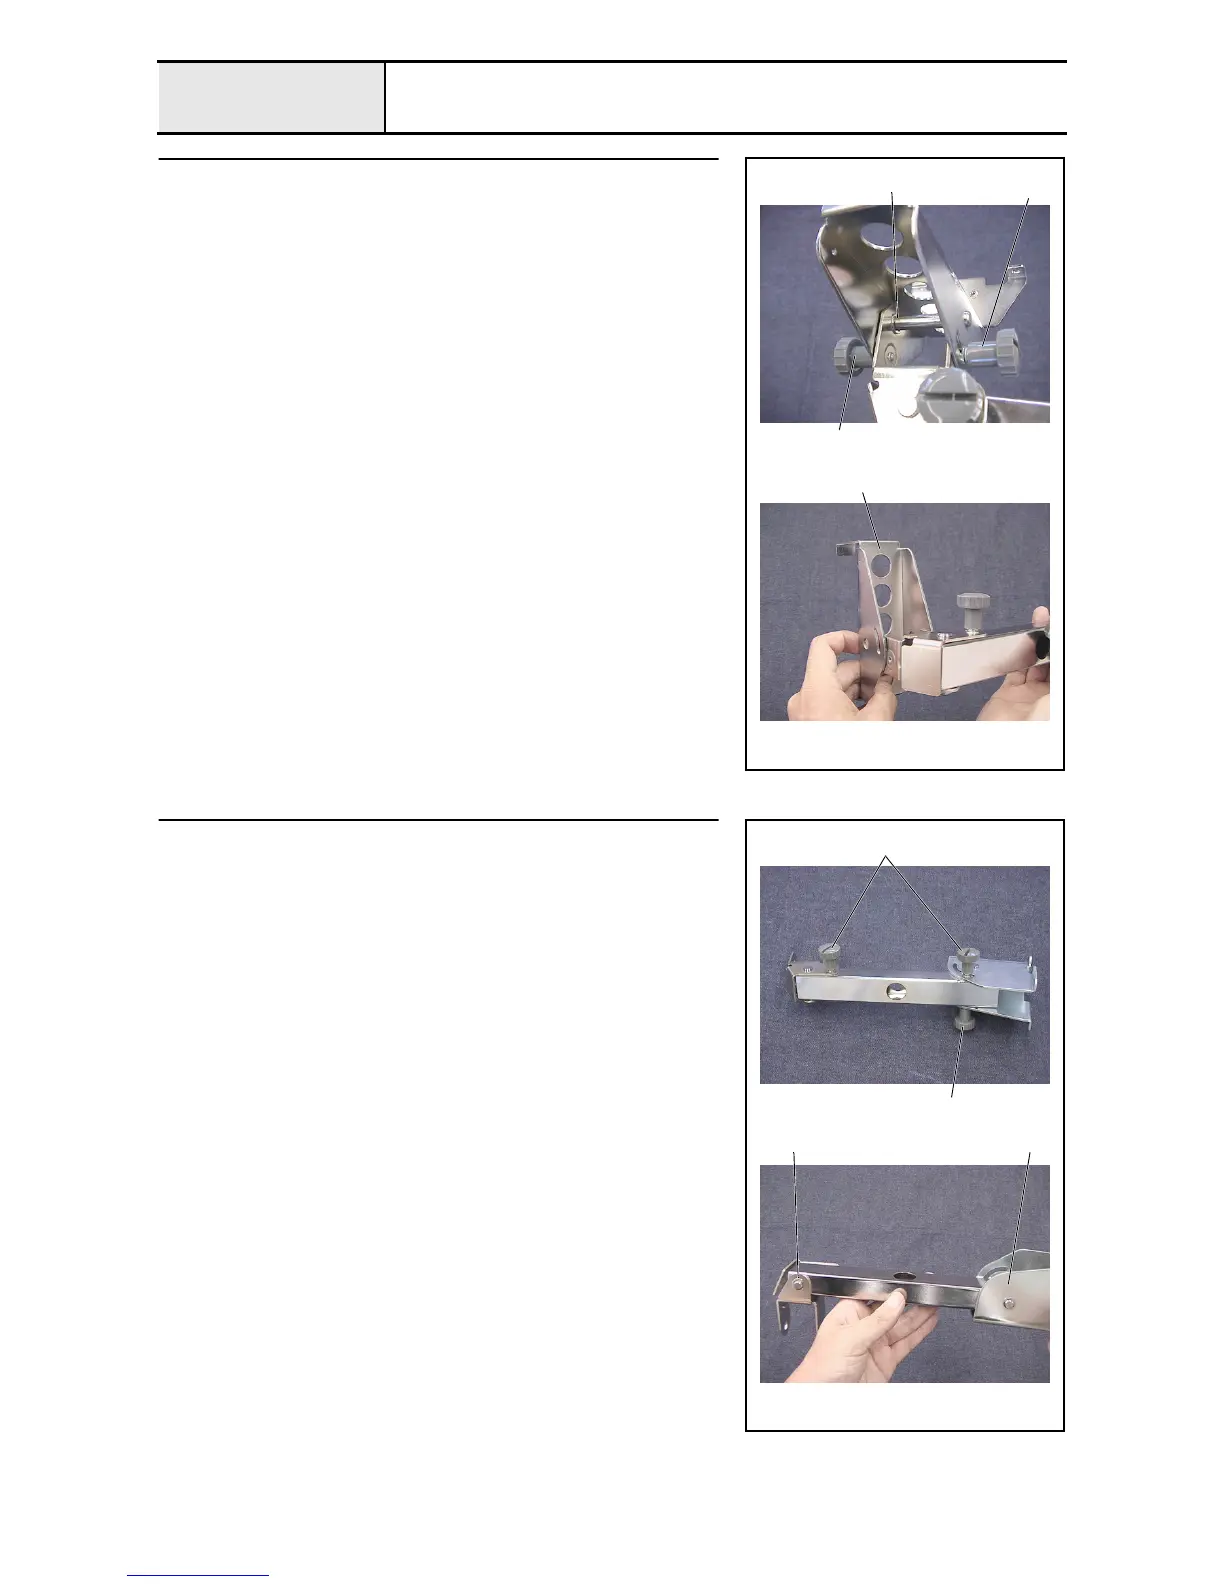
Operation panel lever disassembly (Step 1)
1. Remove the thumb bolt (M4 L) 1, spring washer (2-4), and plain washer
(M4). (2 locations)
2. Remove the retaining ring E6 inside the operation panel lever A, and then
remove the operation panel holder shaft.
3. Remove the retaining ring E6 from the operation panel holder shaft.
4. Remove the operation panel holder 2 from the operation panel lever A.
1
2
Retaining ring E6
1
6
Operation panel lever disassembly (Step 2)
1. Remove the thumb bolt (M4 L) 1, spring washer (2-4), and plain washer
(M4). (3 locations)
2. Remove the retaining ring E6, and then remove the operation panel level
shaft. (2 locations)
3. Remove the operation panel lever A 2 and the operation panel lever C 3
from the operation panel lever B.
1
2 3
1

 Loading...


