3 - 60
Needle bar unit
Main unit
12
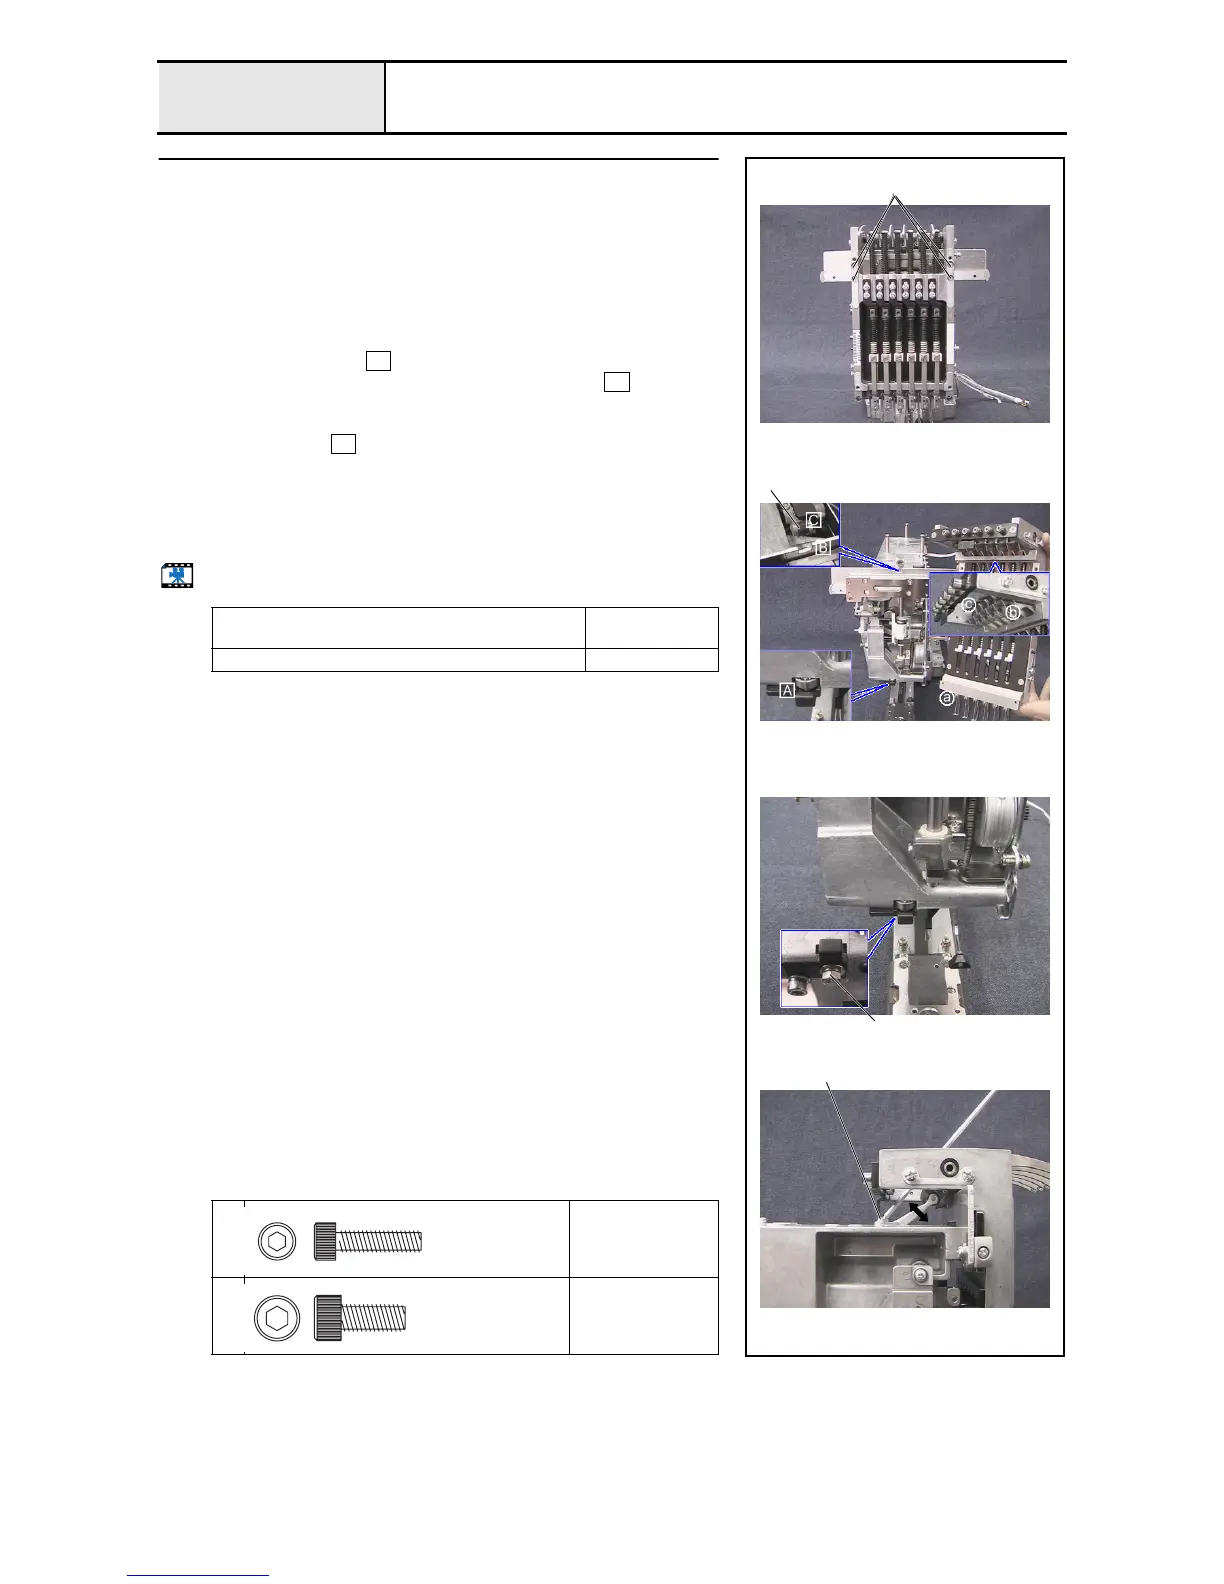
Needle bar case final assembly attachment
1. Rotate the pulley until the base line on the pulley is at the top.
2. Apply MOLYKOTE EM-30L grease to the roller 1 of the thread take-up
differential lever.
3. Attach the needle bar case final assembly to the case bracket assembly with
the 4 screws 1.
*Key point
• Align the thread take-up boss b on the thread take-up lever
assembly with on the case guide UL assembly, and then
align the thread take-up boss c with the roller on the
thread take-up differential lever.
• Align the case guide D a with the case positioning plate
assembly
4. Move the ball bearing 694 assembly 2 on the case positioning plate
assembly toward you, and firmly tighten the nut 2, M4.
5. Adjust the vertical position of the thread take-up differential lever so that
the needle bar case final assembly lightly moves right and left. Firmly
tighten the screw 2.
Start movie clip (CD-ROM version only)
Apply MOLYKOTE EM-30L grease to the roller on the
thread take-up differential lever.
Size of a grain of
rice
Tightening torque of nut (2, M4): 1.18 - 1.57
1
Torque
1.18 –
1.57 N-m
2
Torque
2.94 –
3.43 N-m
1
1
2
2
B
C
A
Bolt, Socket
M4X16
Color; Black
Bolt, Socket
M5X12
Color; Black

 Loading...


