3 - 99
Main unit
Main unit
Assembly
9
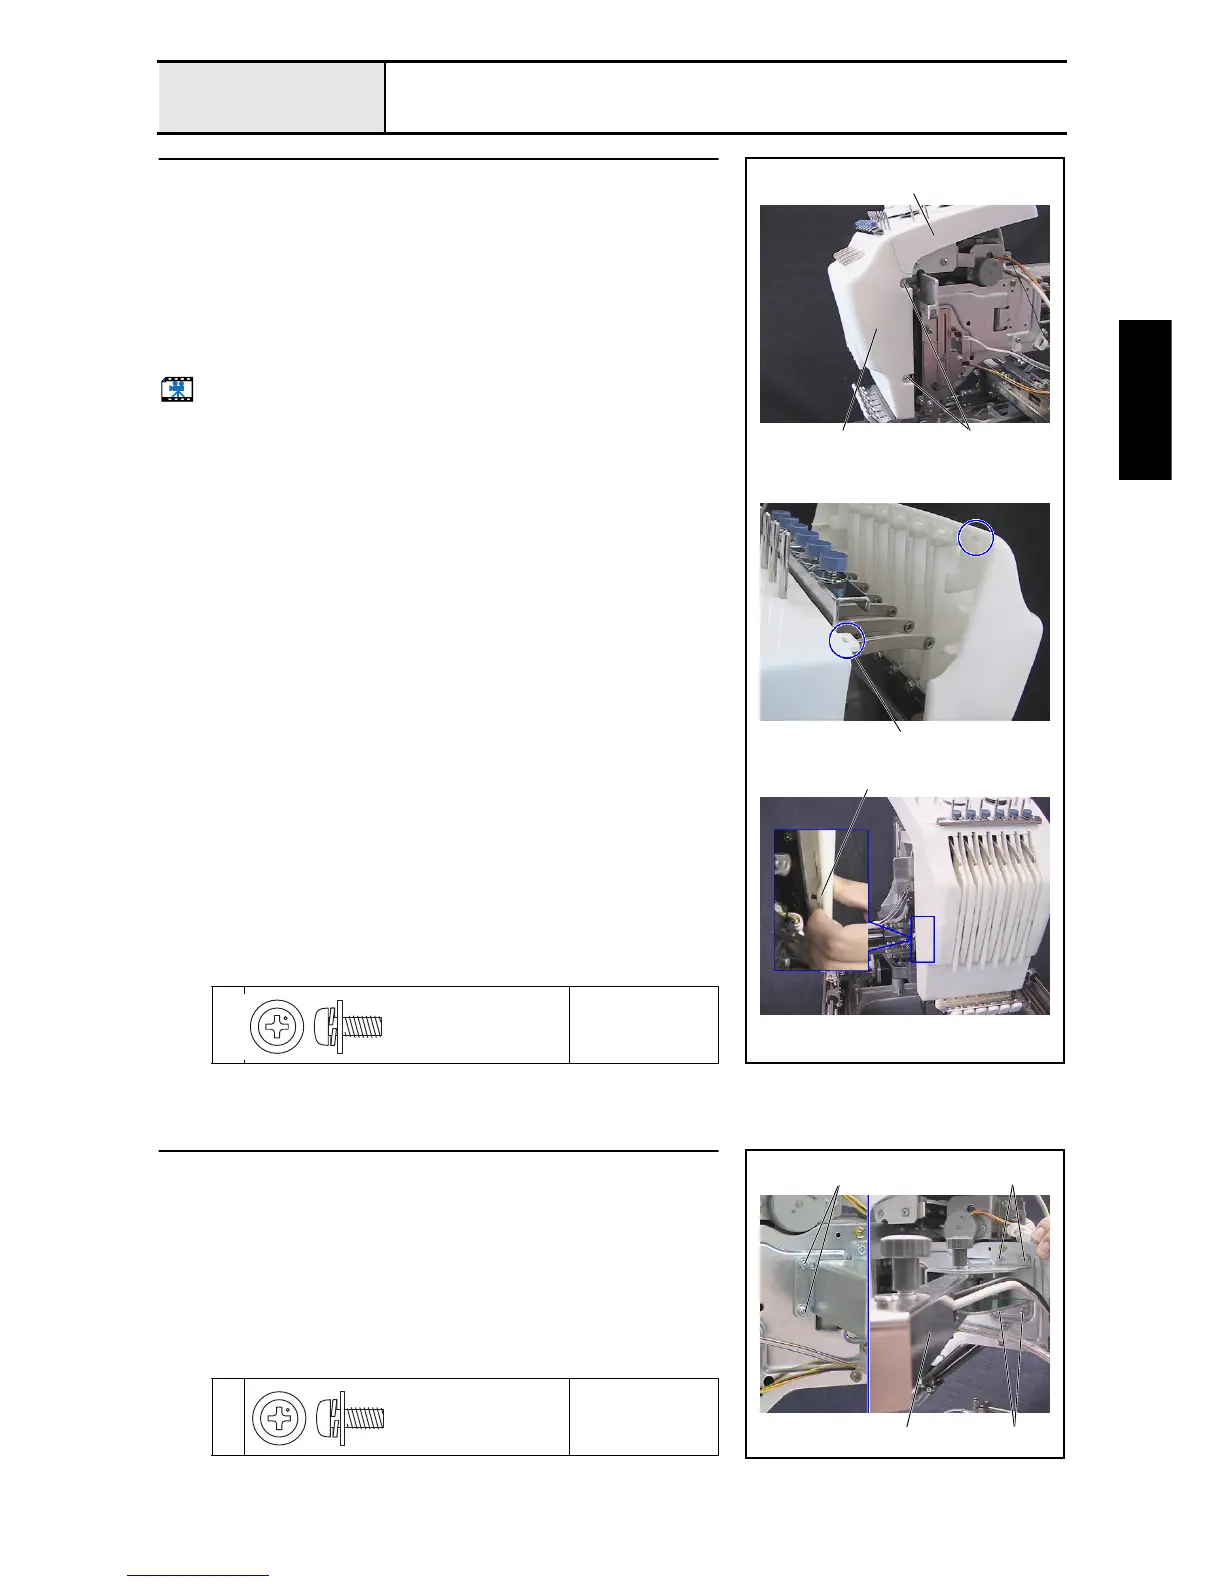
Thread take-up lever cover attachment
1. Attach the thread take-up lever cover 1 to the tension base assembly 2
with the 2 screws 1.
*Key point
• Place the 2 tabs on the upper section of the thread take-up
lever cover over the 2 holes 3 on the operator's side of the
tension base assembly, and then align the pin on the left side
of the needle bar case final assembly with the groove 4 on
the inner left side of the thread take-up lever cover.
Start movie clip (CD-ROM version only)
1
Torque
1.18 –
1.57 N-m
4
3
2
11
Screw, Pan (S/P washer)
M4X10DB
Color; Silver
10
Operation panel assembly attachment
1. Attach the operation panel assembly 1 with the 6 screws 1.
1
Torque
1.18 –
1.57 N-m
1 1
11
Screw, Pan (S/P washer)
M4X10DB
Color; Silver

 Loading...


