2 - 53
Lower shaft unit
Main unit
Disassembly
1
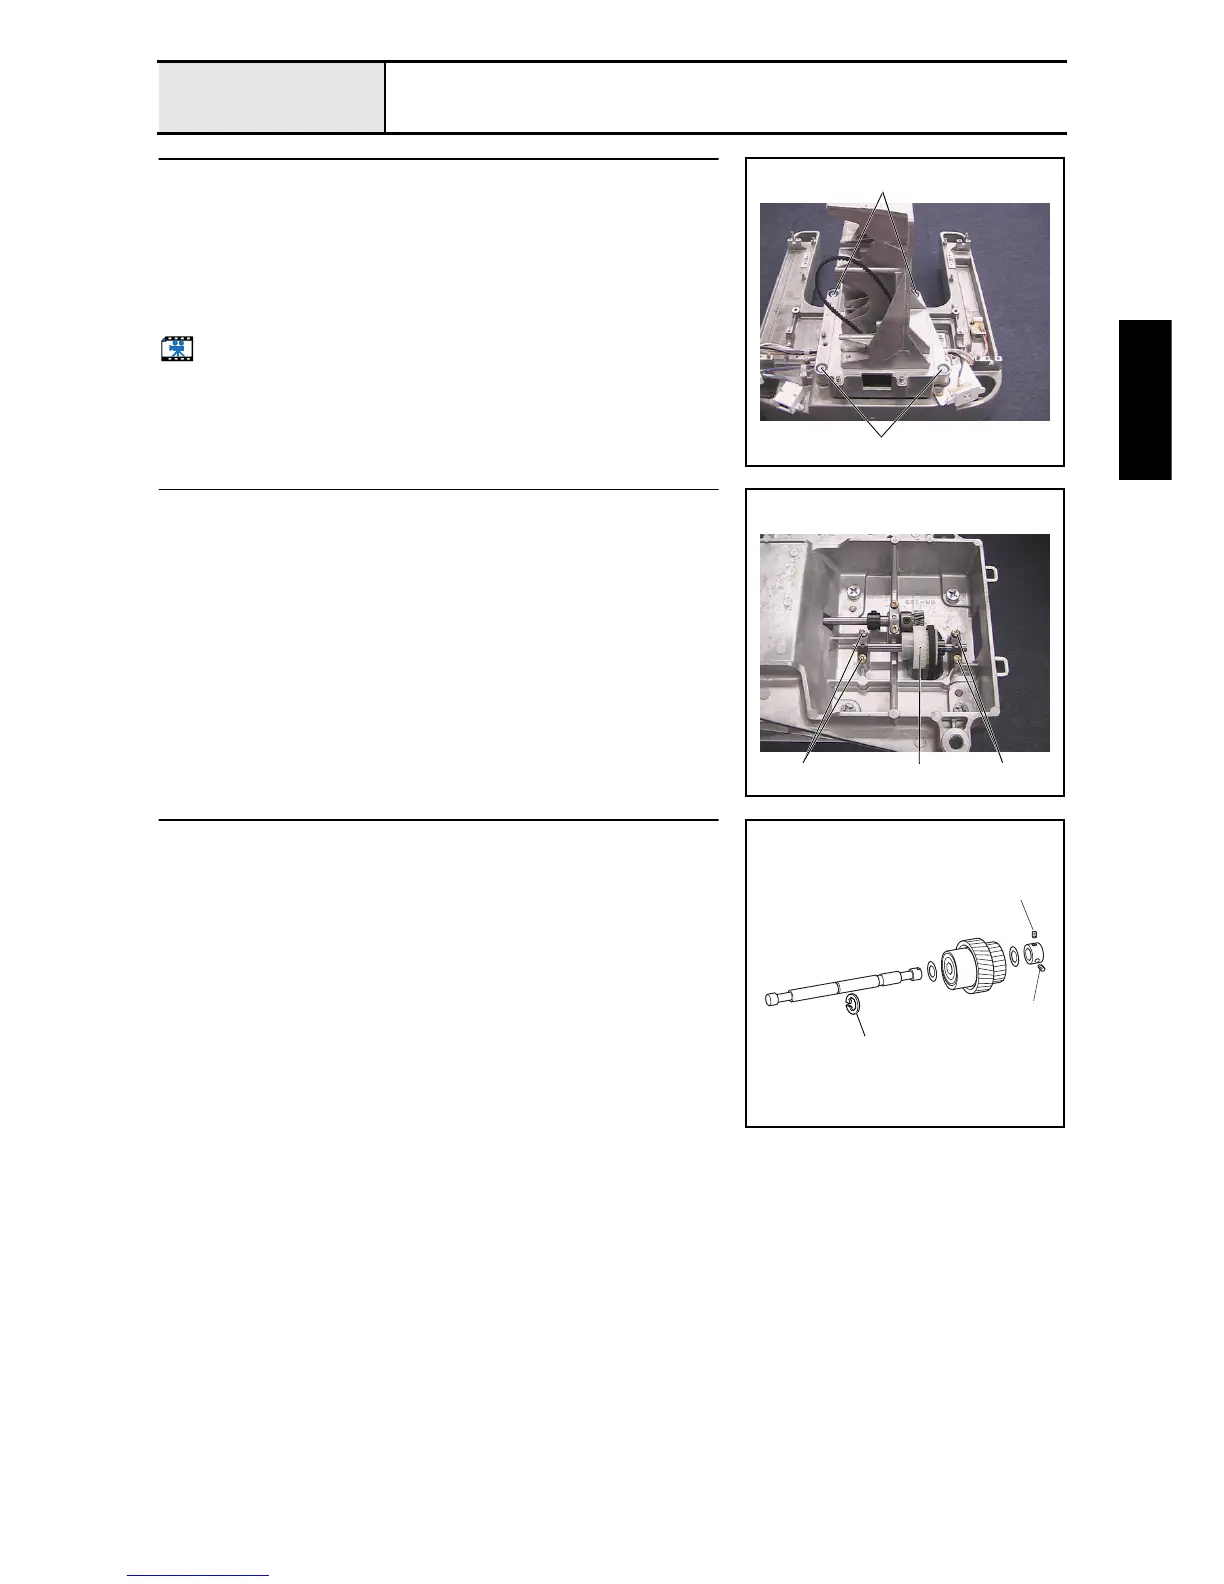
Arm bed and base frame disconnection
1. Mark the position where the arm bed is attached to the base frame. Mark
the position on the base frame.
*Key point
• Marking prevents miss-location during re-assembly.
2. Remove the 4 screws 1 and the 4 plain washers (M8), and then remove
the arm bed from the base frame.
Start movie clip (CD-ROM version only)
1
1
2
Idle pulley assembly removal
1. Remove the 4 screws 1, and then remove the 2 bushing pressers.
2. Remove the idle pulley assembly 1.
1
1 1
3
Idle pulley disassembly
1. Remove the 2 screws 1, and then remove the set screw collar, thrust
washer, idle pulley, and second thrust washer.
2. Remove the retaining ring E7 from the idle pulley shaft.
1
1
Retaining rings E4

 Loading...


