2 - 43
Upper shaft unit
Main unit
Disassembly
1
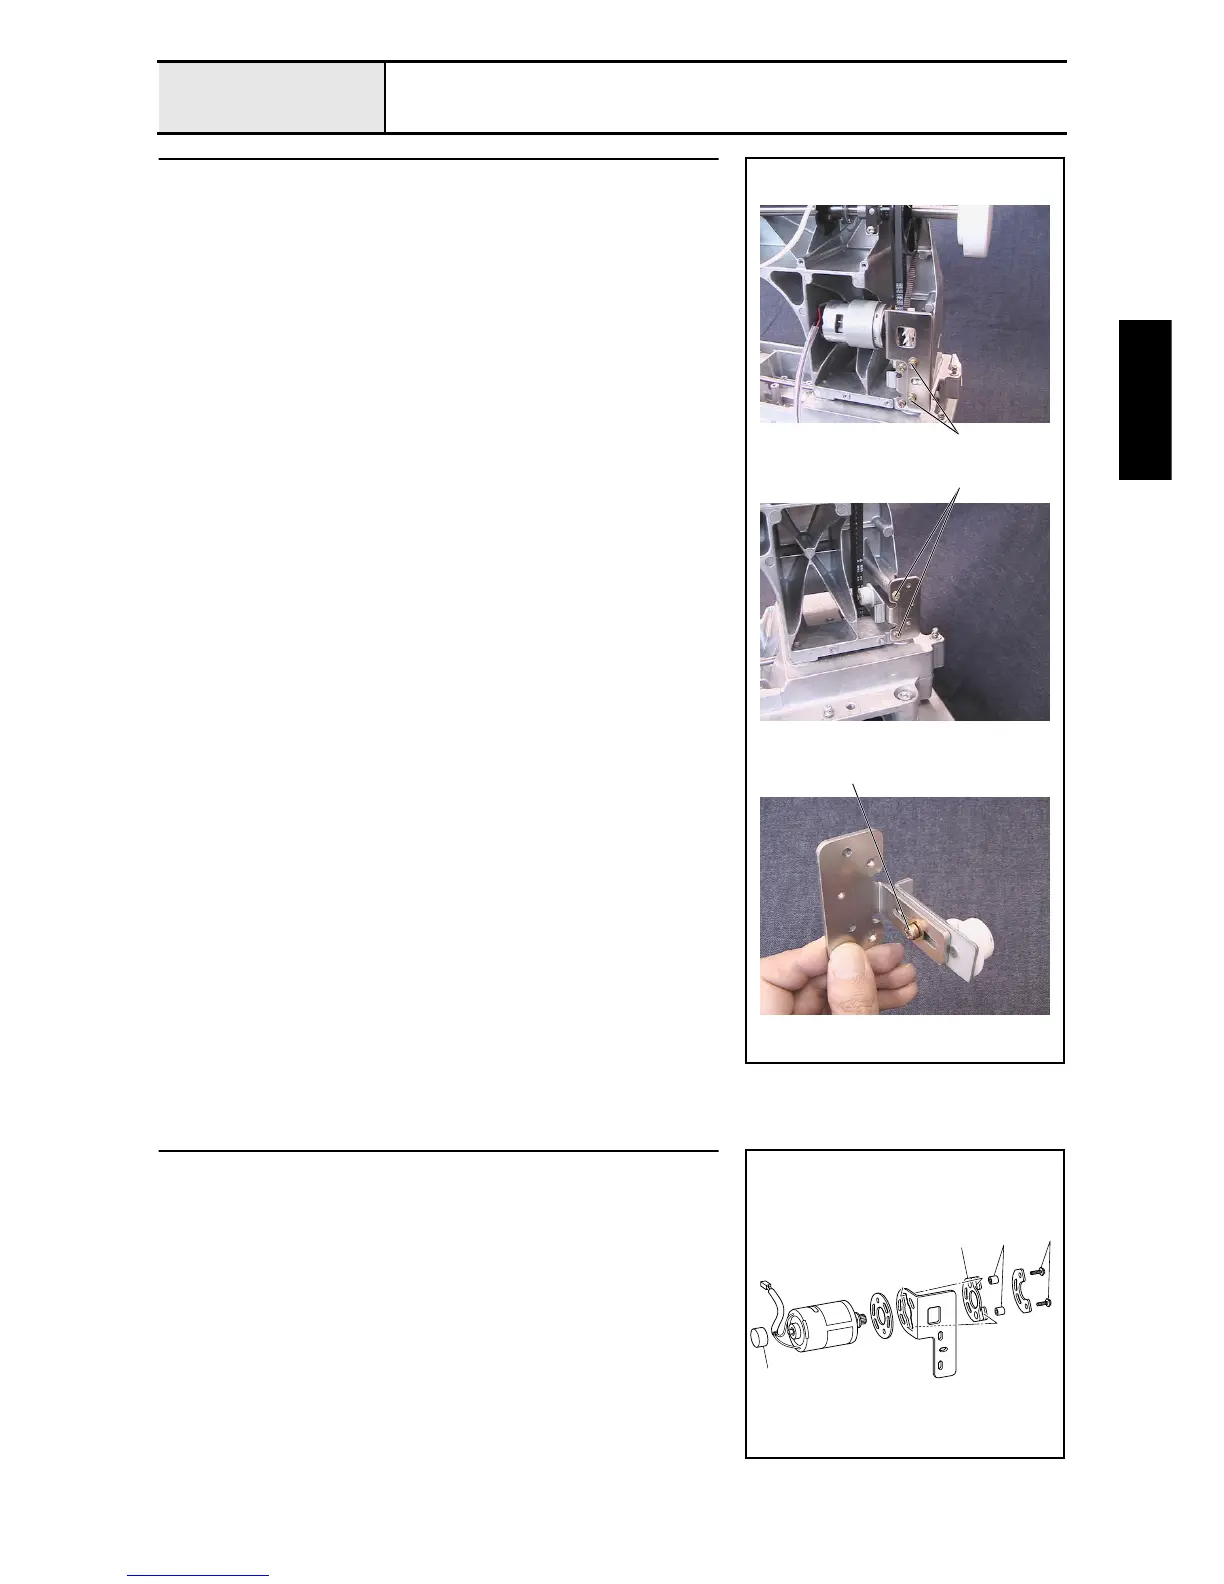
Main motor final assembly removal
1. Remove the 2 screws 1, and then remove the main motor final assembly
and the T-belt (XA9644-050).
2. Remove the motor fan from the main motor final assembly.
3. Remove the 2 screws 2, and then remove the tension pulley final
assembly.
4. Remove the screw 3, and then remove the tension pulley assembly.
1
2
3
2
Main motor disassembly
1. Remove the 2 screws 1, and then remove the main motor assembly, motor
holder spacer, and motor spacer presser from the motor holder.
2. Remove the fender rubber 1 from the motor holder.
3. Remove the 2 spacers (4 x 7) 2 from the fender rubber.
4. Remove the motor cap 3 from the main motor assembly.
1
1
2
3

 Loading...


