EasyManuals Logo

Brother PR600 Service Manual

Brother PR600
272 pages
To Next Page IconTo Next Page
To Previous Page IconTo Previous Page
Page #171 background imageLoading...
Page #171 background image
3 - 71
Needle thread unit
Main unit
Assembly
1
Thread motor assembly attachment
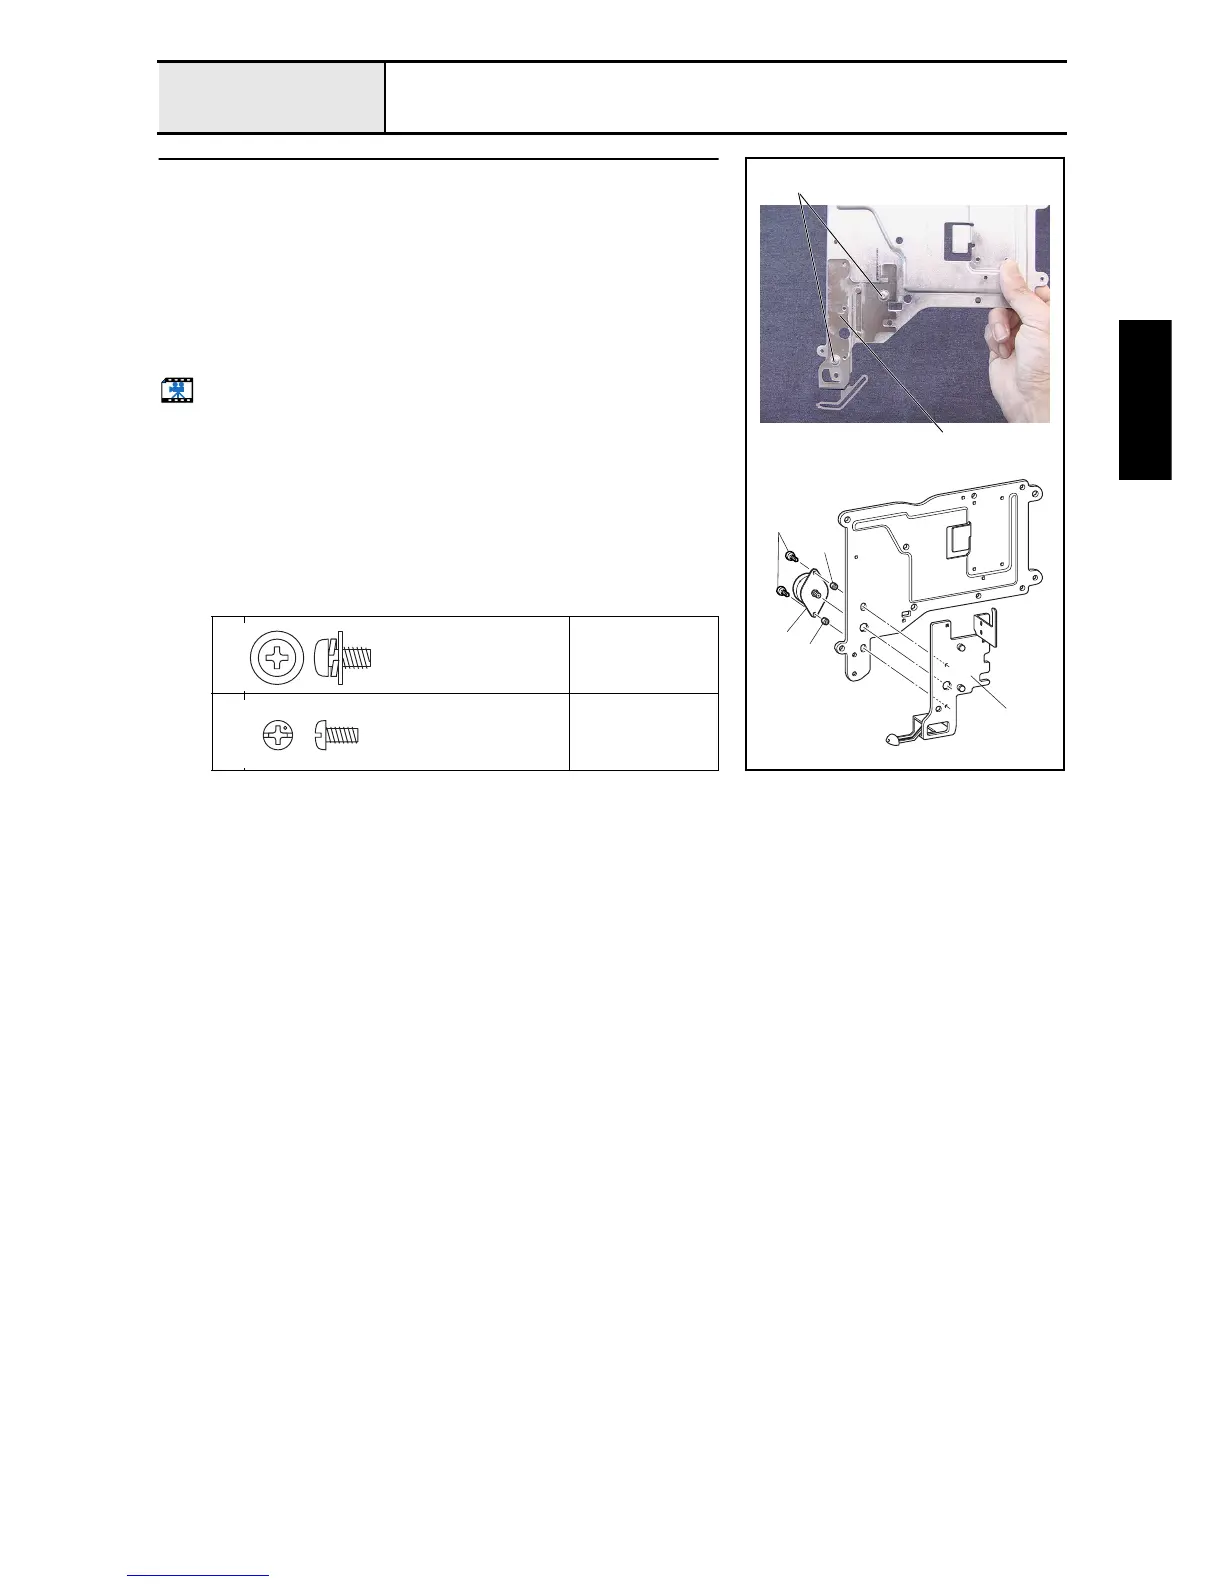
1. Attach the base plate assembly 2 to the thread guide base 1 with the 2
screws 1.
*Key point
• Firmly tighten the 2 screws 2 after completing 4 - 25 "Needle
threader adjustment (up/down)."
2. Attach the thread motor assembly 3 and the 2 spacers 4 to the base plate
assembly 3 with the 2 screws 2.
3. Paint the thread motor's connector red.
Start movie clip (CD-ROM version only)
1
Torque
Hand start
2
Torque
0.59 – 0.78 N-m
2
4
4
2
3
1
2
Screw, Pan (S/P washer)
M4X8DB
Color; Silver
Screw, Pan
M3X6
Color; Silver

Table of Contents

Questions and Answers:

Question and Answer IconNeed help?

Do you have a question about the Brother PR600 and is the answer not in the manual?

Brother PR600 Specifications

General IconGeneral
TypeEmbroidery machine
LCD ScreenYes
USB PortYes
Built-in MemoryYes
ConnectivityUSB
Maximum Embroidery Area200mm
Embroidery Area200mm
Needle Count6 needles

Related product manuals