3 - 94
Main unit
Main unit
1
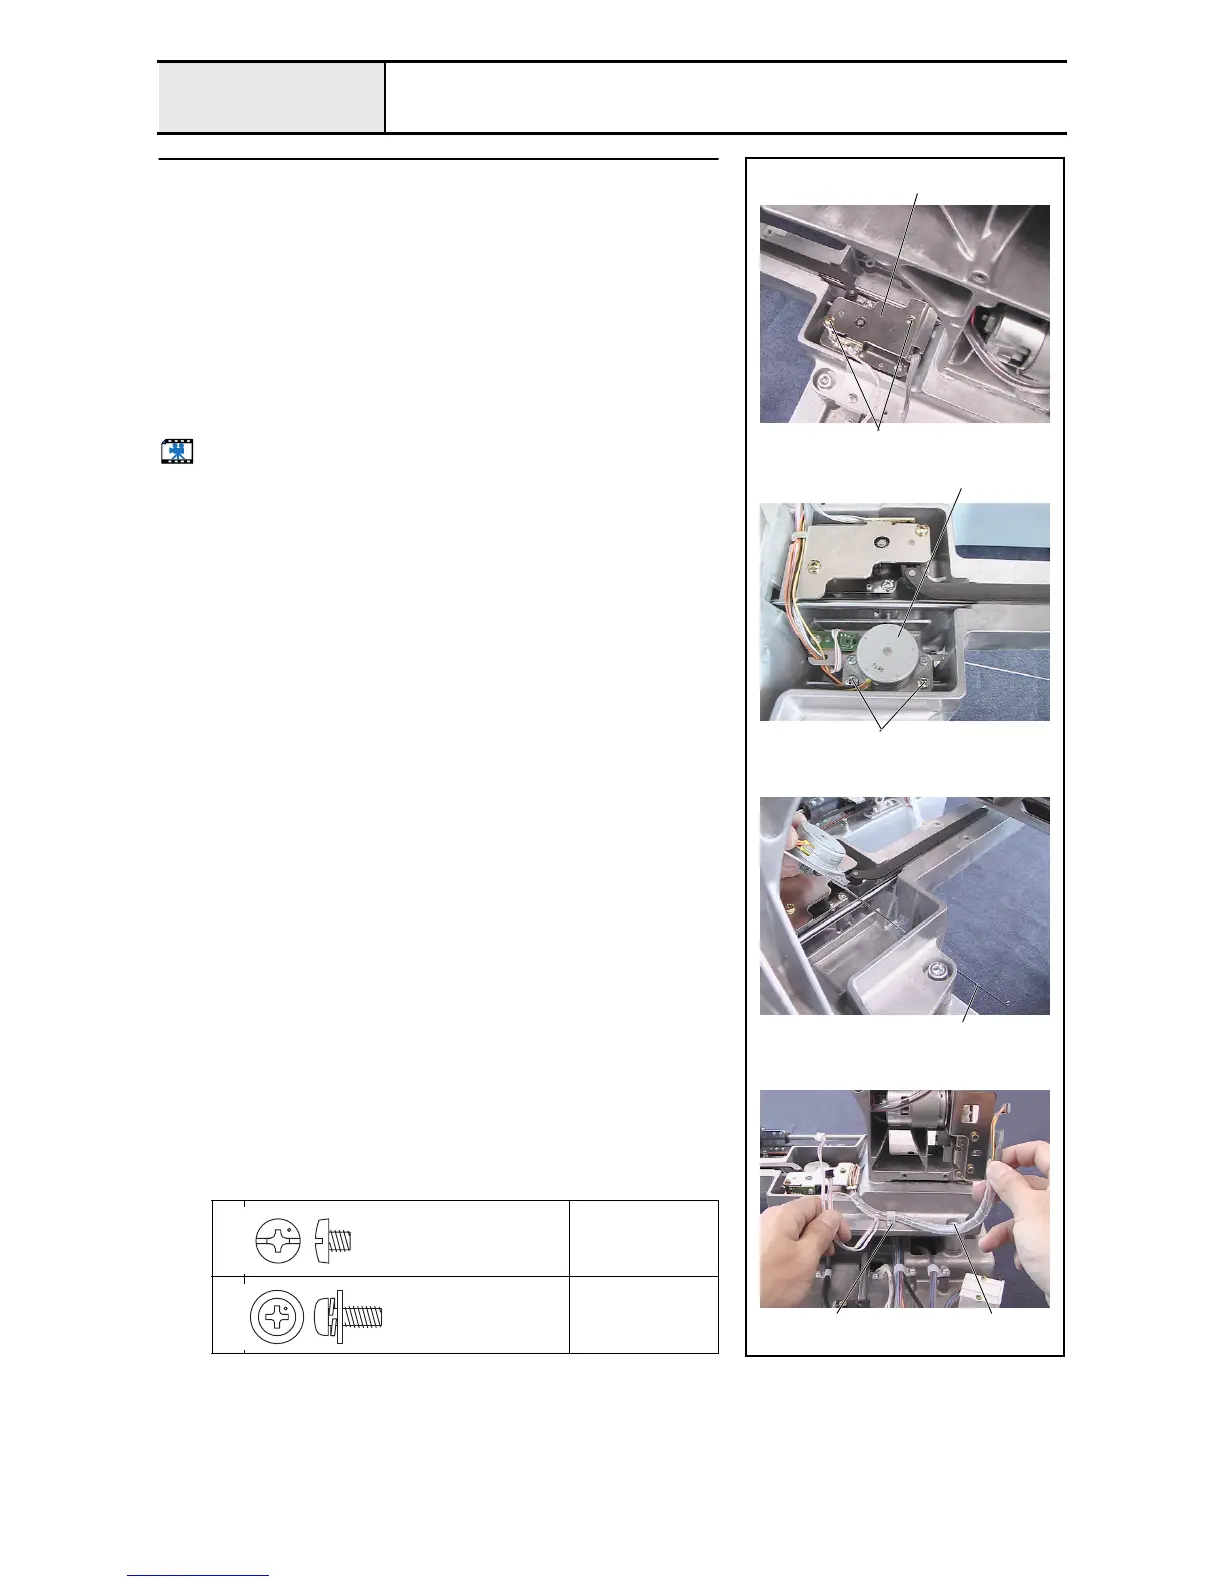
Cutter unit final assembly and picker final assembly attachment
1. Attach the cutter unit final assembly 1 to the arm bed with the 2 screws
1.
2. Attach the picker final assembly 2 to the arm bed with the 2 screws 2.
*Key point
• Fully draw the feed final assembly toward you before attaching
the cutter unit final assembly and the picker final assembly.
• Be careful not to bend the picker link 3 when threading it
through the hole on the arm bed to the needle plate side.
3. Thread the cutter unit final assembly's lead wire and the picker final
assembly's lead wire through the spiral tube D 4, and then attach them to
the arm bed with the screw 3 and cord clamp NK-5N.
Start movie clip (CD-ROM version only)
1
2
Torque
1.18 –
1.57 N-m
3
Torque
0.78 –
1.18 N-m
2
1
1
2
3
3 4
Screw, Bind
M4X4
Color; Silver
Screw, Pan (S/P washer)
M4X10DB
Color; Silver

 Loading...


