EasyManua.ls Logo

Brother PR600 Service Manual

Brother PR600
272 pages
To Next Page IconTo Next Page
To Previous Page IconTo Previous Page
Page #168 background imageLoading...
Page #168 background image
3 - 68
Main unit
Needle bar change unit
2
Change box assembly (Step 2)
1. Attach the change gear 1 to the change camshaft.
2. Move the change gear toward the change cam, and secure it with the 2
screws 1.
*Key point
• Align the screw hole on the change gear with the D-cut face
on the change camshaft.
3. Attach the plain washer (M6), C differential gear 3, and plain washer
(M6) to the differential gear shaft 2, and then attach the retaining ring E4.
4. Attach the differential gear shaft assembly to the change gear box, and then
tighten the screw 2.
*Key point
• Turn the differential gear shaft to adjust the backlash of the C
differential gear.
5. Apply MOLYKOTE EM-30L grease to the groove 4 on the change cam.
Start movie clip (CD-ROM version only)
Apply MOLYKOTE EM-30L grease to the groove on
the change cam.
Size of a bean
1
Torque
1.18 –
1.57 N-m
2
Torque
0.78 –
1.18 N-m
2
3
2
1
2
4
1
Retaining ring E4
Set Screw, Socket (CP)
M5X6
Color; Black
Set Screw, Socket (FT)
M4X4
Color; Black

Table of Contents

Question and Answer IconNeed help?

Do you have a question about the Brother PR600 and is the answer not in the manual?

Brother PR600 Specifications

General IconGeneral
TypeEmbroidery machine
LCD ScreenYes
USB PortYes
Built-in MemoryYes
ConnectivityUSB
Maximum Embroidery Area200mm
Embroidery Area200mm
Needle Count6 needles

Summary

GENERAL INFORMATION

CAUTION

Important safety precautions to follow when handling electronic components and performing repairs.

1 Outline of Mechanism

Main Mechanisms

Describes the main mechanical components of the embroidery machine.

Driveline

Explains the mechanisms for power transmission and movement.

Control system block diagram

Visual representation of the machine's control system architecture and interconnections.

2 Disassembly

Main parts

Explains the disassembly procedures for the main components of the machine.

Feed unit

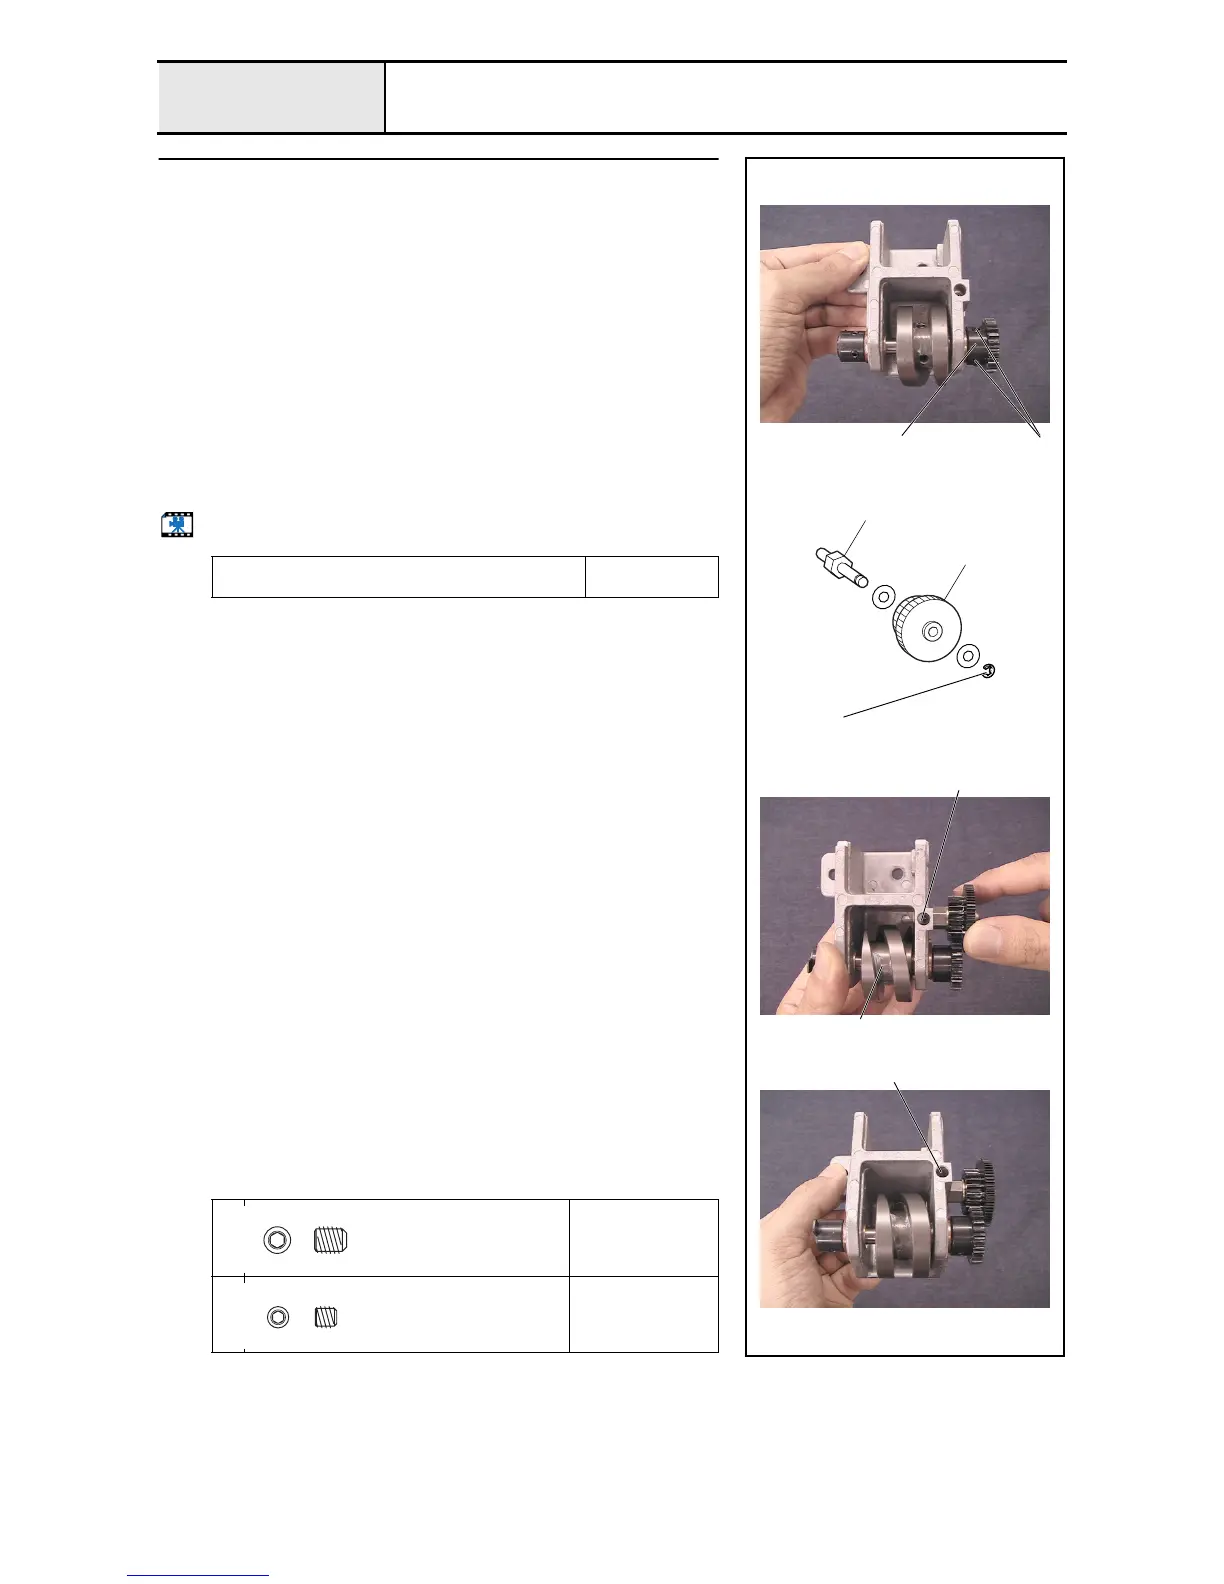
Details the disassembly of the feed mechanism.

Needle thread unit

Covers the disassembly steps for the needle thread system.

Needle bar unit

Steps for disassembling the needle bar assembly.

3 Assembly

Operation panel

Steps for assembling the machine's control panel and its components.

Needle bar unit

Details the assembly of the needle bar mechanism.

Feed unit

Explains the assembly of the feed mechanism.

Main unit

Procedures for reassembling the main unit of the embroidery machine.

4 Adjustment

Precaution

Important considerations and warnings before performing adjustments.

Test mode

Instructions on how to enter and operate the machine's test modes for diagnostics.

Needle position adjustment (front/back)

Adjusting the needle's front-to-back position relative to the needle plate.

Needle bar height adjustment

Setting the correct height for the needle bar.

5 Failure Investigation for Electronic Parts

Error message list

A comprehensive list of error messages and their corresponding page numbers for troubleshooting.

The power is not turned on

Troubleshooting steps for when the machine does not power on.

The hoop does not move normally

Steps to resolve problems with hoop movement.

The needle bar does not move normally

Diagnosing and resolving issues with needle bar movement.

6 Maintenance

Related product manuals