3 - 95
Main unit
Main unit
Assembly
2
Rotary hook attachment
1. Attach the rotary hook 1 to the lower shaft with the 3 screws 1.
1
Torque
0.78 – 1.18 N-m
1
1
Foot set screw
4.46
Color;
3
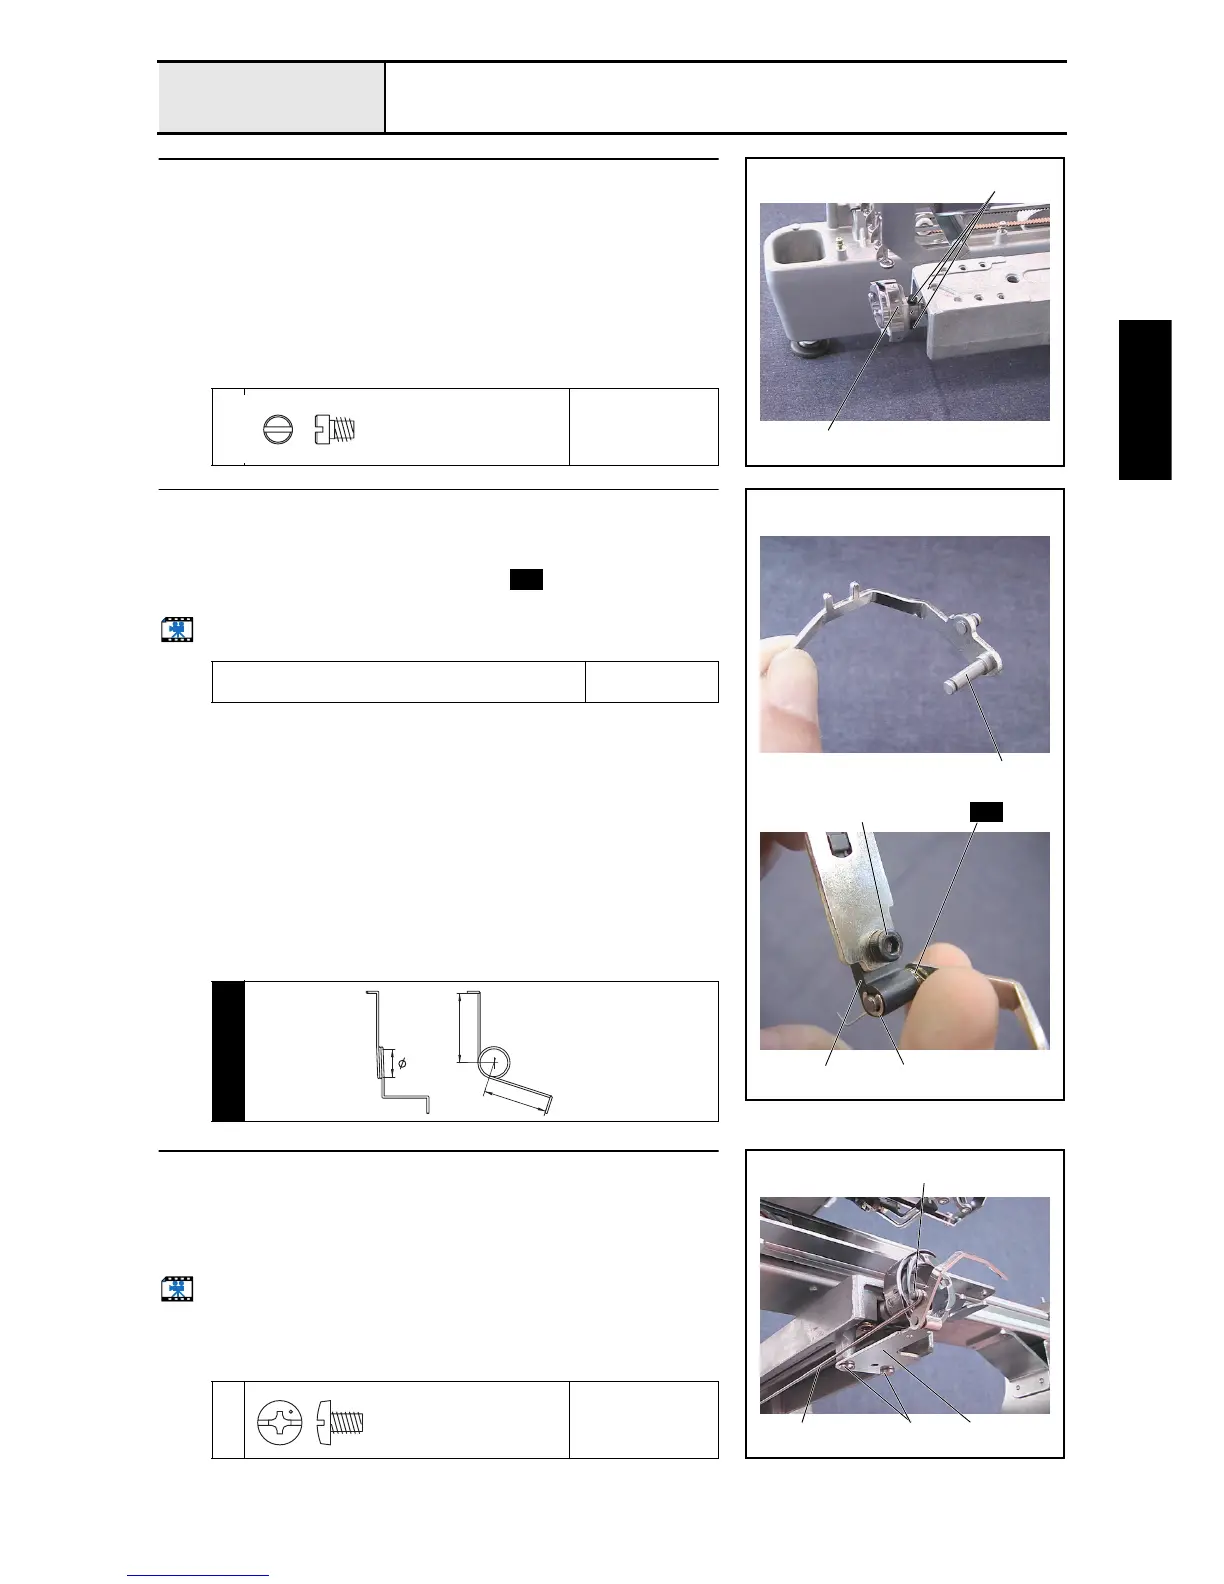
Picker bracket final assembly
1. Apply MOLYKOTE EM-30L grease to the picker assembly's shaft 1.
2. Attach the picker holder 2 to the picker bracket with the screw 1.
3. Attach the picker assembly and the spring to the picker bracket 3,
and then attach the retaining ring E2.
Start movie clip (CD-ROM version only)
Apply MOLYKOTE EM-30L grease to the picker
assembly's shaft.
Size of a grain of
rice
S54
1
Retaining ring E2
S54
1
2
S54
PICKER SPRING
XC5853***
13
5.2
12
4
Picker bracket final assembly attachment
1. Attach the picker bracket final assembly 1 to the arm bed with the 2
screws 1.
2. Attach the picker link 2 to the picker assembly's picker link attachment
shaft, and then attach the retaining ring E2.
Start movie clip (CD-ROM version only)
1
Torque
1.18 –
1.57 N-m
1
Retaining ring E2
1
2
Screw, Bind
M4X6
Color; Silver

 Loading...


