2 - 31
Needle bar change unit
Main unit
Disassembly
3
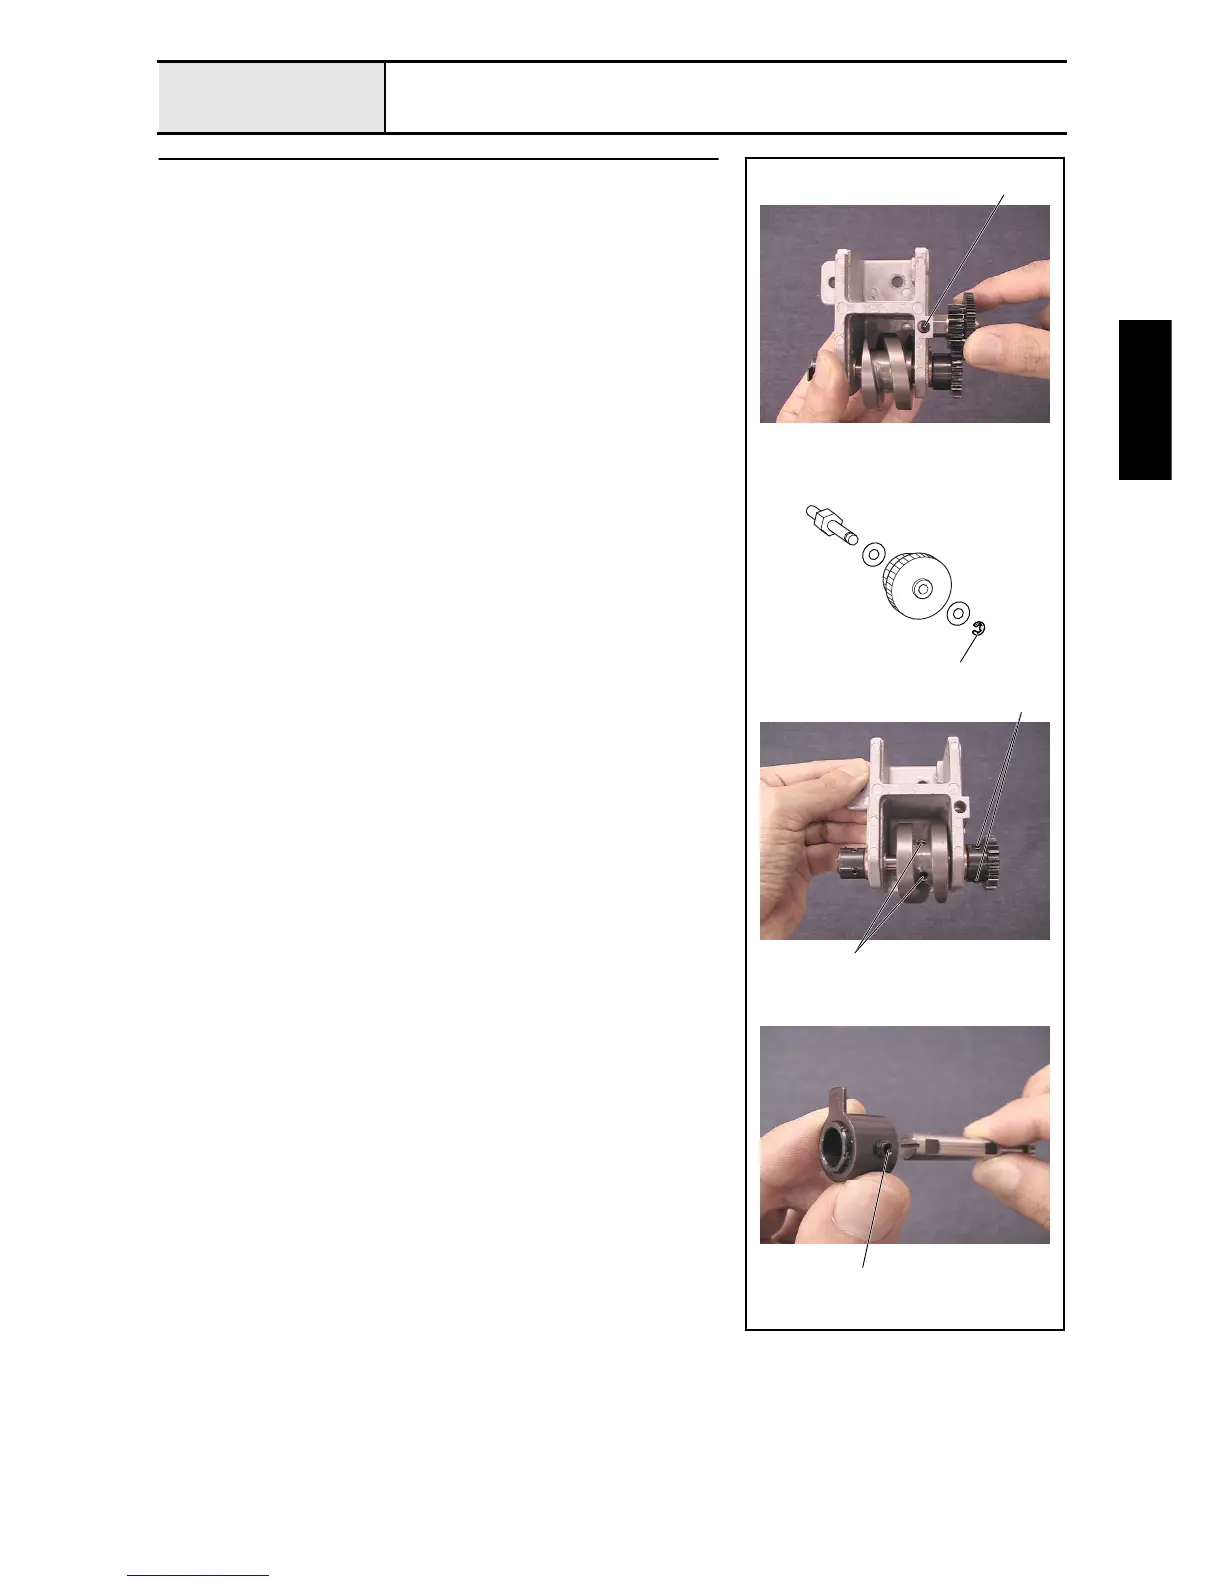
Change box disassembly (Step 2)
1. Remove the screw 1, and then remove the differential gear shaft
assembly.
2. Remove the retaining ring E4, and then remove the plain washer (M6), C
differential gear, and second plain washer (M6) from the differential gear
shaft.
3. Remove the 2 screws 2, and then remove the change gear.
4. Remove the 2 screws 3, and then remove the change camshaft assembly,
thrust washer, and change cam.
5. Remove the 2 screws 4, and then remove the C stop position dog from the
change camshaft.
2
1
3
4
Retaining rings E4

 Loading...


