2 - 66
Thread tension unit
Main unit
3
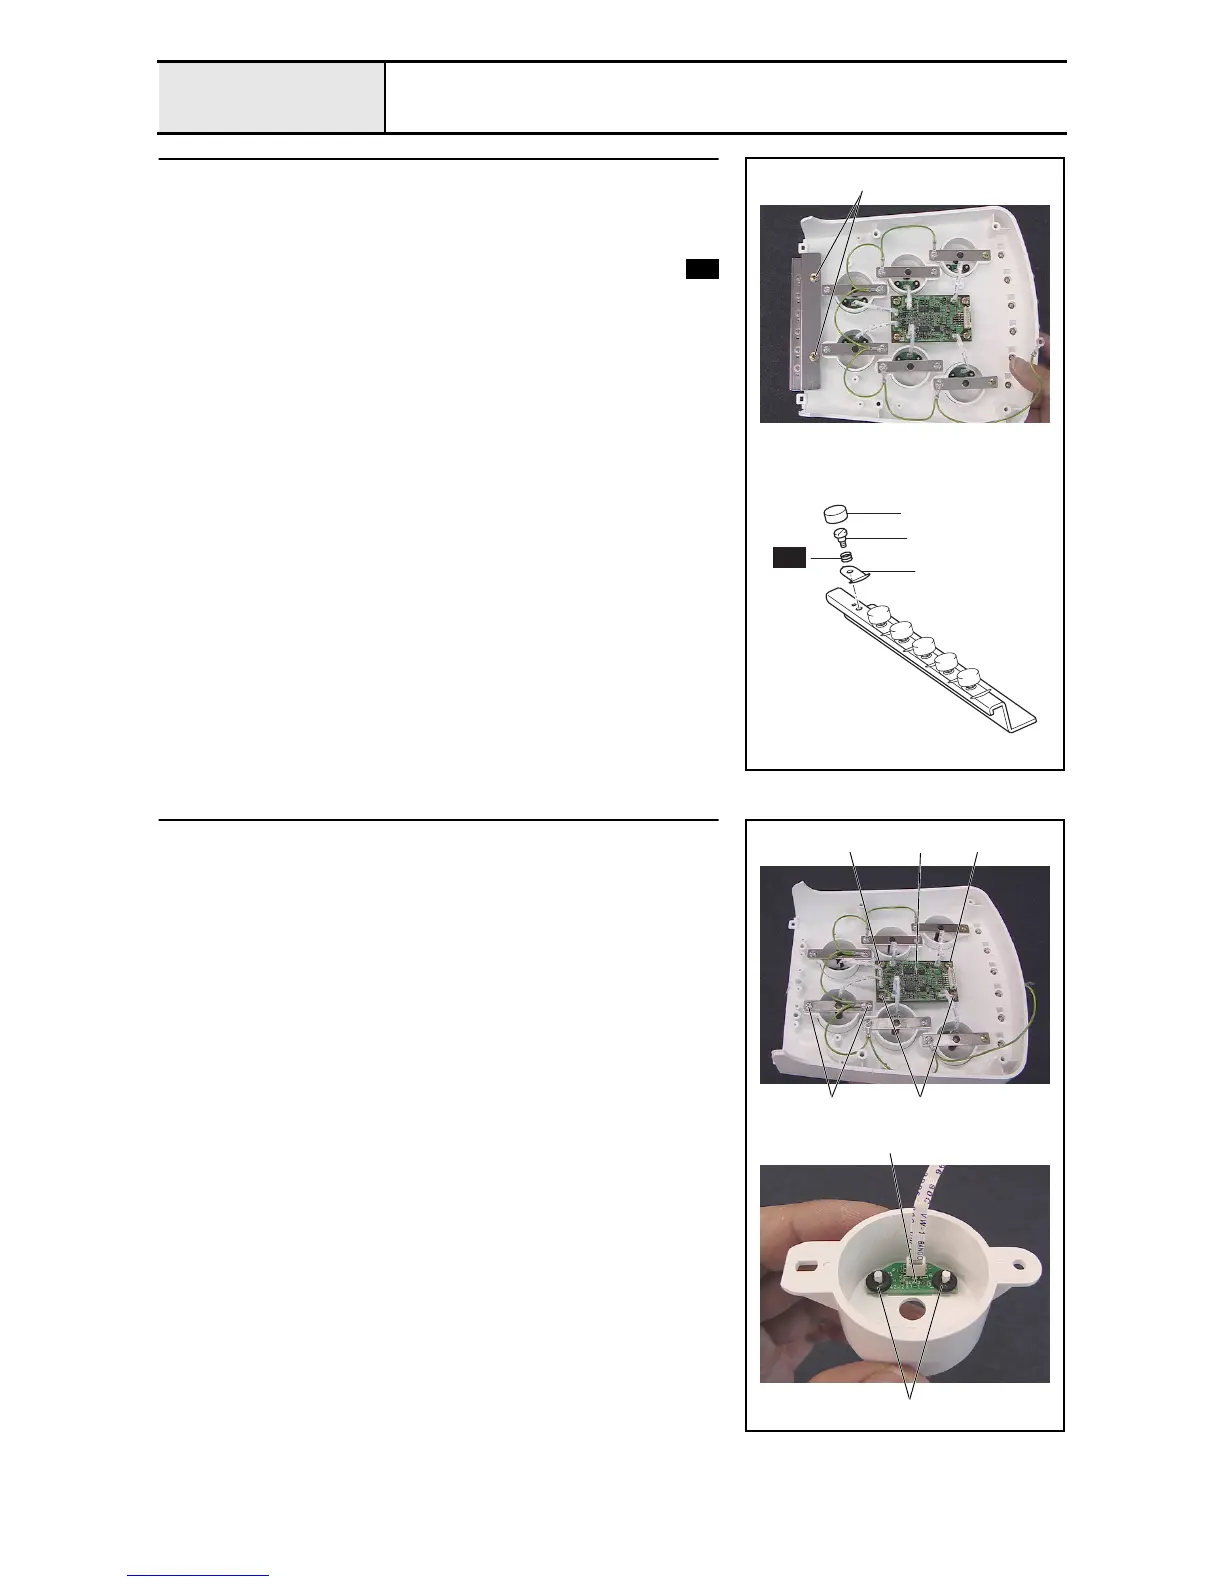
Inner thread eyelet base removal
1. Remove the 2 screws 1, and then remove the inner thread eyelet base
assembly from the tension base assembly.
2. Remove the tension axis cap 1. (6 locations)
3. Loosen the thread guide tension axis 2, and then remove the spring
and the thread guide tension plate 3. (6 locations)
1
2
3
S52
1
S52
4
Thread sensor PCB assembly and head PCB assembly removal
1. Disconnect the FFC (SML2CD-H) from the head PCB assembly 1.
(6 locations)
2. Remove the 4 screws 1, and then remove the head PCB assembly.
3. Remove the 2 screws 2, and then remove the thread tension bracket,
thread quantity sensor cover, and head grounding wire assembly.
(6 locations)
4. Remove the 2 retaining rings CS2, and then remove the 2 rubber washers
and the thread sensor assembly 2 from the thread quantity sensor cover.
(6 locations).
5. Remove the FFC (SML2CD-H) from the thread sensor assembly.
1
1
2
2
1
1
Retaining ring CS2

 Loading...


