3 - 92
Feed unit
Main unit
18
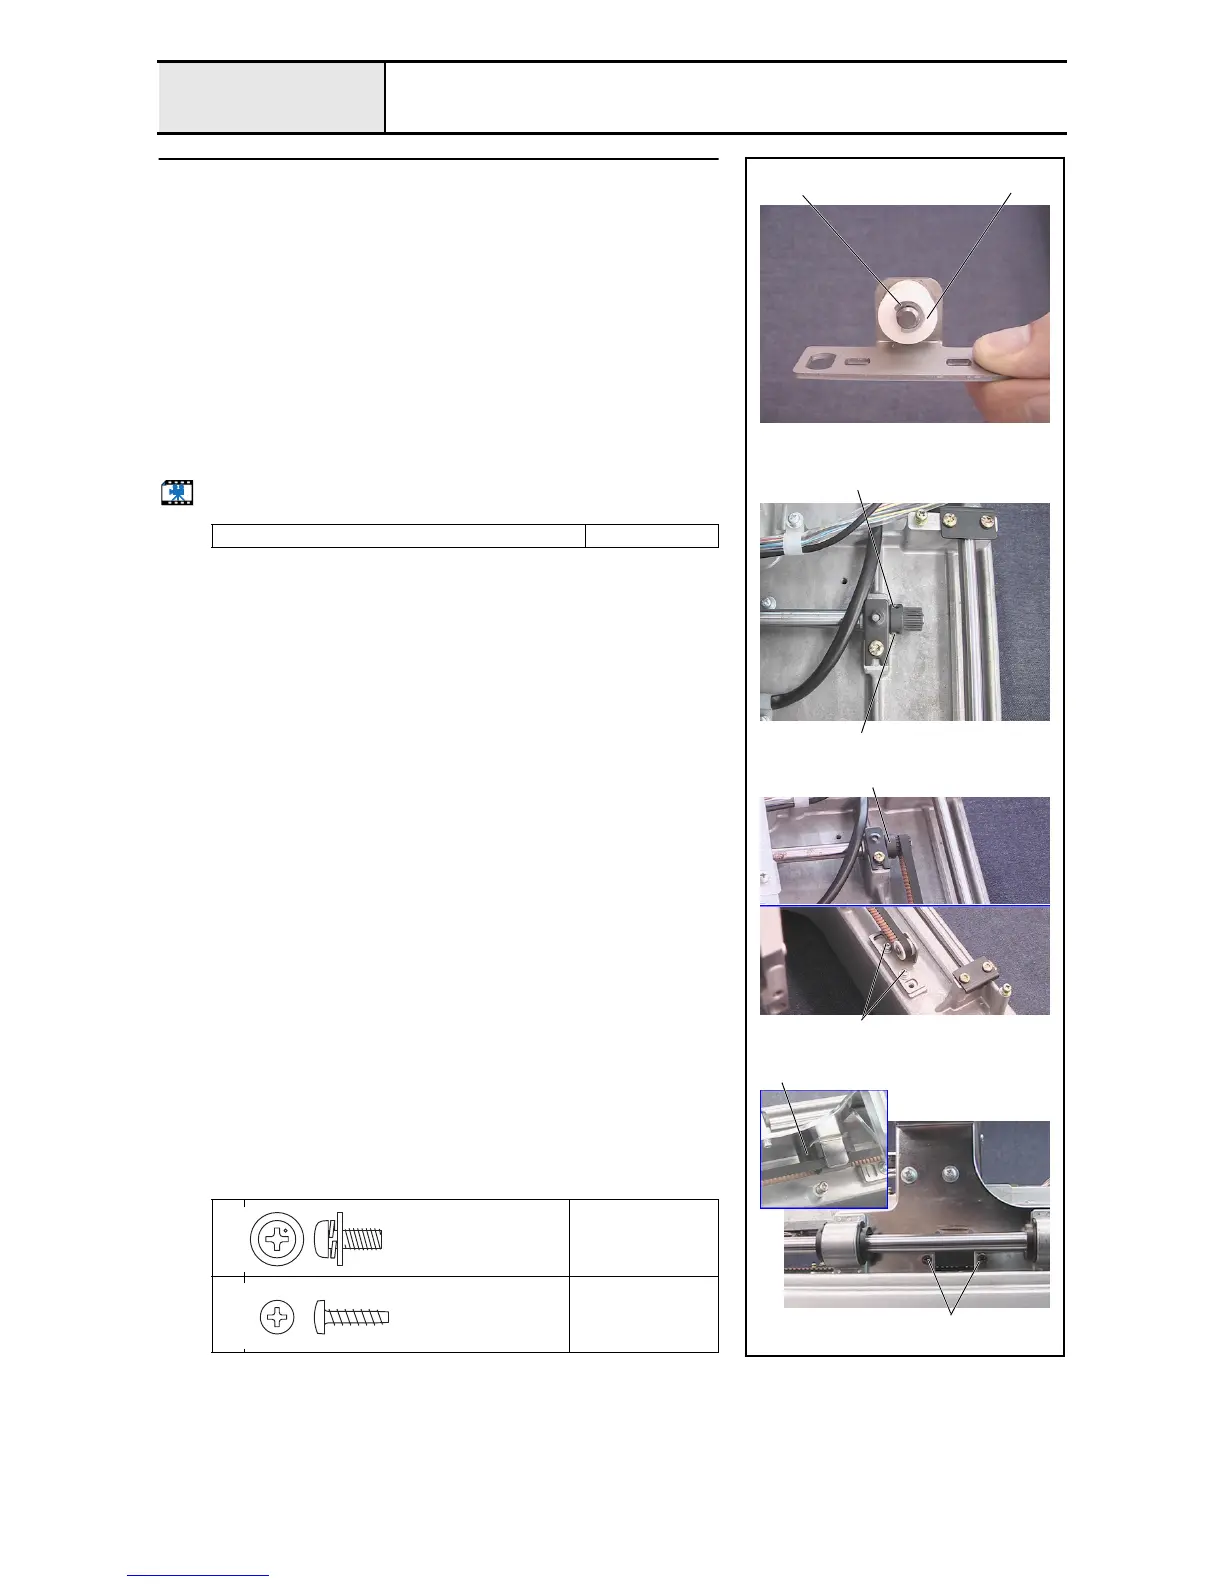
T-belt (Y-guide) attachment
1. Attach the Y tension pulley 1 and the plain washer 7 X 2 to the Y tension
plate assembly, and then attach the 2 sets of retaining rings E4.
2. Loosen the 2 screws 2 securing the Y driving shaft pulley.
3. Hang the T-belt B60S3M579 over the Y tension plate assembly's Y tension
pulley and the Y-guide shaft's pulley 3, and then attach the Y tension plate
assembly to the base frame with the 2 screws 1 (one each on left and
right).
*Key point
• Temporarily tighten the screws 1 first. Firmly tighten them
after completing 4 - 28 "Y-belt tension adjustment."
4. Align the Y-belt presser 4 with the T-belt's highest point, attach the Y-belt
presser to the Y-carriage, and then secure them with the 2 screws 2.
5. Firmly tighten the 2 screws to secure the Y driving shaft pulley.
Start movie clip (CD-ROM version only)
Tightening torque of screw: 0.78 - 1.18
1
Torque
Hand start
2
Torque
0.59 –
0.78 N-m
1
1
2
2
Retaining rings E4
3
2
4
Screw, Pan (S/P washer)
M4X10DB
Color; Silver
Taptite, Bind P
M3X12
Color; Gold

 Loading...


