EasyManuals Logo

Brother PR600 Service Manual

Brother PR600
272 pages
To Next Page IconTo Next Page
To Previous Page IconTo Previous Page
Page #127 background imageLoading...
Page #127 background image
3 - 27
Power unit
Main unit
Assembly
1
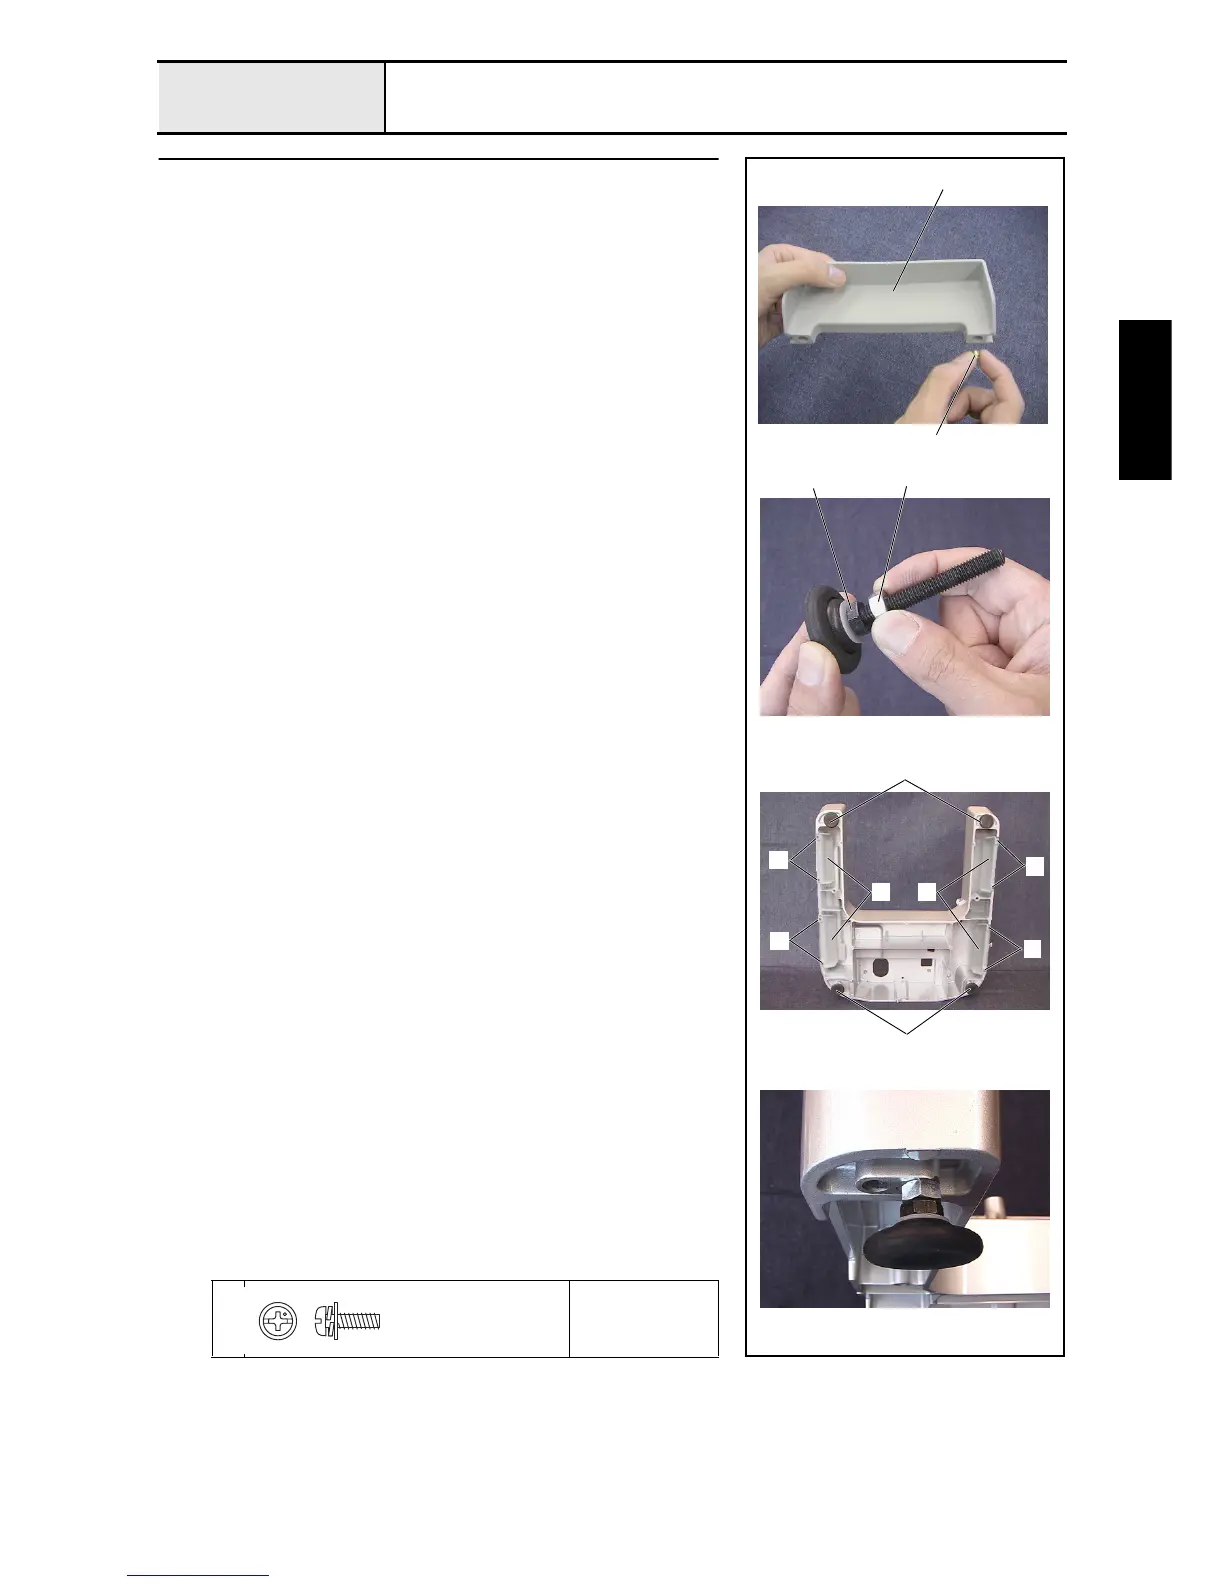
Adjust bolt attachment
1. Attach the 2 bushes 2 to the handle 1. (4 locations)
2. Attach the handle to the base frame with the 2 screws 1. (4 locations)
3. Attach the 4 nuts (2, M8) 4 to the 4 adjust bolts (M8) 3.
*Key point
• Lightly tighten the nut (2, M8) against the head of the adjust
bolt (M8).
4. Attach the 4 adjust bolt assemblies to the base frame.
*Key point
• Lightly tighten the adjust bolt assembly 5 against the base frame.
1
Torque
0.00 –
0.00 N-m
43
2
1
5
5
1
1
1
1
1
1
Screw, Pan (S/P washer)
M3X10
Color; Silver

Table of Contents

Questions and Answers:

Question and Answer IconNeed help?

Do you have a question about the Brother PR600 and is the answer not in the manual?

Brother PR600 Specifications

General IconGeneral
TypeEmbroidery machine
LCD ScreenYes
USB PortYes
Built-in MemoryYes
ConnectivityUSB
Maximum Embroidery Area200mm
Embroidery Area200mm
Needle Count6 needles

Related product manuals