3 - 81
Feed unit
Main unit
Assembly
7
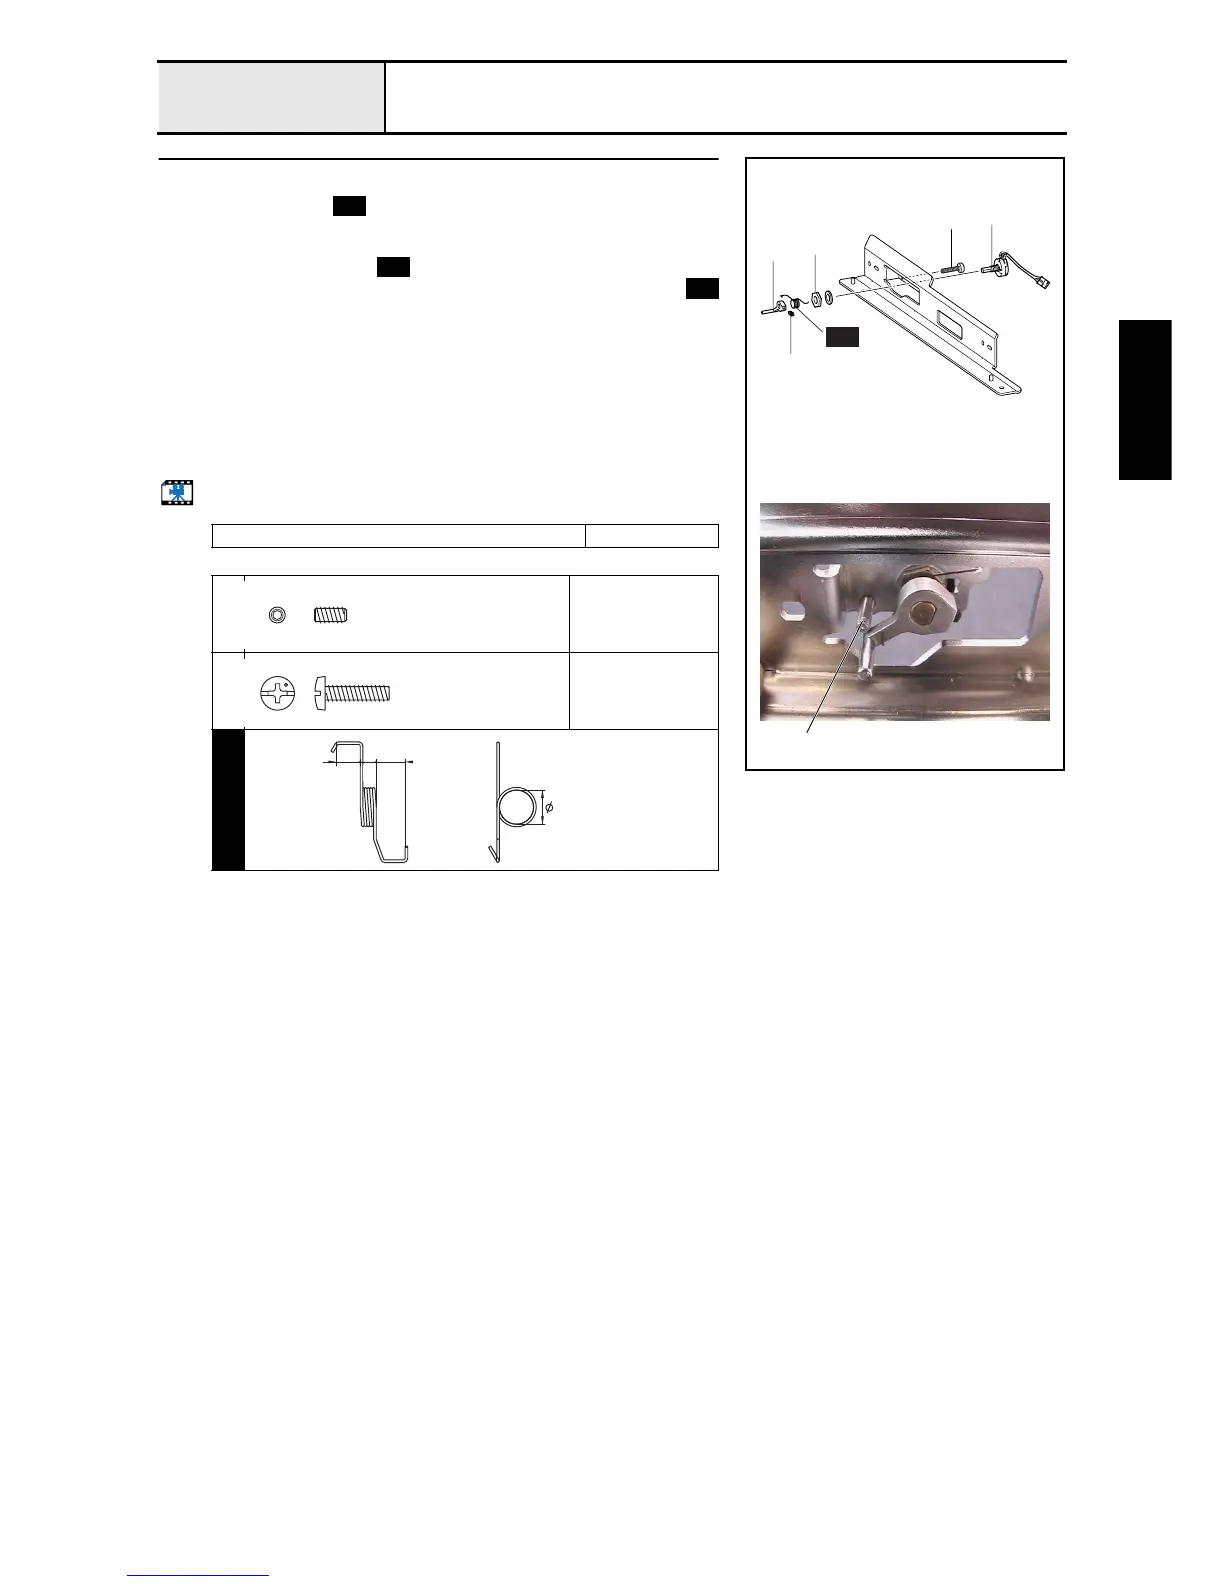
Hoop sensor attachment
1. Attach the spring to the X-carriage A assembly.
2. Attach the hoop sensor assembly 2 to the X-carriage A assembly with the
nut 1 and plain washer (S6), and then thread the hoop sensor assembly's
shaft through the spring .
3. Attach the hoop lever to the hoop sensor shaft, hanging the spring
over the hoop lever 3, and then tighten the screw 1.
4. Tighten the screw 2 from the rear side of the X-carriage A assembly
(hoop sensor assembly side) while pushing down the hoop lever.
*Key point
• Tighten the screw with the hoop lever pushed down so that it
contacts the screw 2 from the beneath after the screw has
been tightened.
• Check operation after attachment.
Start movie clip (CD-ROM version only)
Tightening torque of nut: 1.18 - 1.57
1
Torque
0.59 – 0.78 N-m
2
Torque
0.78 –
1.18 N-m
S44
3
1
1
2
2
S44
2
S44
S44
S44
Set Screw, Socket (FT)
M3X6
Color; Black
Screw, Bind
M3X12
Color; Silver
SPRING
XC5802***
6.4
4.5 5.43

 Loading...


