2 - 79
Operation panel
Main unit
Disassembly
9
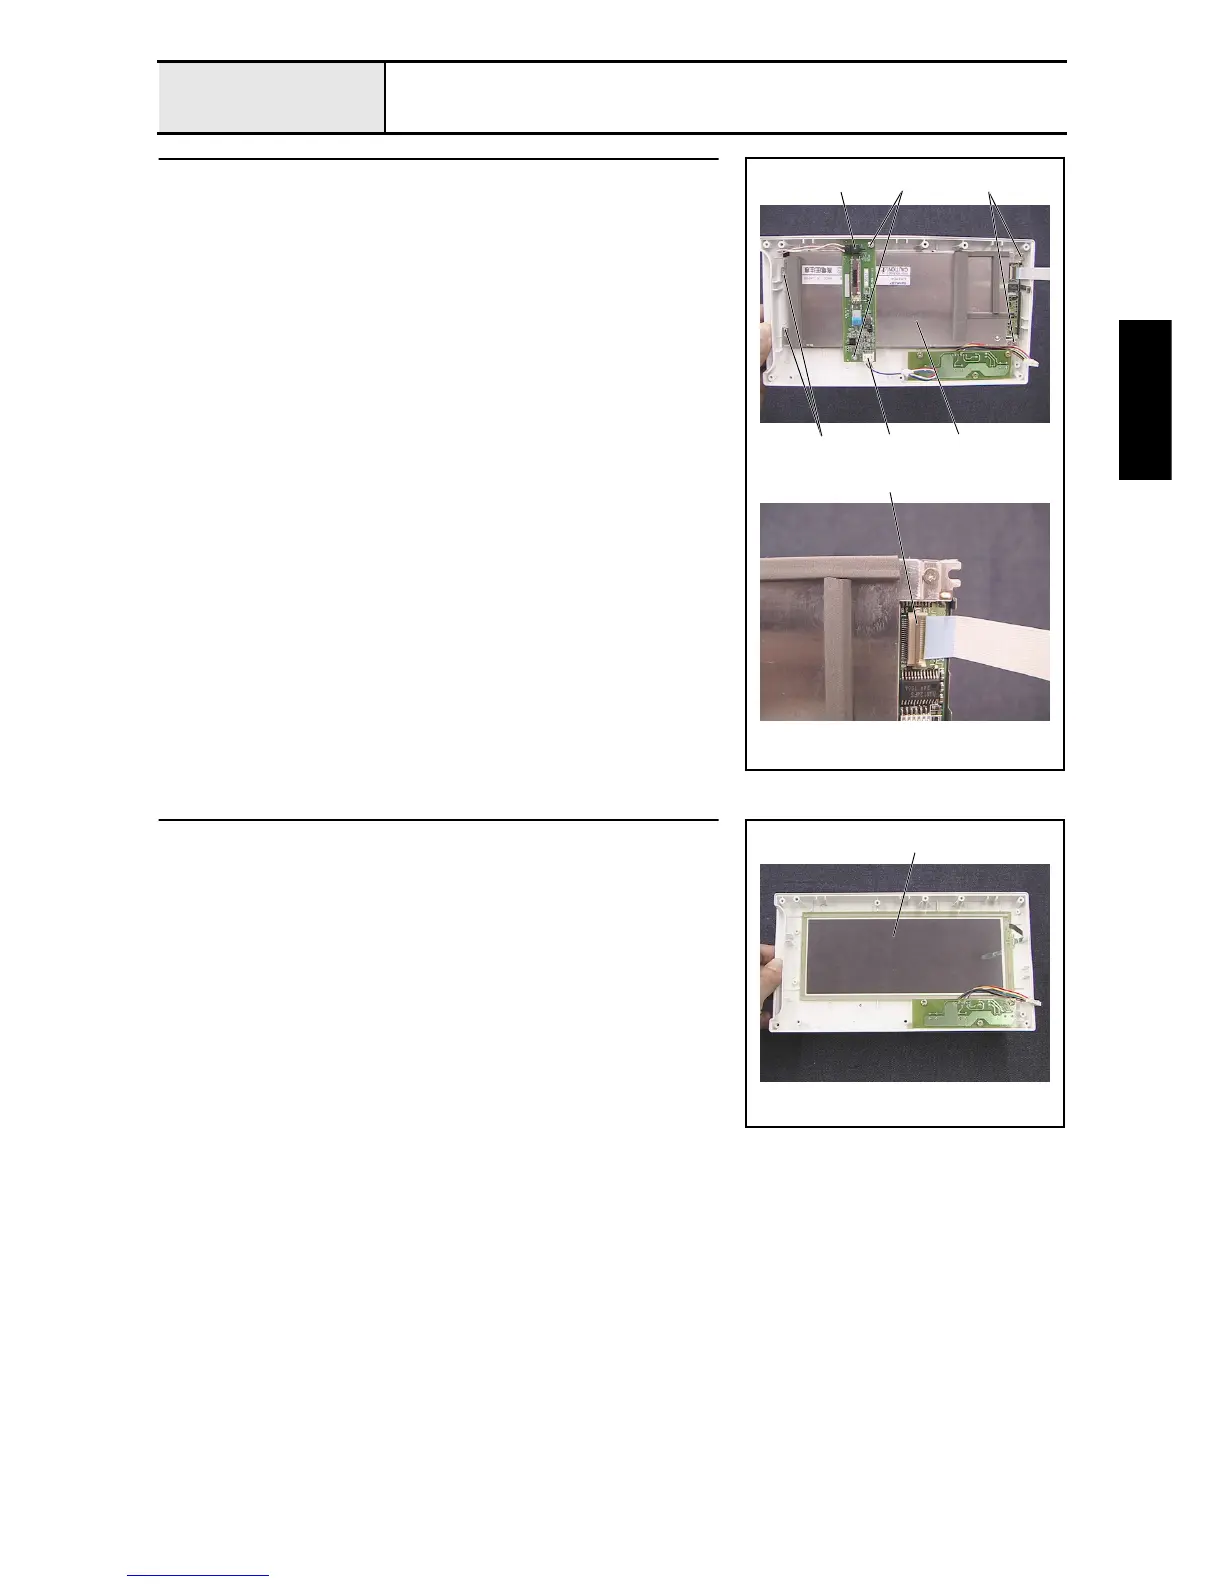
LCD removal
1. Disconnect the inverter lead wire 1 from the inverter (IM4302).
2. Remove the 2 screws 1, and then remove the inverter (IM4302) from the
operation panel A.
3. Remove the lead wire (LCDM8M64) 2 from the inverter (IM4302).
4. Remove the 4 screws 2, and then remove the LCDM (LM8M64) 3.
5. Unlock the LCDM's (LM8M64) connector 4, and disconnect the LCD
cable from the LCDM (LM8M64).
2
2
1
1
2
4
3
10
Touch panel removal
1. Remove the touch panel (EMU601A2B040) 1 from the operation panel A.
1

 Loading...


