2 - 30
Needle bar change unit
Main unit
1
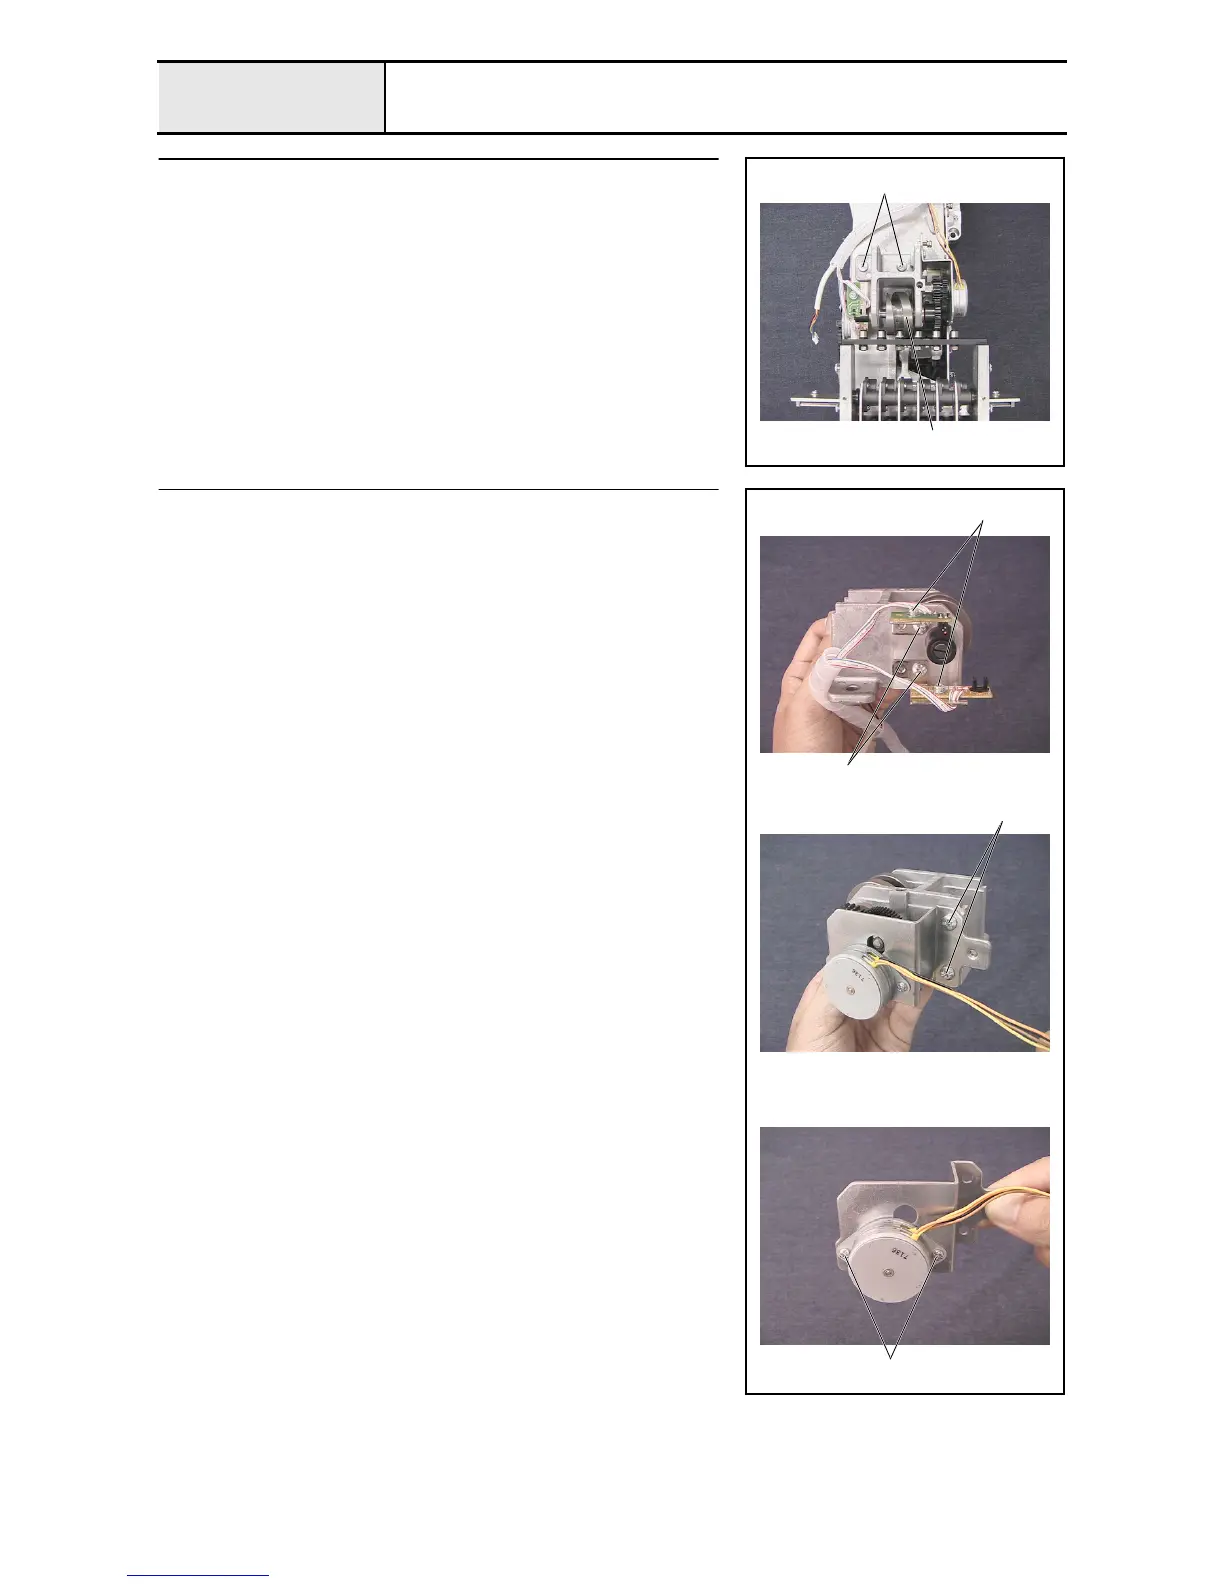
Change box removal
1. Remove the 2 screws 1, and then remove the change box assembly 1.
1
1
2
Change box disassembly (Step 1)
1. Remove the 2 screws 1, and then remove the C sensor bracket assembly
and the C sensor bracket assy lower.
2. Remove the 2 screws 2, and then remove the color change sensor
assembly and the index sensor assembly from the C sensor bracket
assembly and the C sensor bracket assy lower.
3. Remove the 2 screws 3, and then remove the change motor base
assembly.
4. Remove the 2 screws 4, and then remove the index sensor assembly from
the change motor base.
1
2
3
4

 Loading...


