3 - 62
Main unit
Thread wiper unit
1
Wiper set assembly
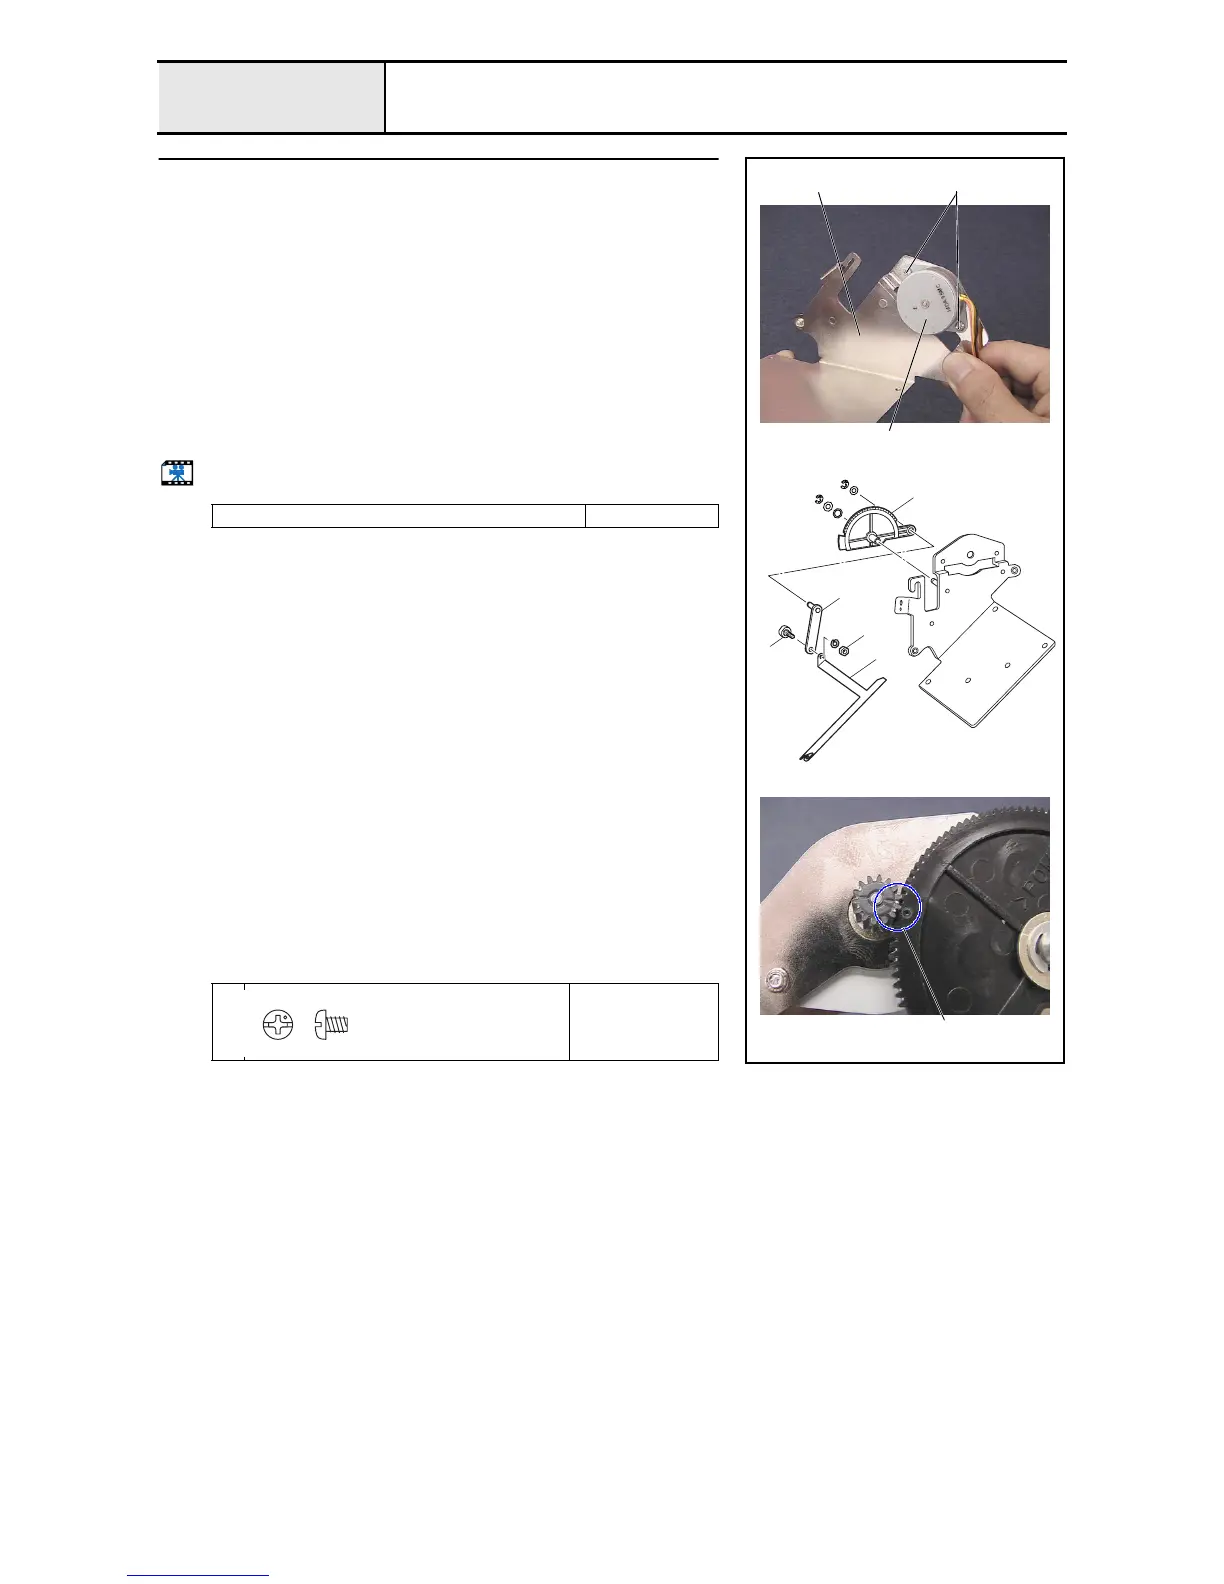
1. Attach the wiper motor assembly 2 to the wiper base assembly 1 with
the 2 screws 1.
2. Attach the wiper link assembly 4 and the plain washer (M5) to the wiper
lever 3, and then attach the retaining ring E4.
3. Attach the wiper lever assembly, washer, and plain washer (M6) to the
wiper base assembly's shaft, and then attach the retaining ring E4.
*Key point
• Align the mark 5 on the wiper lever assembly's gear with the
mark on the wiper lever assembly.
4. Attach the wiper hook 8 to the wiper link with the wiper shoulder screw
6, spring washer (2-4), and the nut (3, M4) 7.
5. Paint the wiper motor assembly's connector blue.
Start movie clip (CD-ROM version only)
Tightening torque of nut (3, M4): 1.18 - 1.57
1
Torque
0.78 –
1.18 N-m
3
4
7
8
6
5
11
2
Screw, Pan
M3X4
Color; Silver

 Loading...


