4 - 6
Test mode Main board test mode
Test Mode Operation Manual
NOTE •Note: After replacing the main board, you must set the picker motor over-pulses (See 8. in this manual) and
adjust the frame sensor (See 11. in this manual).
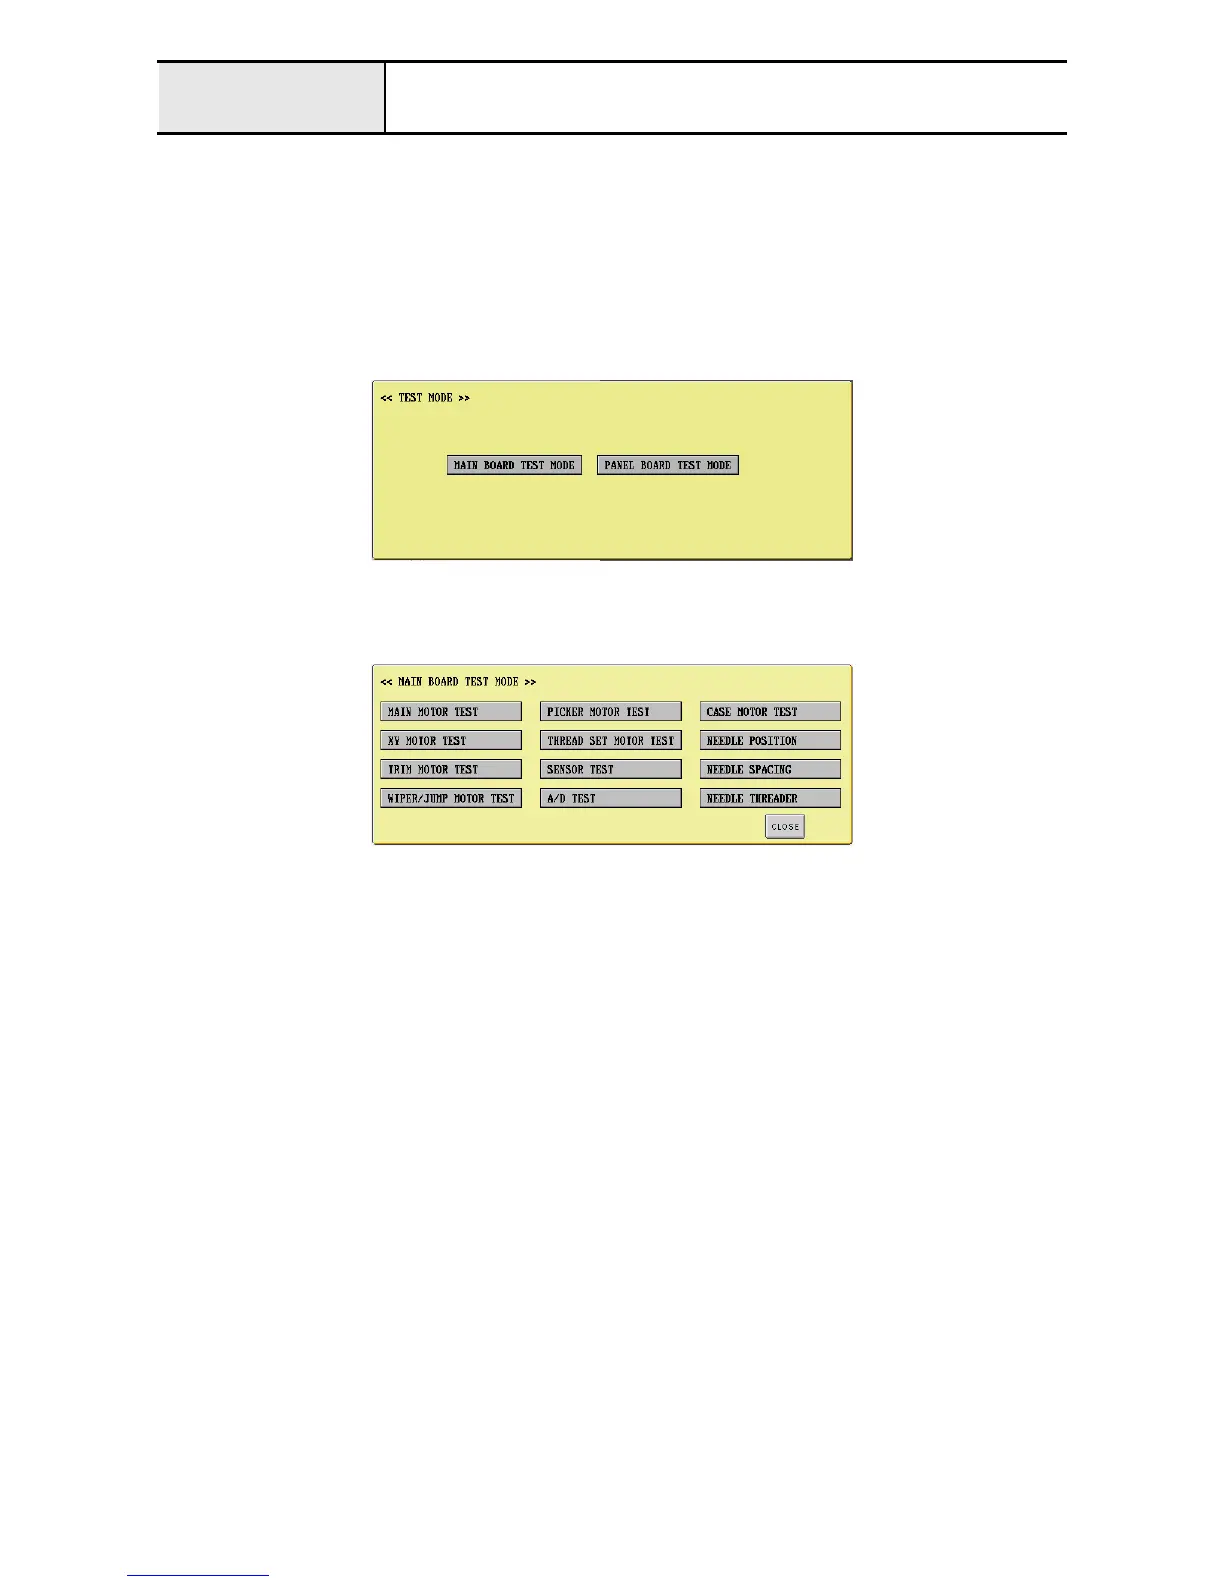
1. Hold down the three mechanical switches on the operation panel ([START/STOP], [THREAD CUT], [THREAD
GUIDE]) and turn the [POWER] switch on. The sewing machine starts in test mode and the screen shown below
appears.
2. Select [MAIN BOARD TEST MODE] to open the main board's test mode selection screen, or select [PANEL
BOARD TEST MODE] to open the panel board's test mode selection screen.
3. When [MAIN BOARD TEST MODE] is selected on the above screen, the screen shown below appears.
[MAIN MOTOR TEST] : Opens the main shaft motor test mode screen.
[XY MOTOR TEST] : Opens the X/Y carriage motor test mode screen.
[TRIM MOTOR TEST] : Opens the trim (thread cut) motor test mode screen.
[WIPER/JUMP MOTOR TEST] : Opens the wiper and jump bracket motor test mode screen.
[PICKER MOTOR TEST] : Opens the picker motor test mode screen.
[THREAD SET MOTOR TEST] : Opens the thread motor test mode screen.
[SENSOR TEST] : Opens the sensor test mode screen.
[A/D TEST] : Opens the A/D conversion value test mode screen.
[CASE MOTOR TEST] : Opens the needle bar case motor test mode screen.
[NEEDLE POSITION] : Opens the needle position adjustment screen.
[NEEDLE SPACING] : Opens the needle and rotary hook timing adjustment and needle
space adjustment screen.
[NEEDLE THREADER] : Opens the needle threader adjustment screen.
[CLOSE] : Closes the <MAIN BOARD TEST MODE> screen.

 Loading...


