● If you press <Common Settings> set <Delete Failed TX Jobs> to <Off>, the documents with
forwarding errors will be saved on the <Status Monitor/Cancel> screen, and the documents will not be
processed according to the settings you specied here.
<Forwarding Settings>
<Function Settings> <Receive/Forward> <Common Settings>
You can specify the conditions for forwarding received documents. You can also set to forward all incoming
documents to a specied destination without specifying any conditions.
Conguring Forwarding Settings
1
Press .
2
Press <Function Settings> <Receive/Forward> <Common Settings>.
3
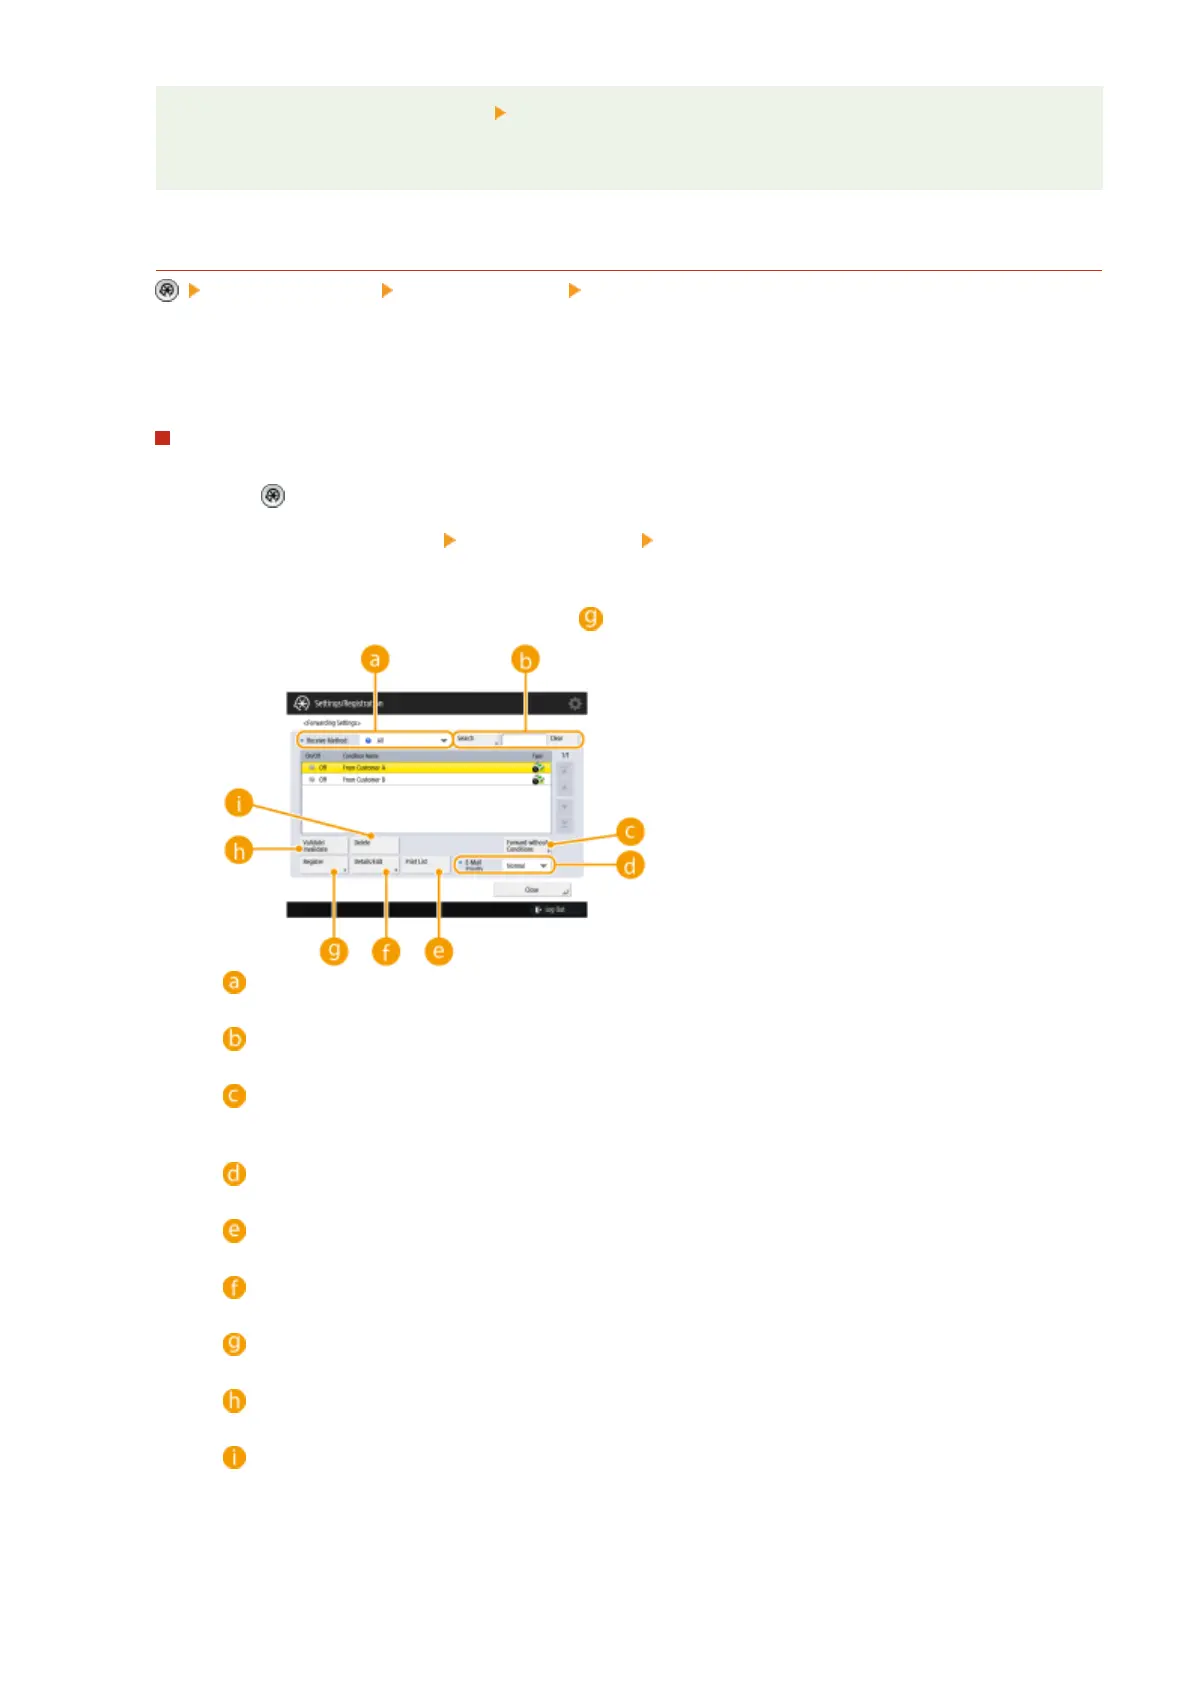
Press <Forwarding Settings>, and specify the required settings.
● To register forwarding settings, press <Change> and proceed to step 4.
<Receive Method:> drop-down list
Select the reception method for the forwarding settings to display in the list.
<Search>
You can search for forwarding settings using a keyword. To reset the results, press <Clear>.
<Forward without Conditions>
You can specify the forwarding destination when forwarding settings are not registered or none of the
set forwarding conditions are met.
<E-Mail Priority>
If the forwarding destination is an e-mail address, you can set the e-mail priority for the e-mail.
<Print List>
You can print the forwarding settings.
<Details/Edit>
You can display the details of the forwarding settings. You can also edit the settings.
<Register>
You can register forwarding settings.
<Validate/Invalidate>
You can enable/disable registered forwarding settings.
<Delete>
You can delete the registered forwarding settings.
4
Congure the forwarding conditions.
Settings/Registration
790
 Loading...