GE MEDICAL SYSTEMS PROPRIETARY TO GE
D
IRECTION 2294854-100, REVISION 3 LOGIQ™ 9 PROPRIETARY MANUAL
6-14 Section 6-7 - Brake Adjustment
Section 6-7
Brake Adjustment
6-7-1 Front Wheel Brakes
Service adjustment to the front brakes involve setting the brake so it will properly “bite” the rear tire. The
default setting should provide proper braking. If not, follow the procedures below.
6-7-1-1 Tools
Allen Wrenches
6-7-1-2 Manpower
One person, 1 hour + travel
6-7-1-3 Preparations
1.) Set the rear brakes to prevent the scanner from rolling.
2.) Remove the front bumper Section 8-2-7 “Front Bumper Replacement Procedure” on page 8-11.
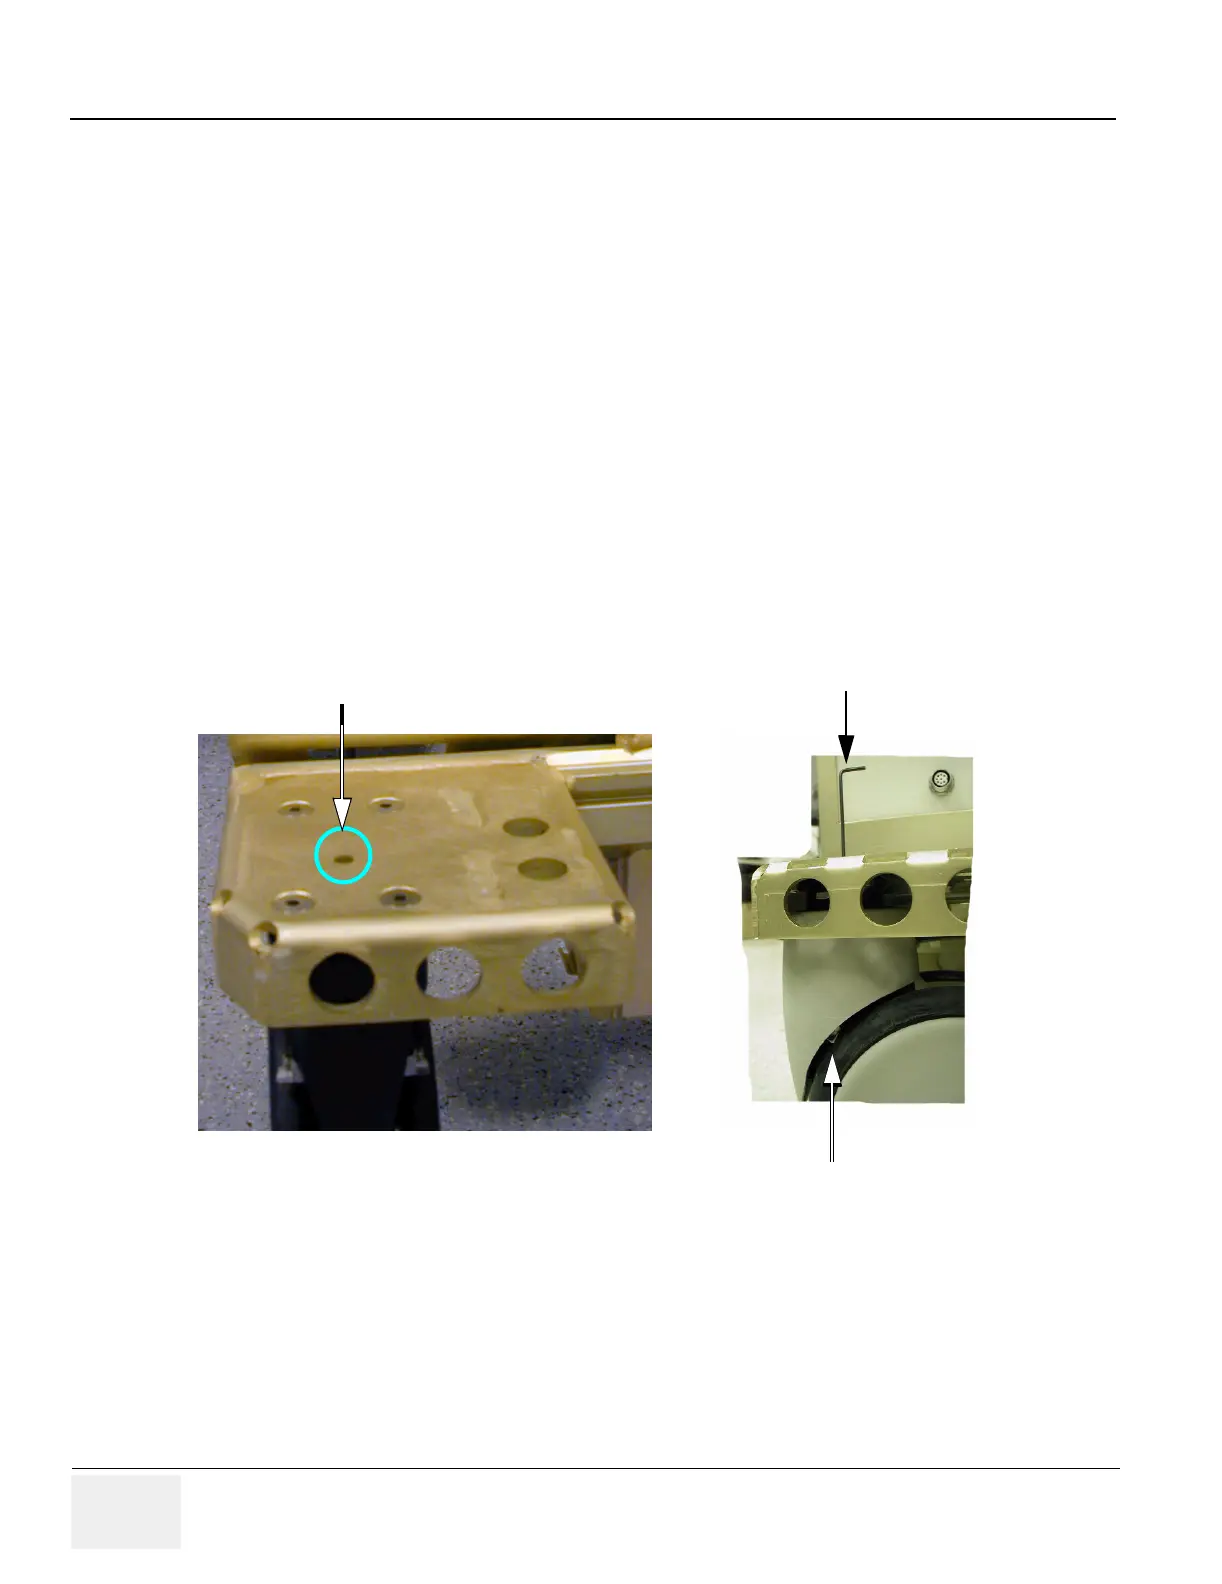
6-7-1-4 Front Brake Adjustment Procedure
1.) Refer to Figure 6-11. Use the Allen wrench to add more pressure in order to get more braking action.
2.) If the brakes are too tight, loosen the adjustment with the Allen wrench.
3.) Check the brakes and readjust as necessary before replacing the front bumper.
Figure 6-11 Front Brake Adjustment
Adjustment Hole
Allen Wrench to Adjust Brake
Wheel Brake
 Loading...


