GE MEDICAL SYSTEMS PROPRIETARY TO GE
D
IRECTION 2294854-100, REVISION 3 LOGIQ™ 9 PROPRIETARY MANUAL
Chapter 8 Replacement Procedures 8-129
8-33-4 Removal Procedure
1.) From Back End Processor (BEP) side (left side of the system), unscrew two (2) screws. These
fasten the upper edge of the Internal I/O Assembly to the chassis.
2.) From External I/O side (right side), unscrew one (1) screw. This screw fasten the lower edge of
Internal I/O to the chassis.
3.) Pull the Internal I/O Assembly backwards, free from its socket in the Card Rack sidewall, and out
of the system.
8-33-5 Installation Procedure
1.) Align Internal I/O in position and push it into its card rack socket.
2.) Fasten two (2) screws on BEP side and one (1) screw on External Power side.
3.) Connect the cables to both sides of the Internal I/O.
4.) Fasten the two fastening screws.
5.) Mount the External I/O as described on Section Section 8-32 on page 8-126.
6.) Mount the Rear Cover as described on Section 8-2-6 on page 8-10 and Section 8-2-3 on page 8-7.
7.) Mount the two Side Covers as described Section 8-2-2 on page 8-5.
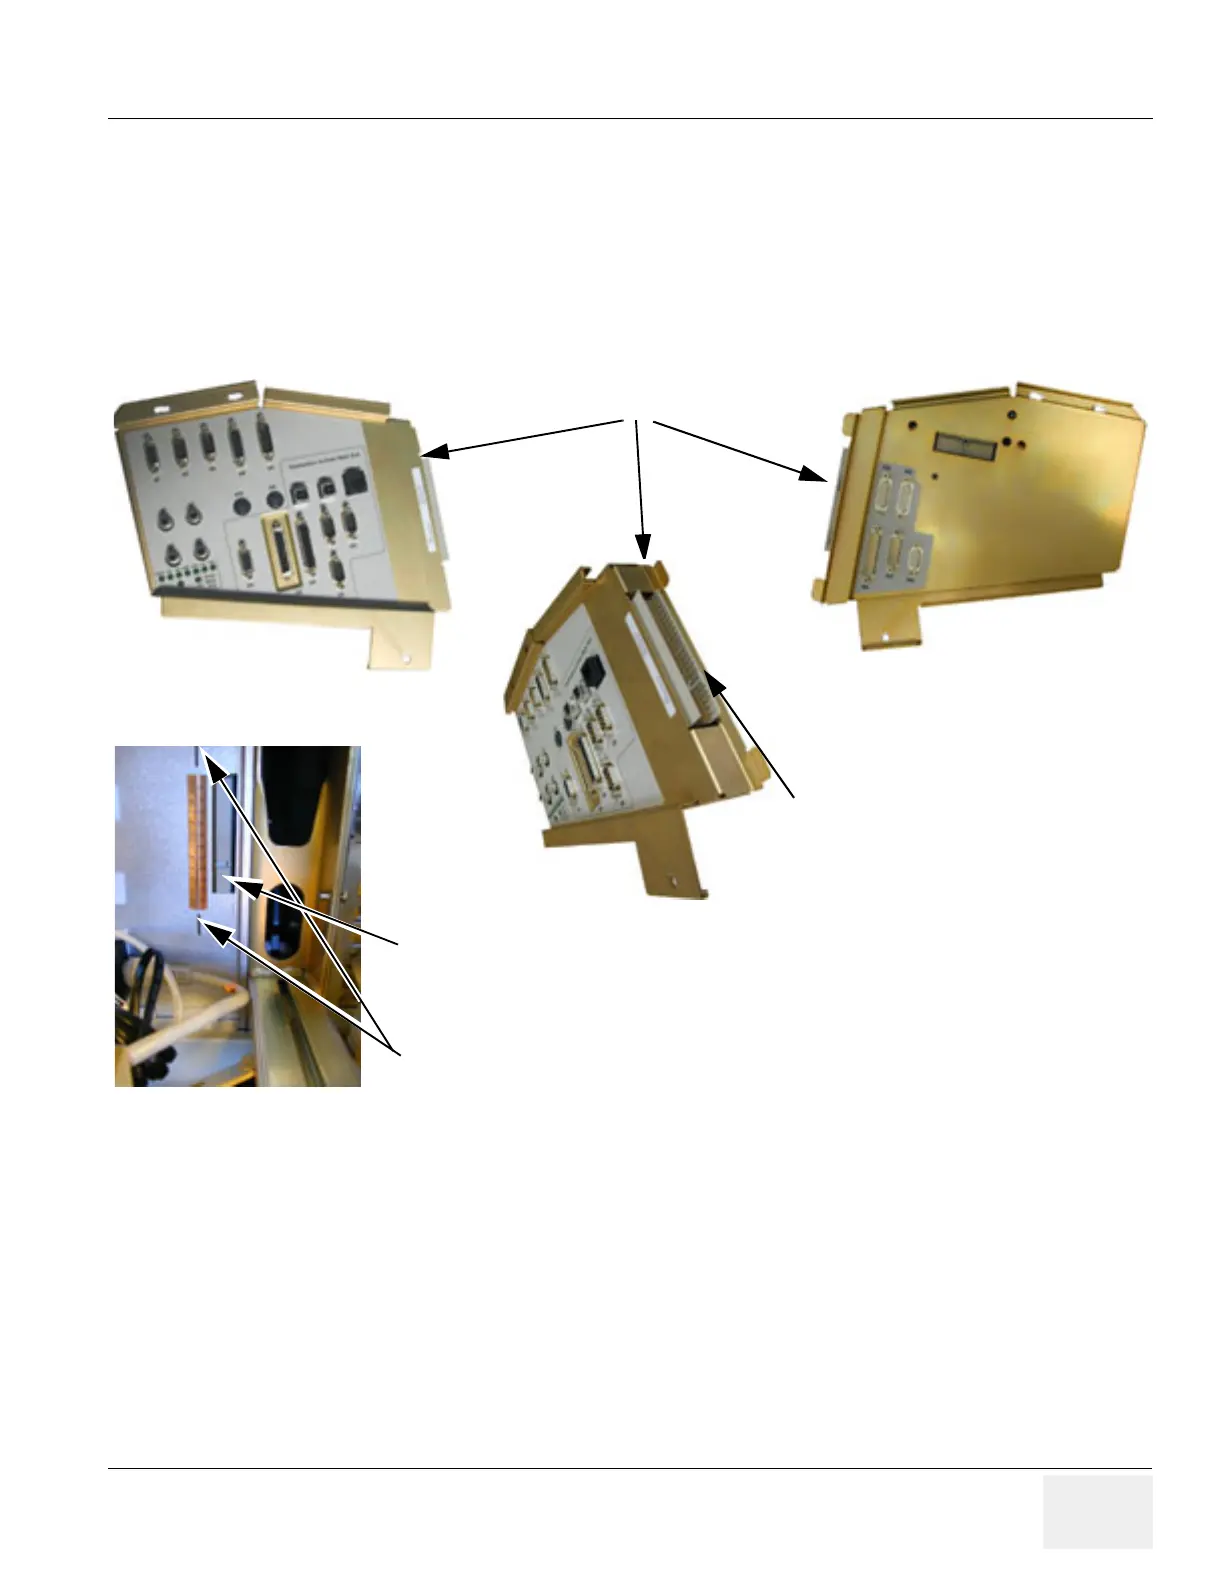
Figure 8-140 Internal I/O
Front end
External I/O side
Connector to Card Rack socket
BEP side
Card Rack socket
Hitch up in Card Rack
 Loading...


