GE MEDICAL SYSTEMS PROPRIETARY TO GE
D
IRECTION 2294854-100, REVISION 3 LOGIQ™ 9 PROPRIETARY MANUAL
8-34 Section 8-6 - BEP CD-RW Drive Replacement Procedure (BEP 2.x and above only)
Section 8-6
BEP CD-RW Drive Replacement Procedure (BEP 2.x and above only)
8-6-1 Manpower
One person, 1 hour + travel
8-6-2 Tools
Phillips screwdriver
8-6-3 Preparations (click here to view the cover removal video)
1.) Power Down/Shutdown the system as described in Section 4-3-2 on page 4-3.
2.) Remove the left- and/or right-side covers as shown in Section 8-2-2 on page 8-5.
3.) Remove the front cover as shown in Section 8-2-5 on page 8-9.
8-6-4 CD-RW Drive Removal Procedure
NOTE: Mounting hardware may vary in size from M3 to 4-40 threads. Hardware length may seem the
same but in fact may be different and very critical. ALWAYS keep track of EXACTLY where
each screw was removed so that it is returned to the same place on re-assembly.
1.) Remove the side cover from the BEP. Carefully disconnect the cover fan power cable and set the
cover aside.
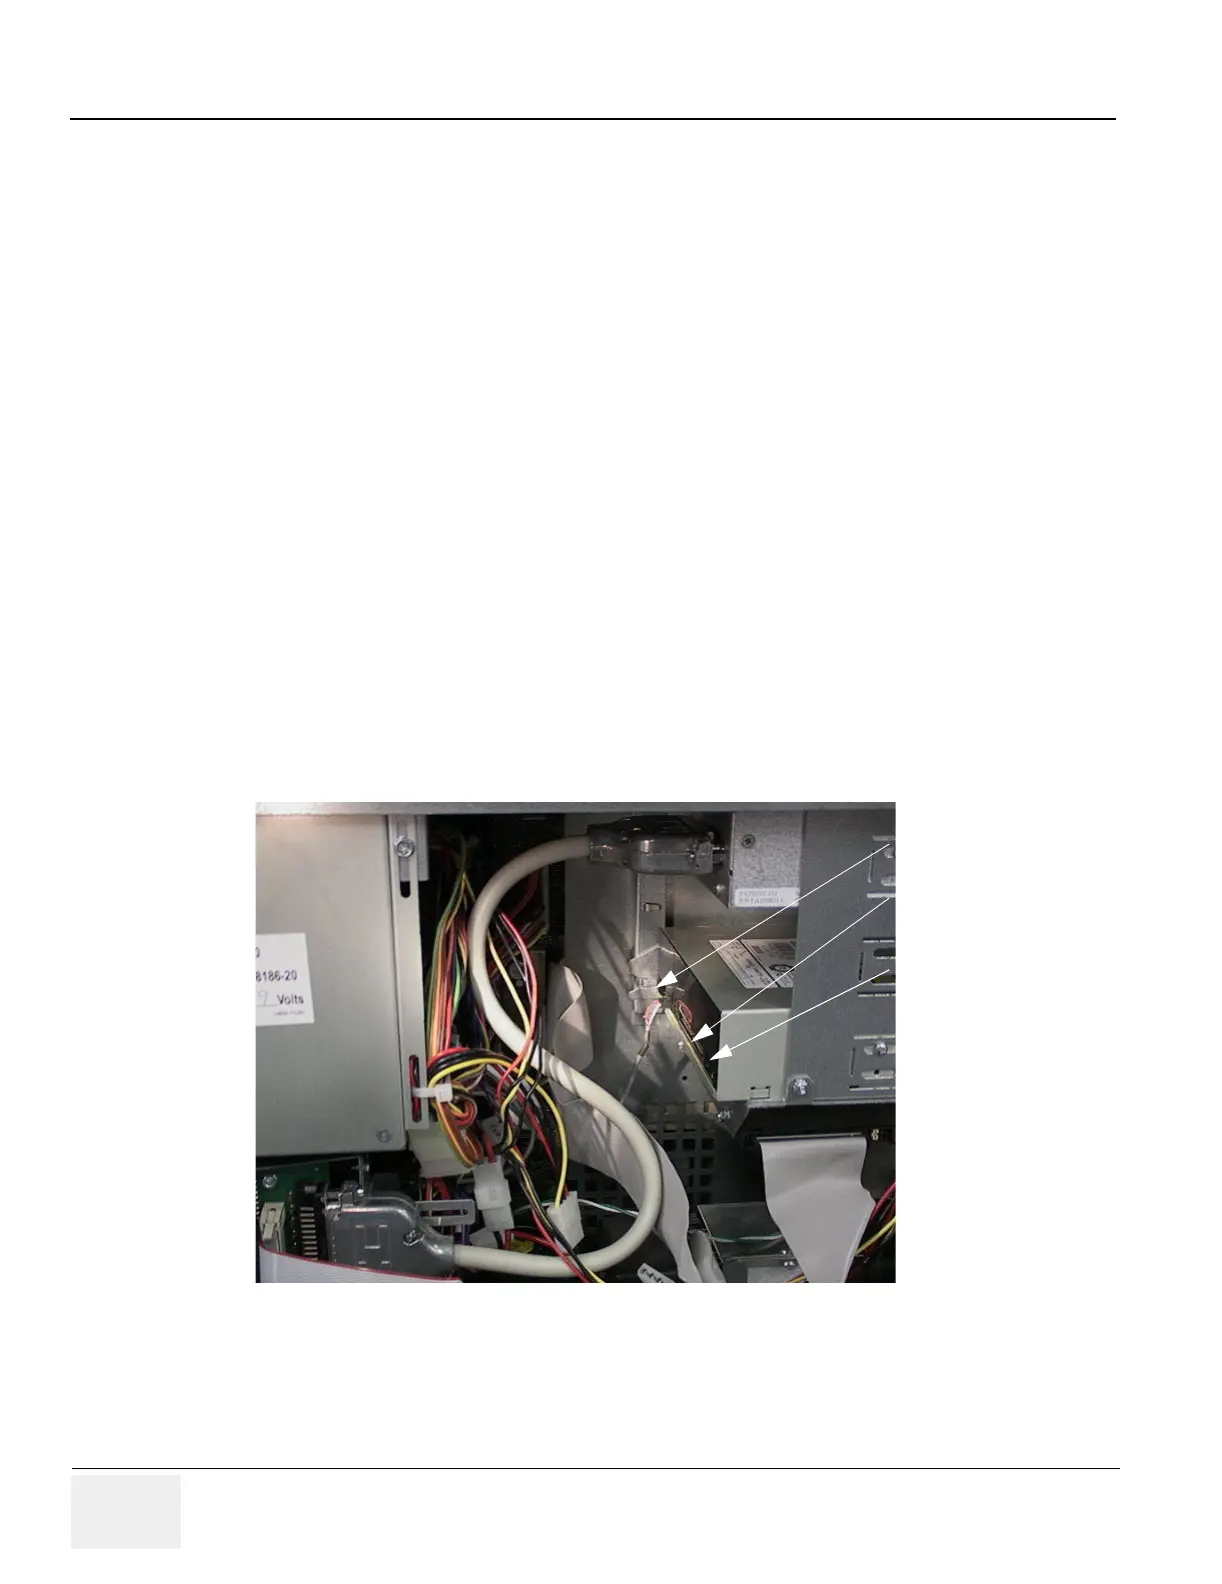
2.) Disconnect the Power, IDE and Audio cables from the back of the CD-RW drive.
3.) Remove the one screw attaching the side of the CD-RW Drive as shown in Figure 8-
34 on page 8-35 .
Figure 8-33 BEP CD-RW Connections
Audio Connection
IDE Connection -
Large Ribbon Cable
Power Connection
 Loading...


