GE MEDICAL SYSTEMS PROPRIETARY TO GE
D
IRECTION 2294854-100, REVISION 3 LOGIQ™ 9 PROPRIETARY MANUAL
Chapter 6 Service Adjustments 6-15
6-7-2 Rear Wheel Brakes Adjustment
Service adjustment to the rear brakes involves setting the brake so it will properly “bite” the rear tire.
The default setting should provide proper braking. If not, follow the procedures below to remove the rear
wheel and adjust the brake.
6-7-2-1 Tools
Bottle Jack
Allen Wrenches
6-7-2-2 Manpower
One person, 1 hour + travel
6-7-2-3 Preparations (click here to view the cover removal video)
1.) Remove the left- and right-side covers.
2.) Remove the upper rear cover.
3.) Remove the lower rear cover.
Select the movie camera icon to view the video of the rear brake
adjustment procedure.
2 minutes and 57 seconds
WARNINGWARNING
Prior to elevating scanner, verify that the floating keyboard is locked in its lowest
position. Verify that the front brake is locked and the scanner is unable to swivel. Verify
that the rear brakes are in the locked position.
WARNINGWARNING
Use extreme caution when elevating scanner. Elevating scanner will make it unstable
which could cause the scanner to tip over.
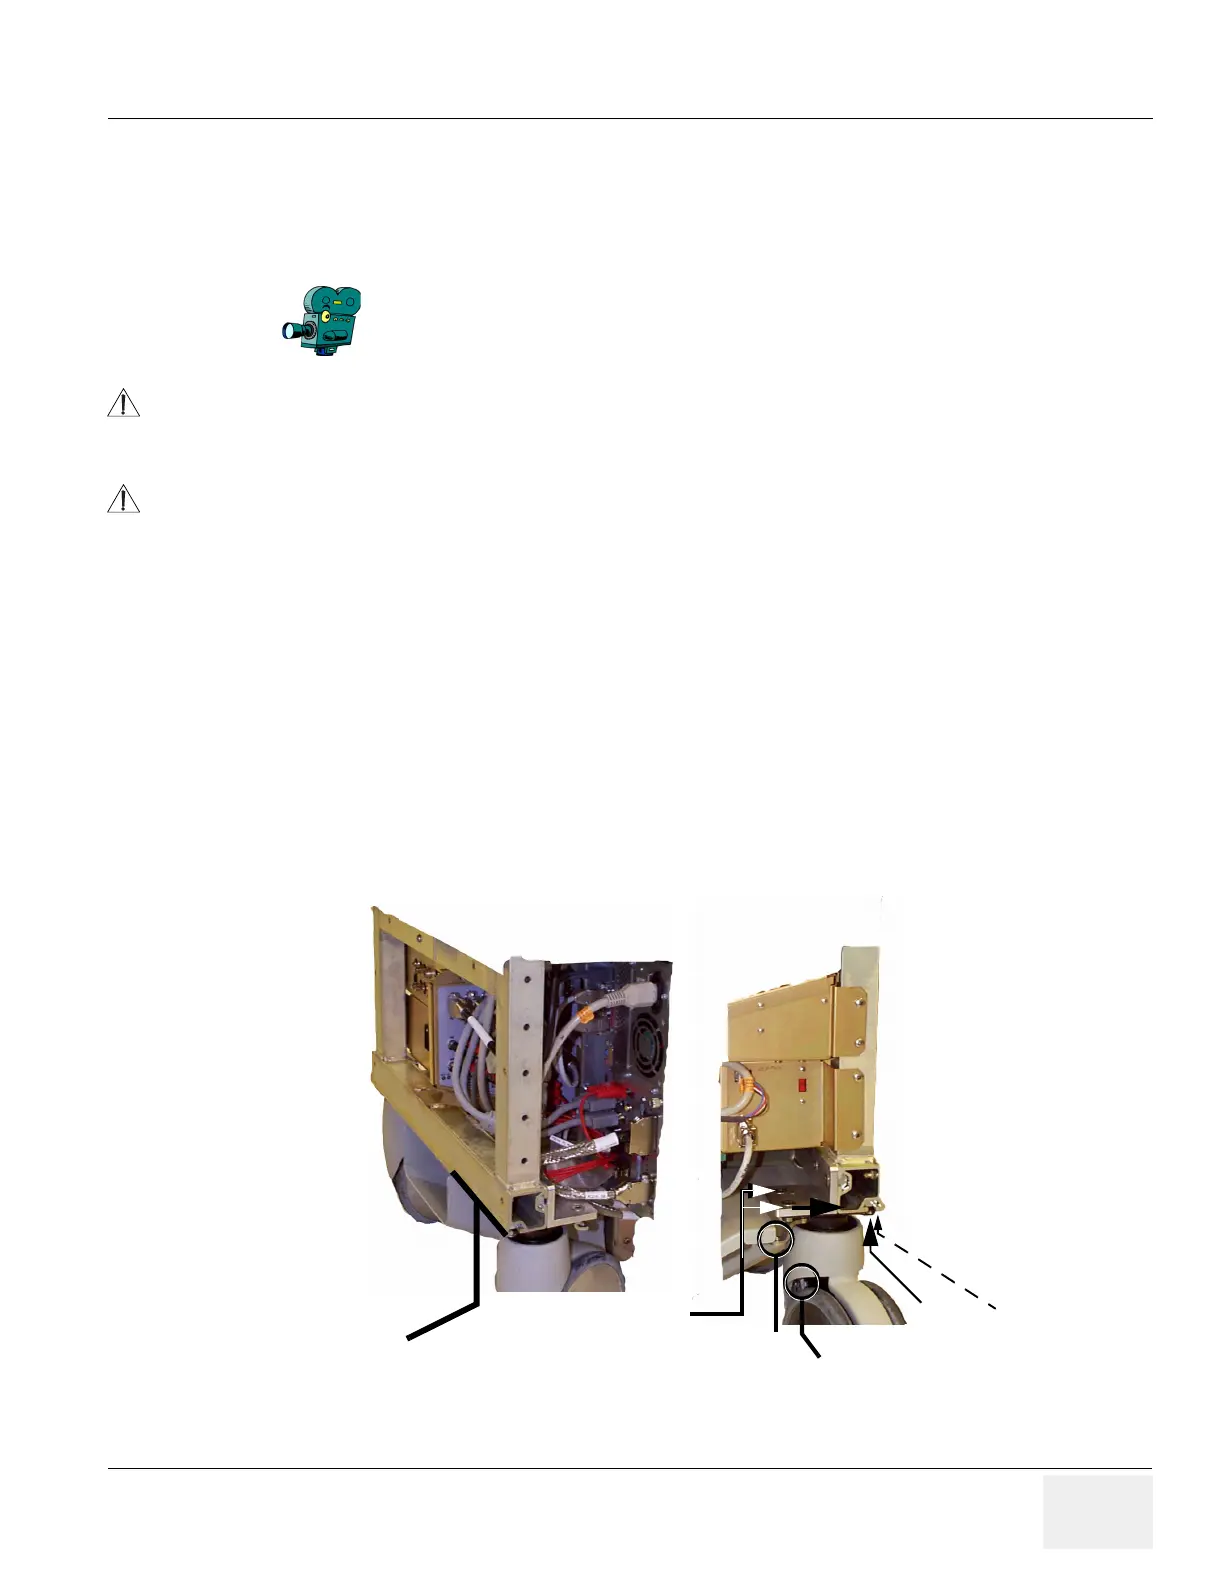
Figure 6-12 Rear Brake Adjustment
2 screws removed
2 screws removed
from underside
from top
Brake
Rear Brake
Set / Release
Handle
Area on either side
of bottom shield used
to elevate scanner and
remove rear wheel.
 Loading...


