Error Troubleshooting
Phaser 7100 Service Manual Xerox Internal Use Only2-14
Service Diagnostics
The Phaser 7100 printer has built-in diagnostics to test electromechanical components, display status,
and provide some NVRAM access. Use these tests to diagnose problems and isolate which component
or sub assembly part needs replacement.
If confronted with an error that requires more than a cursory investigation to clear or when directed by
a troubleshooting procedure, use Service Diagnostics to exercise selected sub-assemblies of parts in the
vicinity of the reported error. Diagnostic tests are controlled from the Control Panel and are described
in this chapter.
Entering Service Diagnostics
1. Press and hold Right Arrow.
2. Press and hold Left Arrow.
3. Release both buttons.
4. Press Online within 3 seconds. The Diagnostics Preventive Diag screen appears.
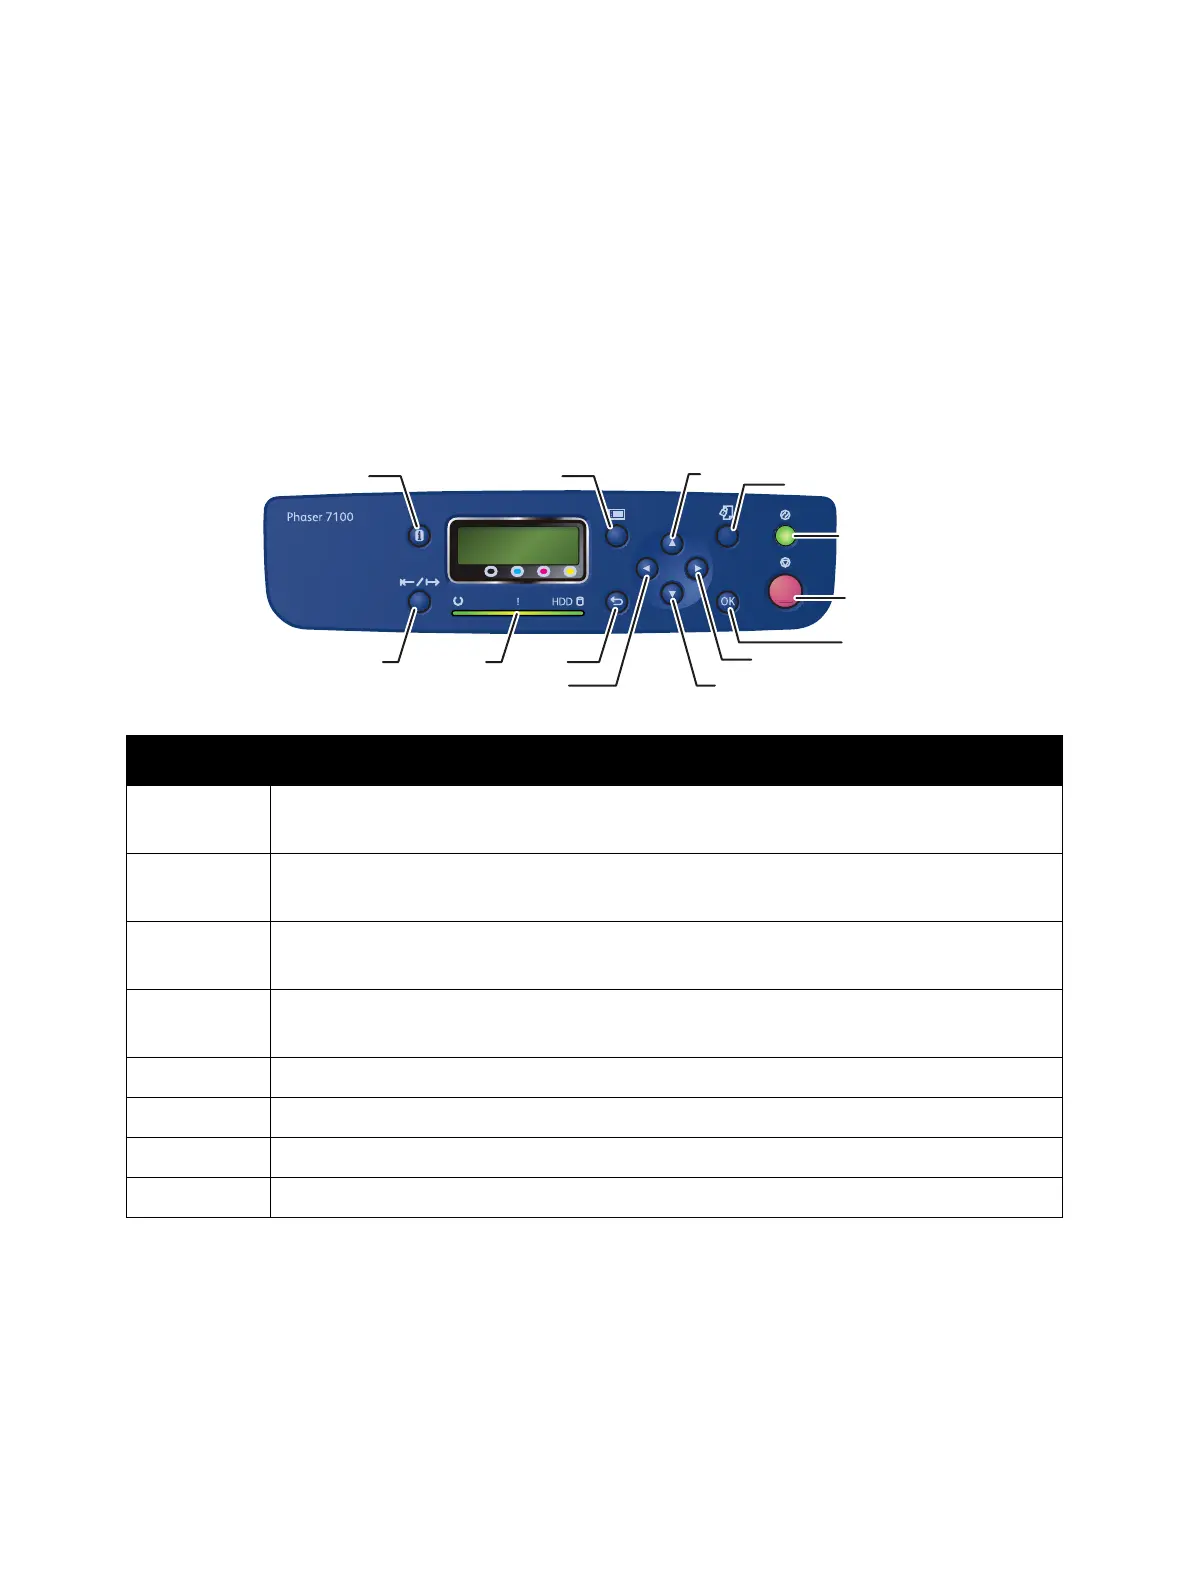
Button Function
Up Arrow Moves or selects an item at the same level.
Use to select numbers and input values (to decrease or increase the value at the cursor).
Down Arrow Moves or selects an item at the same level.
Use to select numbers and input values (to decrease or increase the value at the cursor).
Left Arrow Returns to the previous level.
Moves the cursor to the left when entering a multiple digit number.
Right Arrow Moves to the next level of the selection.
Moves the cursor to the right when entering a multiple digit number.
Menu Returns to the highest level of Service Diagnostics menu of the selected item.
OK Confirms settings or runs the selected test.
Online Use together with the Left or Right button to enter or exit Diagnostics.
Cancel Resets a diagnostic item, cancel, or exit the menu.
Down Arrow
Up Arrow
Left Arrow
Back
Menu
Right Arrow
OK
Print Menu
Online Indicators
Information
Power Saver
Cancel
s7100-465
 Loading...


