Service Parts Disassembly
Phaser 7100 Service Manual Xerox Internal Use Only4-120
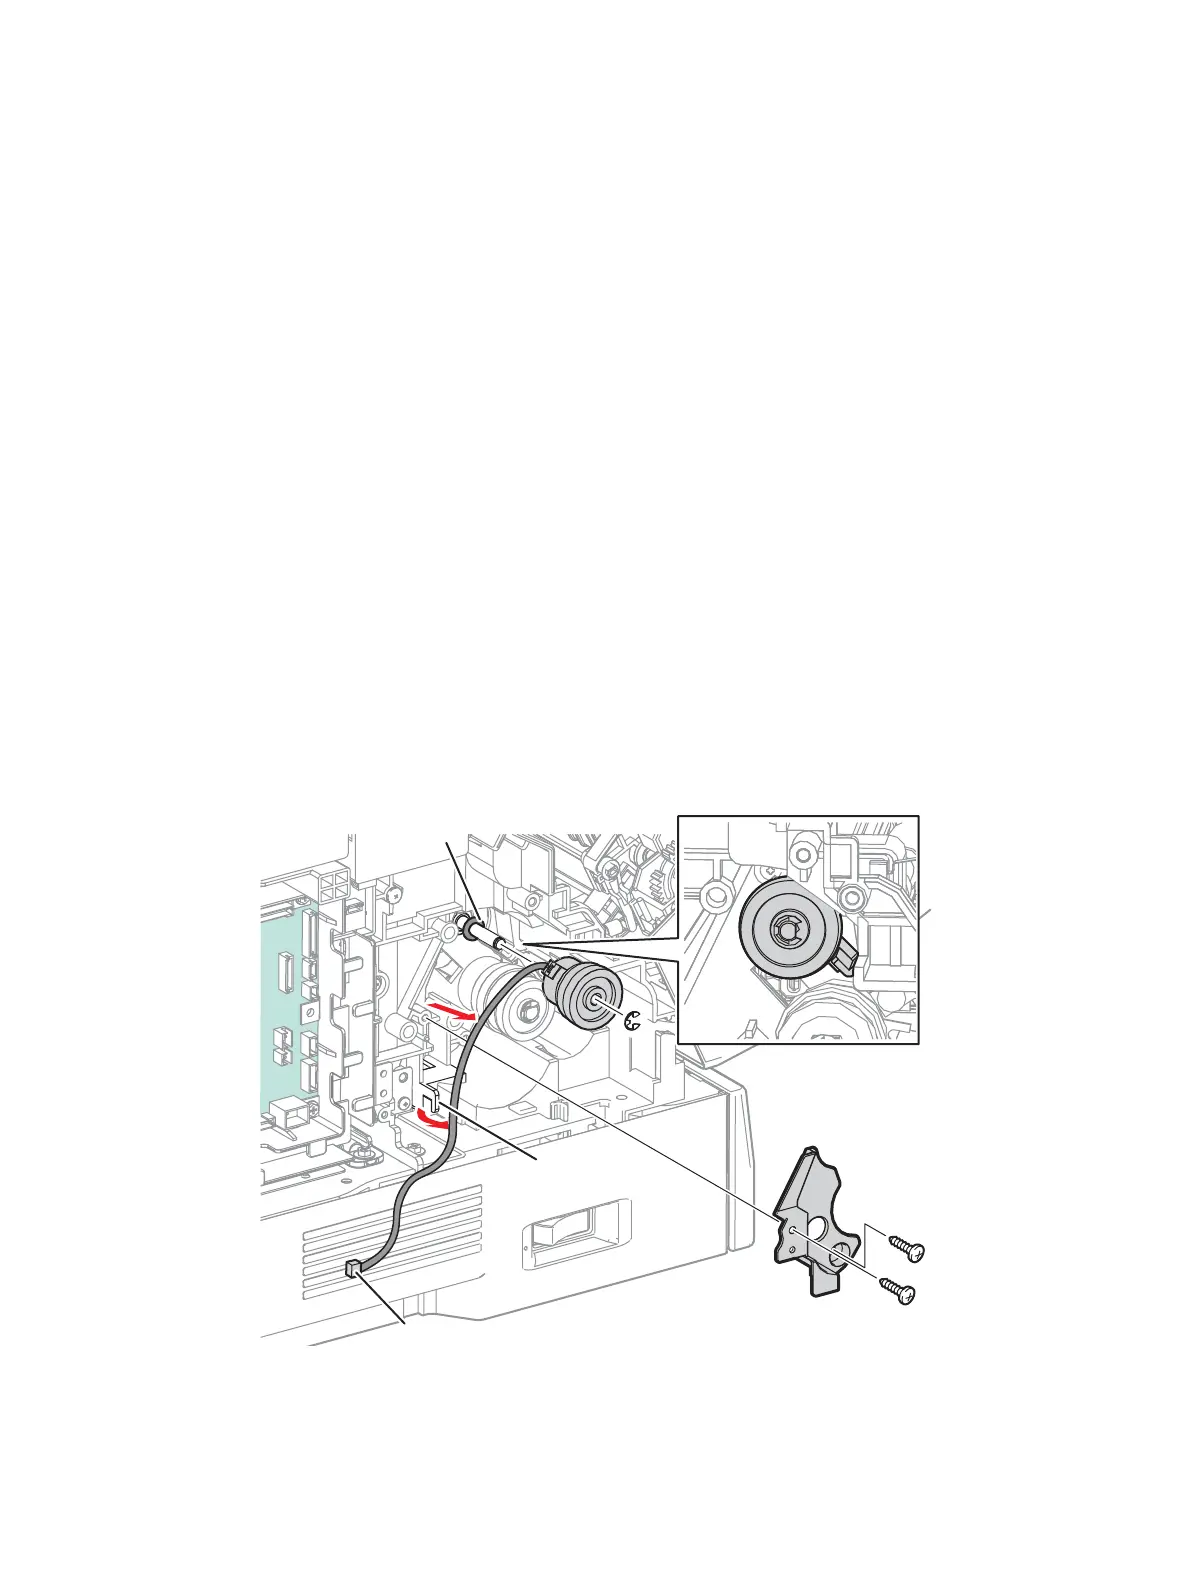
REP 5.5 Registration Clutch Assembly
PL 5.1.11/ PL 5.1.99
1. Remove the I/P PWB Cover Assembly (REP 1.5 Image Processor (I/P) PWB Cover Assembly on
page 4-19).
2. Remove the Rear Cover (REP 1.6 Rear Cover on page 4-20).
3. Remove the Left Side Cover (REP 1.10 Left Side Cover on page 4-25).
4. Remove the Paper Handling Drive Assembly (REP 11.7 Paper Handling Drive Assembly on
page 4-197).
Note: P/J458 has been disconnected in the Paper Handling Drive Assembly removal procedure.
5. Remove 2 screws (silver, tapped, 10 mm) that secure the CTD Harness Cover to the printer and
remove the CTD Harness Cover.
6. Release the wiring harness that is connected to the Registration Clutch Assembly from the Harness
Guide.
7. Remove the E-ring that secures the Registration Clutch Assembly.
Note: When removing the Registration Clutch Assembly in the following step, be careful not to
drop the Washer (PL 5.1.13) that is attached to the Shaft.
8. While freeing the depressed part of the Registration Clutch Assembly from the boss of the printer,
remove the Registration Clutch Assembly by pulling it out from the Shaft.
Figure 1
Replacement Note: Align the Clutch with the notch (see Figure 1 on page 4-120).
s7100-125
Washer
Harness Guide
P/J458
 Loading...


