Service Parts Disassembly
Phaser 7100 Service Manual Xerox Internal Use Only4-42
REP 2.5 Right Tray Guide Assembly
PL 2.1.5
1. Remove Tray 1.
2. Remove the I/P PWB Cover Assembly (REP 1.5 Image Processor (I/P) PWB Cover Assembly on
page 4-19).
3. Remove the Rear Cover (REP 1.6 Rear Cover on page 4-20).
4. Remove the Right Side Cover (REP 1.11 Right Side Cover on page 4-27).
5. Remove the Right Feeder Cover (REP 2.3 Right Feeder Cover on page 4-40).
6. Remove the Tray Cover (REP 2.11 Tray Cover on page 4-50).
7. Remove the Protect Cover Assembly (REP 2.7 Protect Cover Assembly on page 4-44).
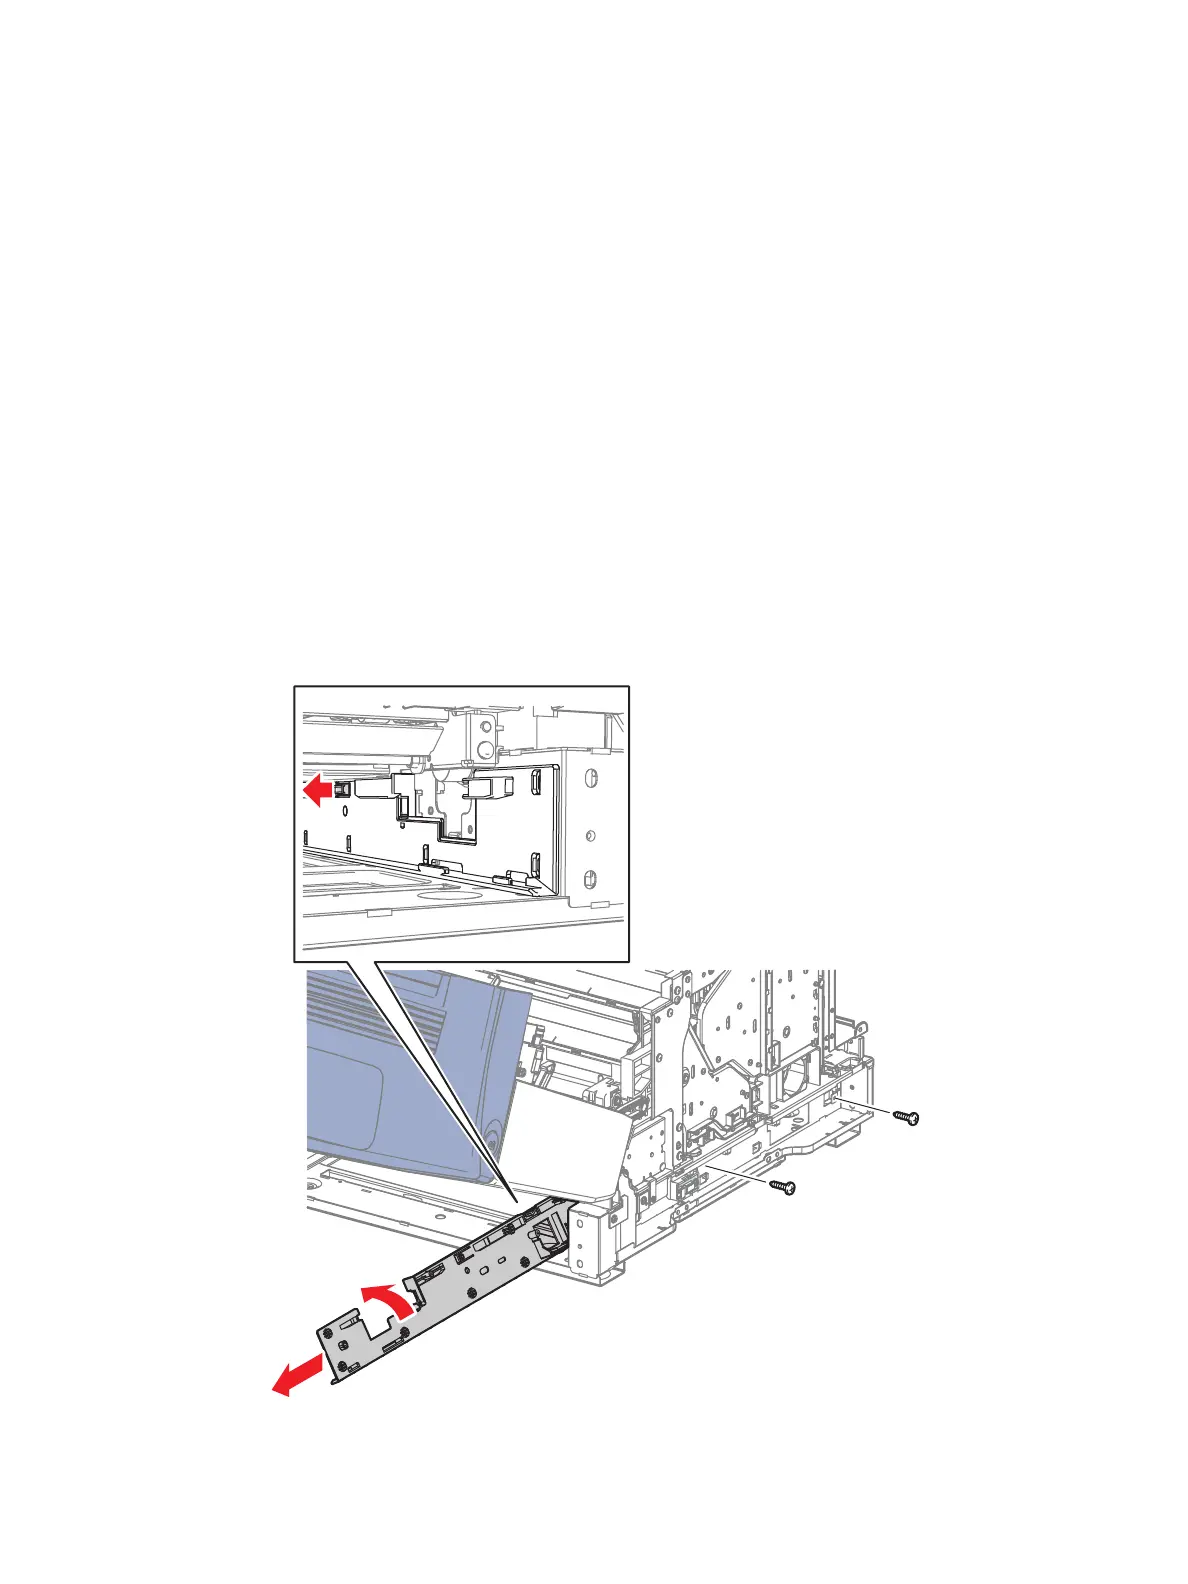
8. Remove 2 screws (silver, tapped, 10mm) that secure the Right Tray Guide Assembly.
9. Remove the Size Switch Holder Assembly (REP 2.6 Size Switch Holder Assembly on page 4-43)
from the Right Tray Guide Assembly.
10. From the inside of the printer, release the hook that secures the Right Tray Guide Assembly while
pushing the Guide Assembly toward the front inner side of the printer and pull the Guide
Assembly out to remove.
 Loading...


