Service Parts Disassembly
Xerox Internal Use Only Phaser 7100 Service Manual 4-197
REP 11.7 Paper Handling Drive Assembly
PL 11.1.19
Note: For additional tips, refer to the Paper Handling Drive Assembly Removal video (also available
in the Phaser 7100 Training materials).
1. Remove the I/P PWB Cover Assembly (REP 1.5 Image Processor (I/P) PWB Cover Assembly on
page 4-19).
2. Remove the Rear Cover (REP 1.6 Rear Cover on page 4-20).
3. Remove the Left Side Cover (REP 1.10 Left Side Cover on page 4-25).
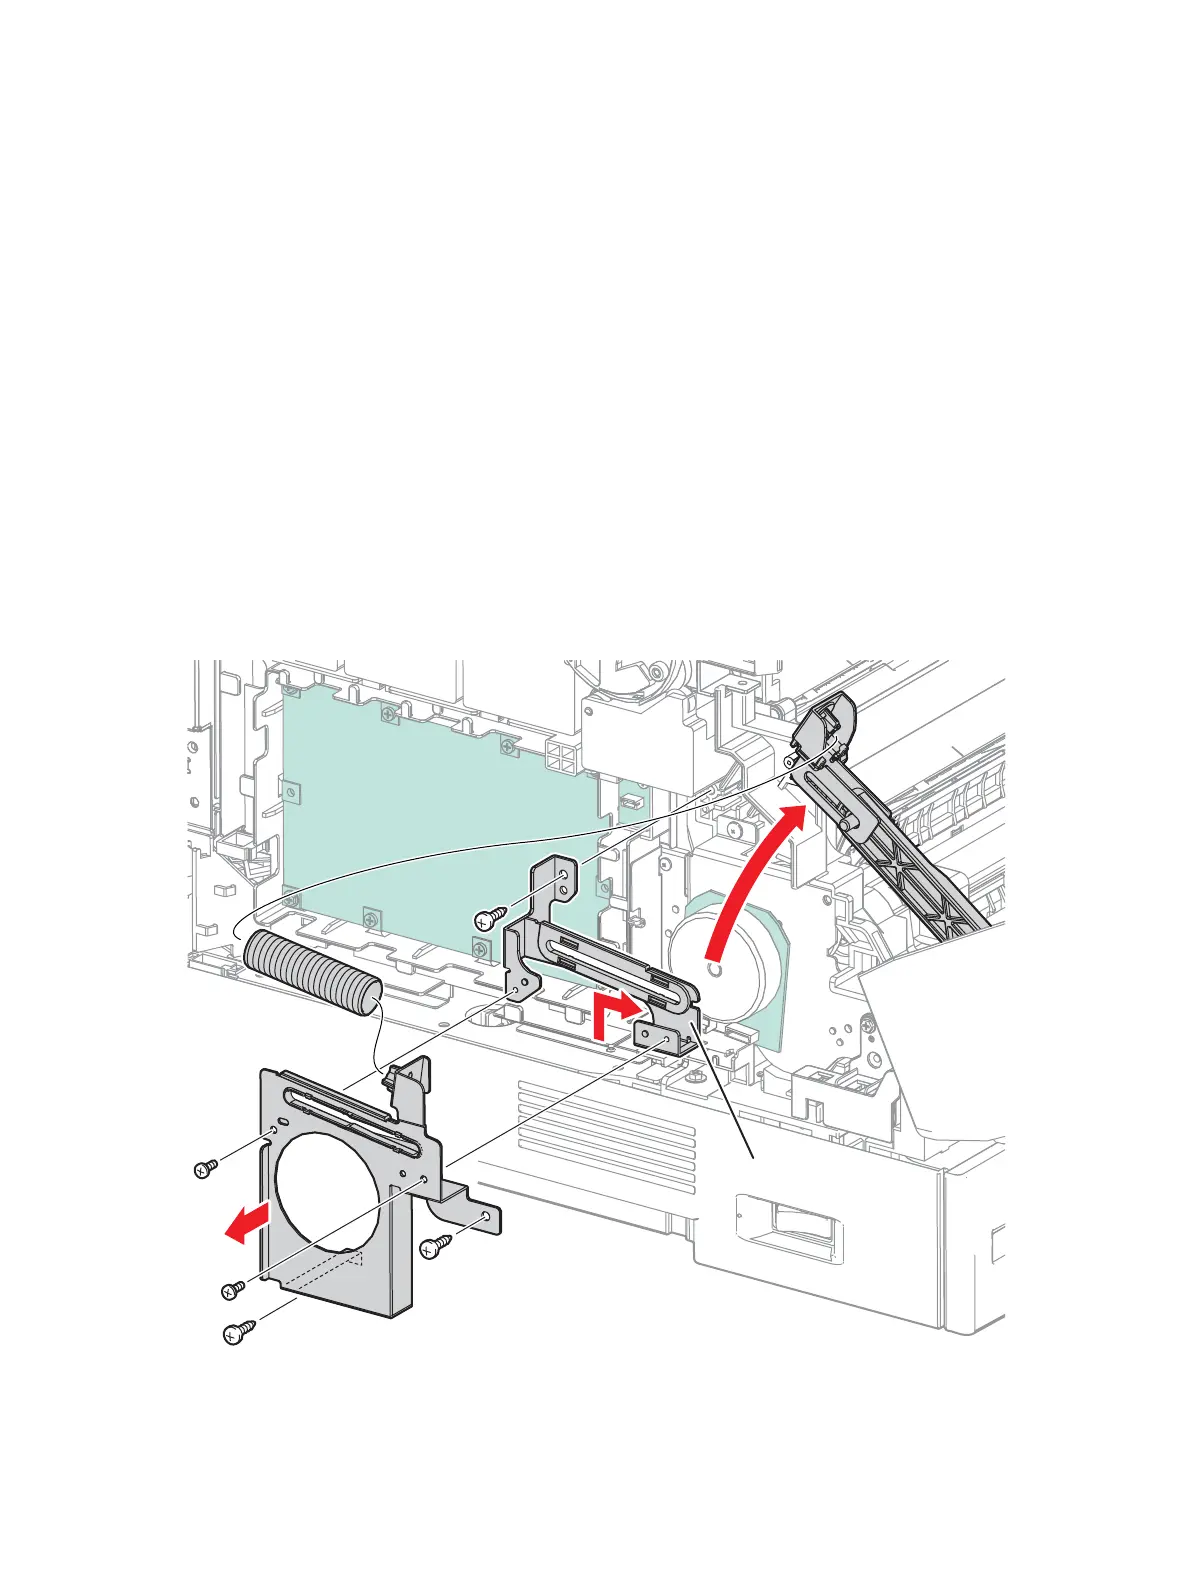
4. Remove the Damper Spring (PL 4.1.3) from the Damper Assembly.
5. Remove 2 screws (silver, tapped, 12 mm) and 2 screws (silver, 6 mm) that secure the Rail Bracket
Assembly (PL 4.1.5) to the printer and remove the Rail Bracket Assembly.
6. Lift the Front Left Support Arm (PL 4.2.13) upward.
7. Remove one screw (silver, tapped, 12 mm) that secures the Base Bracket Assembly (PL 4.1.2) to
the printer.
8. Lift and shift the Base Bracket Assembly to remove.
s7100-227
Base Bracket Assembly
 Loading...


