Service Parts Disassembly
Xerox Internal Use Only Phaser 7100 Service Manual 4-7
Preparation
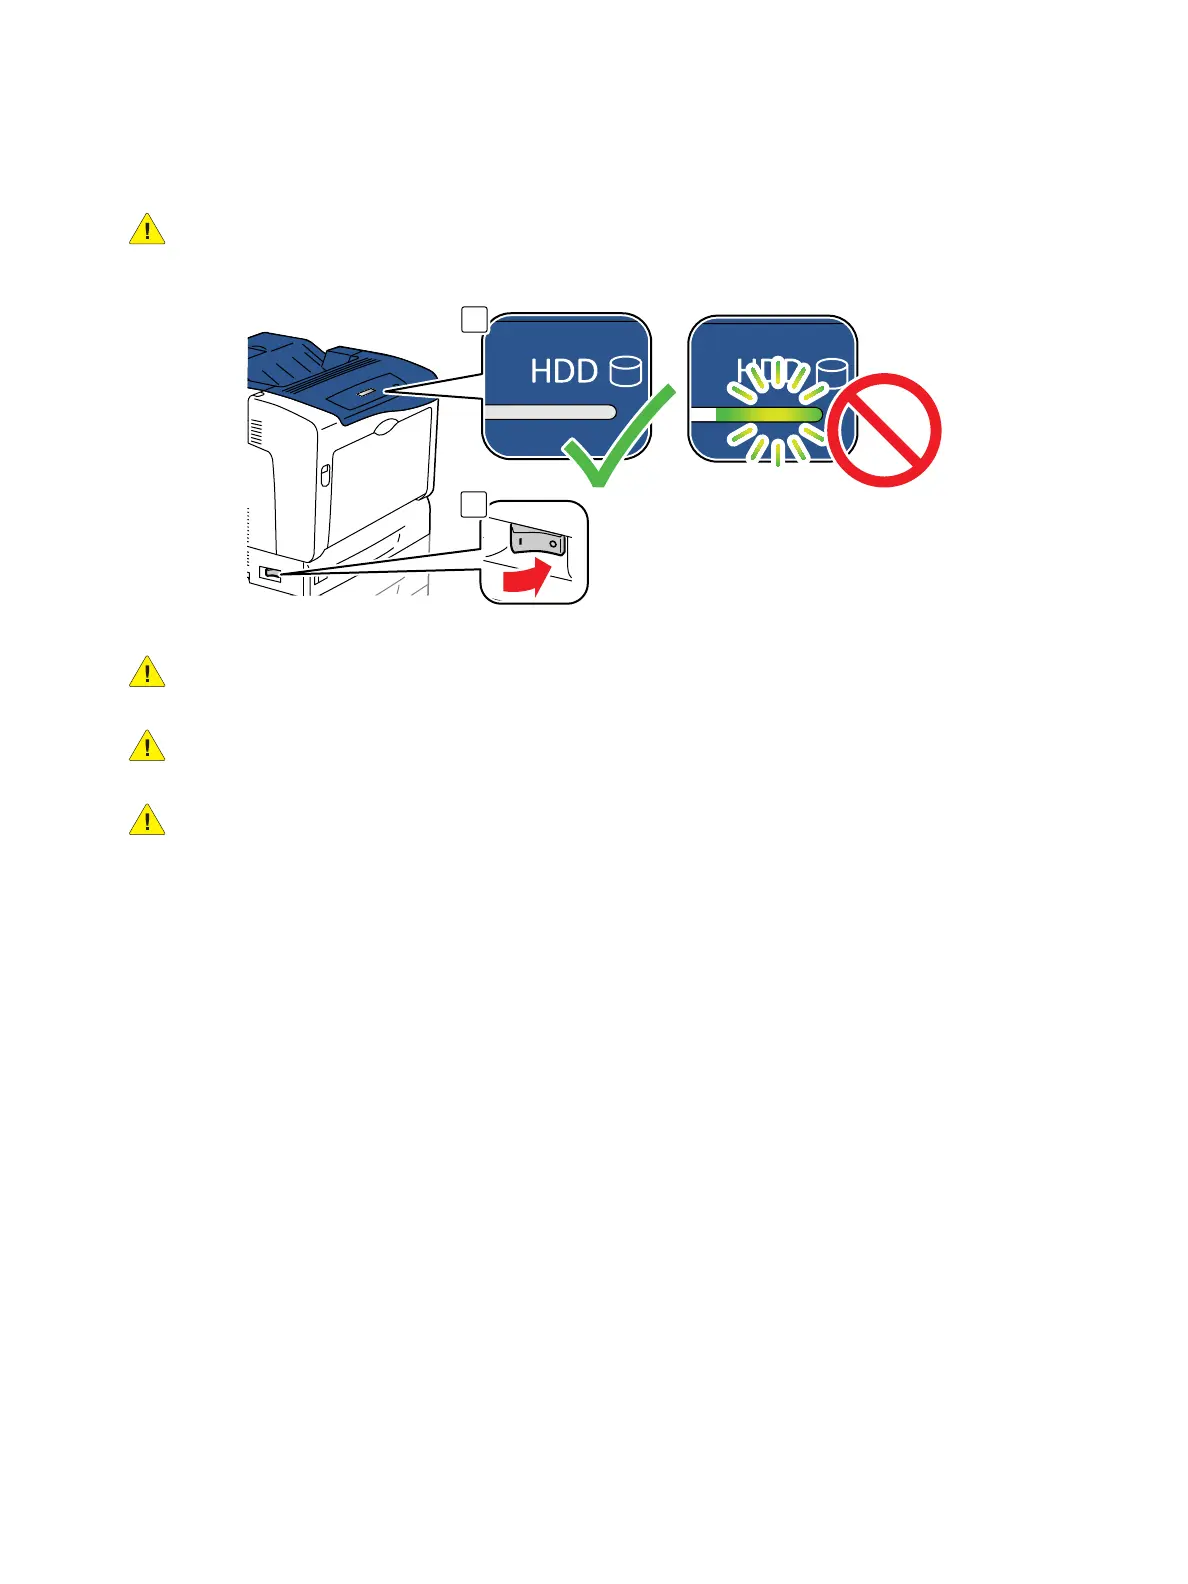
CAUTION: To prevent printer malfunction or internal hard drive damage, prior to power Off the
printer, be sure to verify that the HDD indicator on the Control Panel is not On or blinking.
WARNING: Unplug the power cord from the wall outlet.
WARNING: Allow the Fuser Unit to cool before performing any procedures.
CAUTION: Many parts are secured by plastic tabs. Do not over flex or force these parts. Do not
over torque screws threaded into plastic.
Note: Names of parts that appear in the removal procedures may not match the names that
appear in the Parts List. For example, a part called Paper Tray in a removal procedure may appear
on the Parts List as Cassette Assembly. While using removal procedure, ignore any prerequisite
procedures for parts already removed.
1. Wear an Electrostatic Discharge wrist strap.
2. Turn Off power and disconnect the power cord from the wall outlet.
3. Disconnect all cables from the printer.
4. Remove the Toner Cartridges (REP 8.0 Toner Cartridge Assembly (Y/ M/ C/ K) on page 4-136).
Notations in the Disassembly Text
• The notation “(item X)” points to a numbered callout in the illustration corresponding to the
disassembly procedure being performed.
• The notation “PLX.X.X” indicates that this component is listed in the Parts List.
• Arrows in an illustration show direction of movement when removing or replacing a component.
• The notation “(tap, plastic, 10 mm)” or “(metal, 6 mm)” refer to the type of screw being removed.
Note: Provides information specific to the replacement of parts or assemblies.
 Loading...


