Service Parts Disassembly
Xerox Internal Use Only Phaser 7100 Service Manual 4-99
REP 4.7 Fuser Drive Assembly
PL 4.2.16
WARNING: The Fuser may be hot. Turn the printer power Off and allow at least 30 minutes for
the Fuser to cool before removing the Fuser.
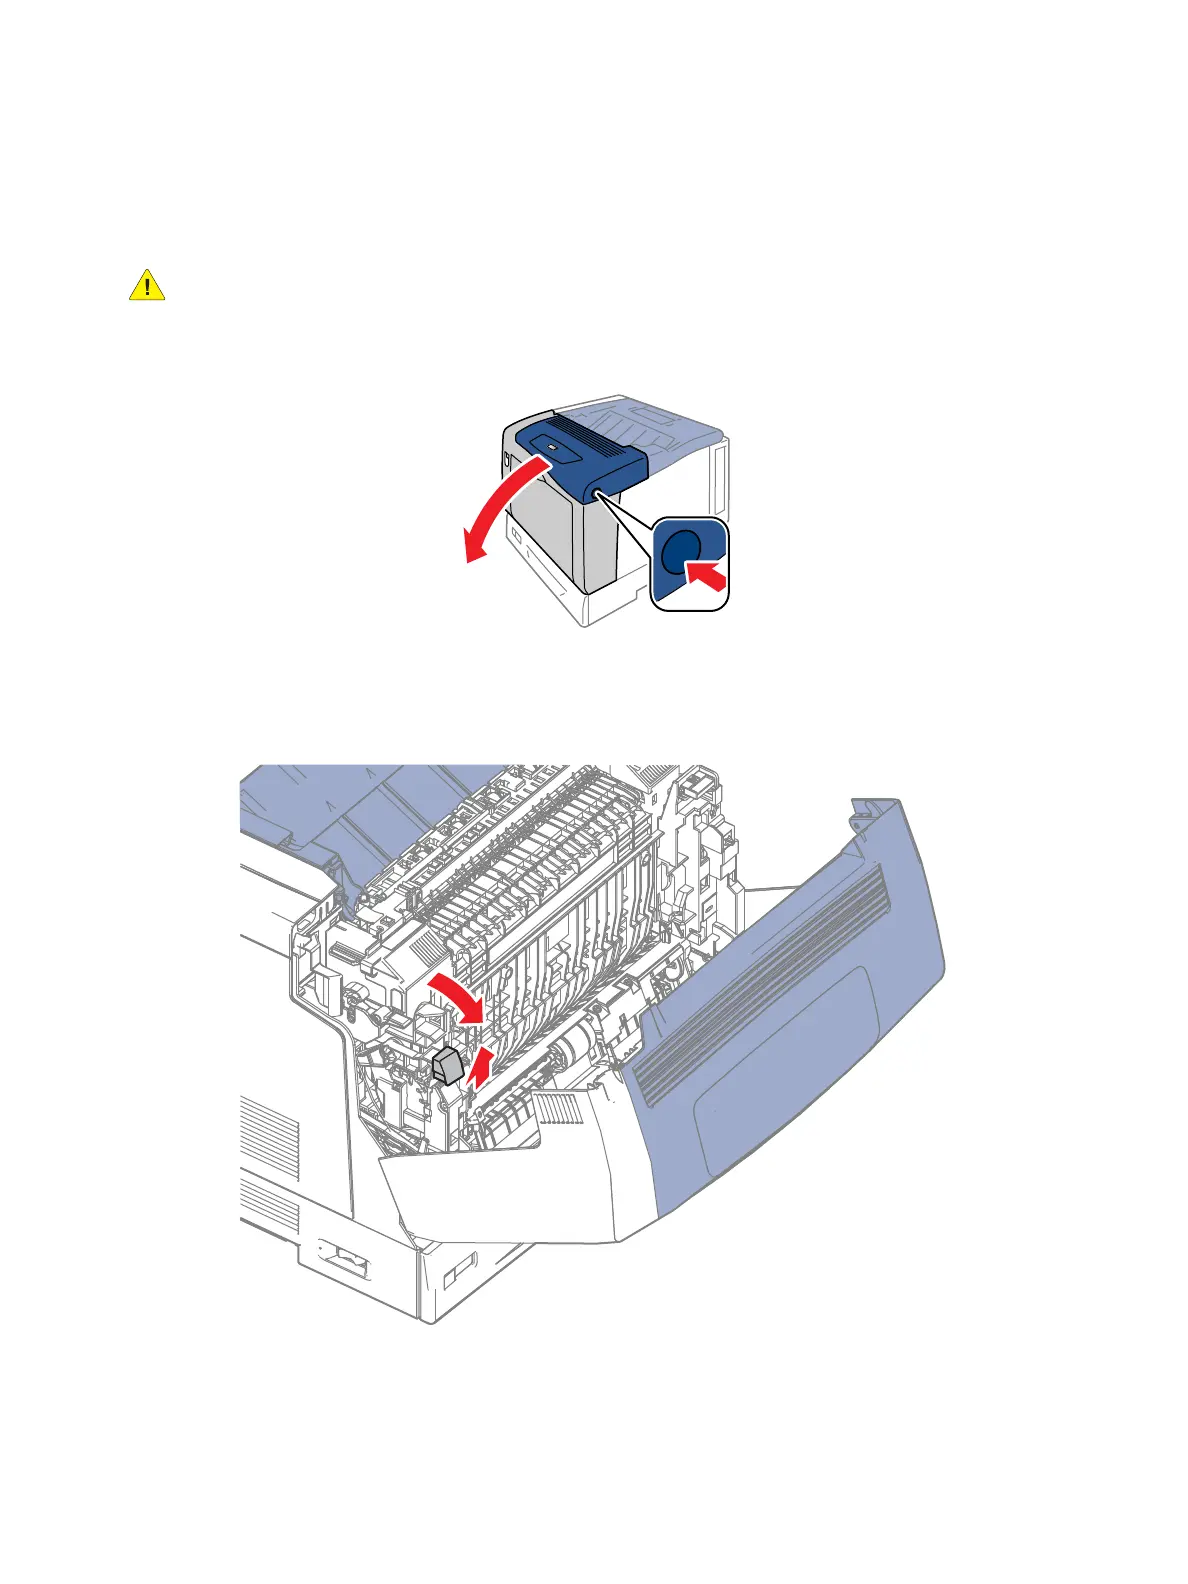
1. Press the B button and open the Front Cover Assembly (PL 1.1.38).
2. Remove the Fuser Unit (REP 10.1 Fuser Unit on page 4-183).
3. Release latch A and open the Front Frame Assembly (PL 4.1.6) until it is in a position where it is
convenient to perform the operation and maintain that position to perform the subsequent steps.
4. Remove the Left Latch Lever (REP 4.4 Right/ Left Latch Lever, Latch Spring on page 4-89).
2
1
 Loading...


