REAR BRAKE
4-42
▼▼▼▼▼▼▼▼▼▼▼▼▼▼▼▼▼▼▼▼▼
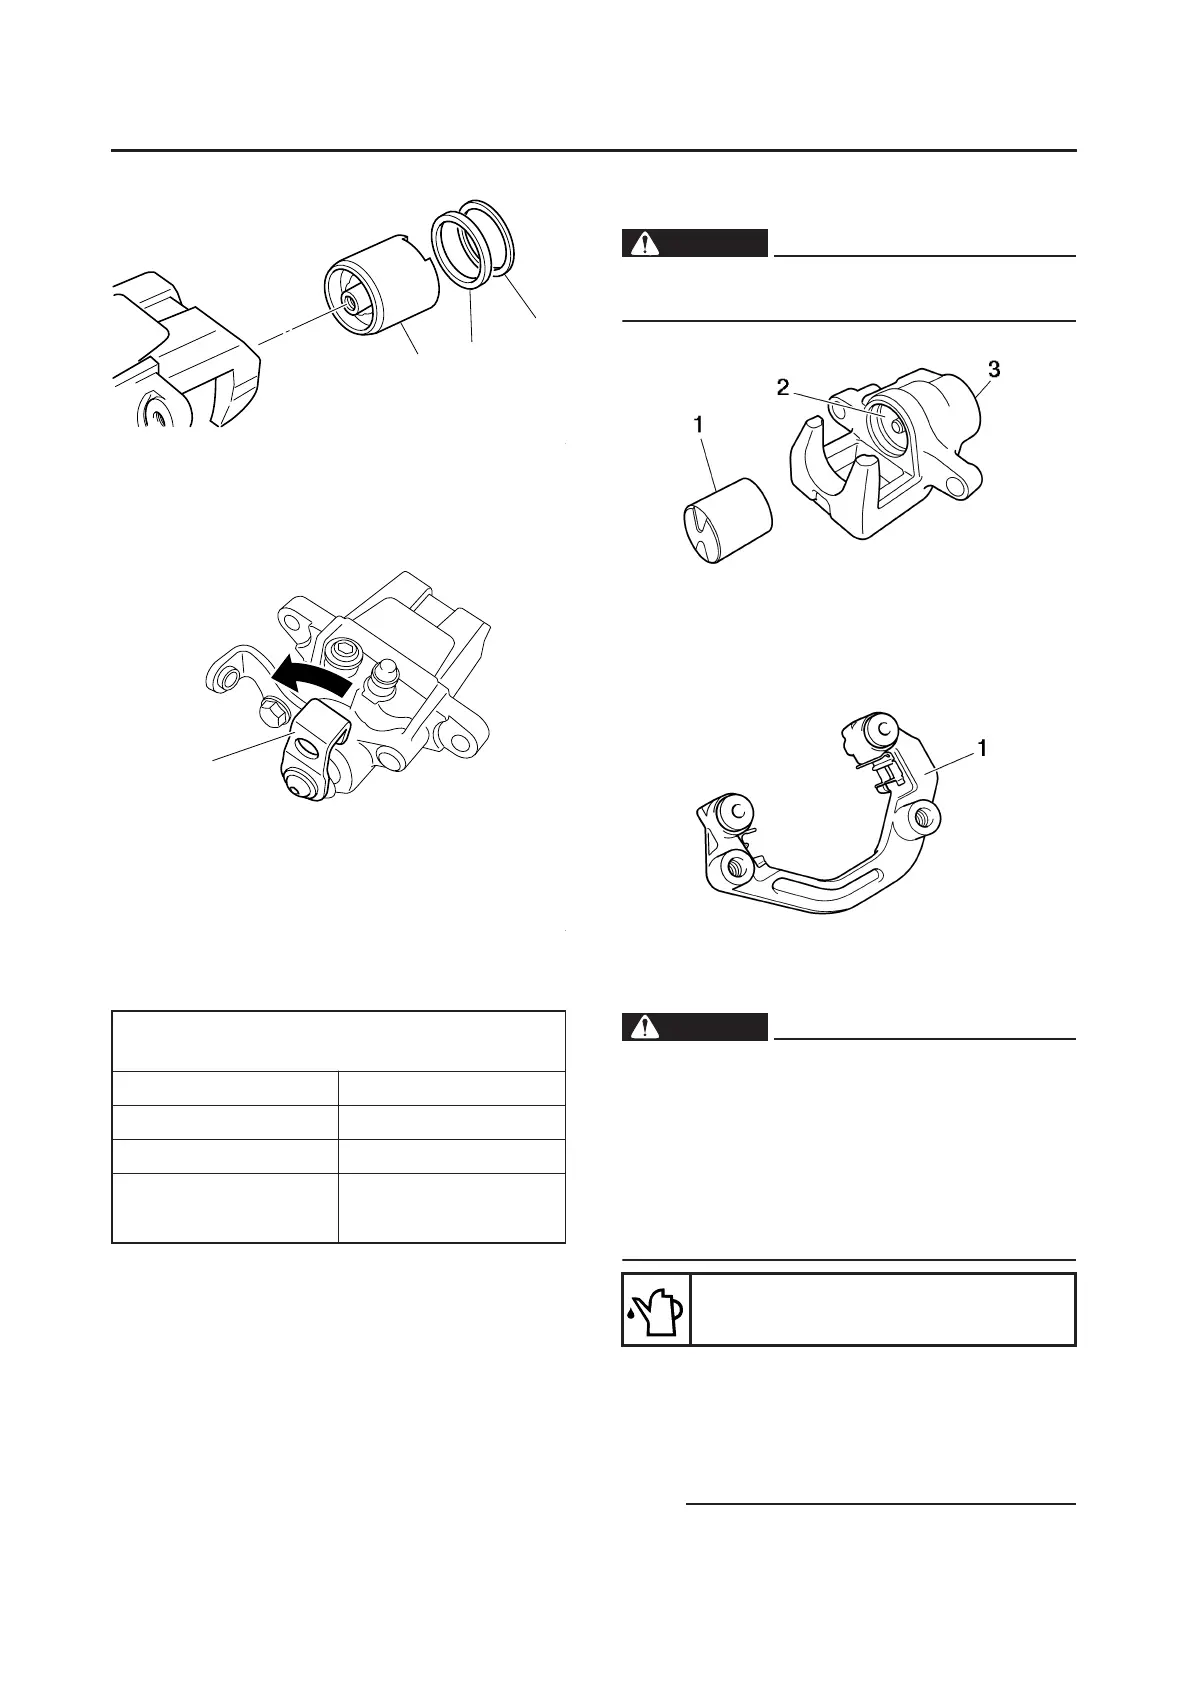
a. Operate the rear brake lock lever “4” continu-
ously in the direction shown by the arrow until
the piston comes out.
b. Remove the dust seal and brake caliper pis-
ton seal.
▲▲▲▲▲▲▲▲▲▲▲▲▲▲▲▲▲▲▲▲▲
EAS22640
CHECKING THE REAR BRAKE CALIPER
1. Check:
● Brake calipe piston “1”
Rust/scratches/wear → Replace the brake
caliper pistons.
● Brake caliper cylinder “2”
Scratches/wear → Replace the brake caliper
assembly.
● Brake caliper body “3”
Cracks/damage → Replace the brake caliper
assembly.
● Brake fluid delivery passages
(brake caliper body)
Obstruction → Blow out with compressed air.
WARNING
EWA13610
Whenever a brake caliper is disassembled,
replace the brake caliper piston seals.
2. Check:
● Brake caliper brackets “1”
Cracks/damage → Replace.
EAS22660
ASSEMBLING THE REAR BRAKE CALIPER
WARNING
EWA13620
● Before installation, all internal brake com-
ponents should be cleaned and lubricated
with clean or new brake fluid.
● Never use solvents on internal brake com-
ponents as they will cause the piston seals
to swell and distort.
● Whenever a brake caliper is disassembled,
replace the brake caliper piston seals.
1. Install:
● Brake caliper piston “1”
Turn the brake caliper piston clockwise until
section “a” of the brake caliper piston is level
with the surface of the brake caliper body.
NOTE:
Align the recesses “b” in the brake caliper piston
Recommended brake component
replacement schedule
Brake pads If necessary
Piston seals Every two years
Brake hoses Every four years
Brake fluid
Every two years and
whenever the brake is
disassembled
1
3
2
4
Recommended fluid
DOT 4
 Loading...