ELECTRICAL COMPONENTS
8-106
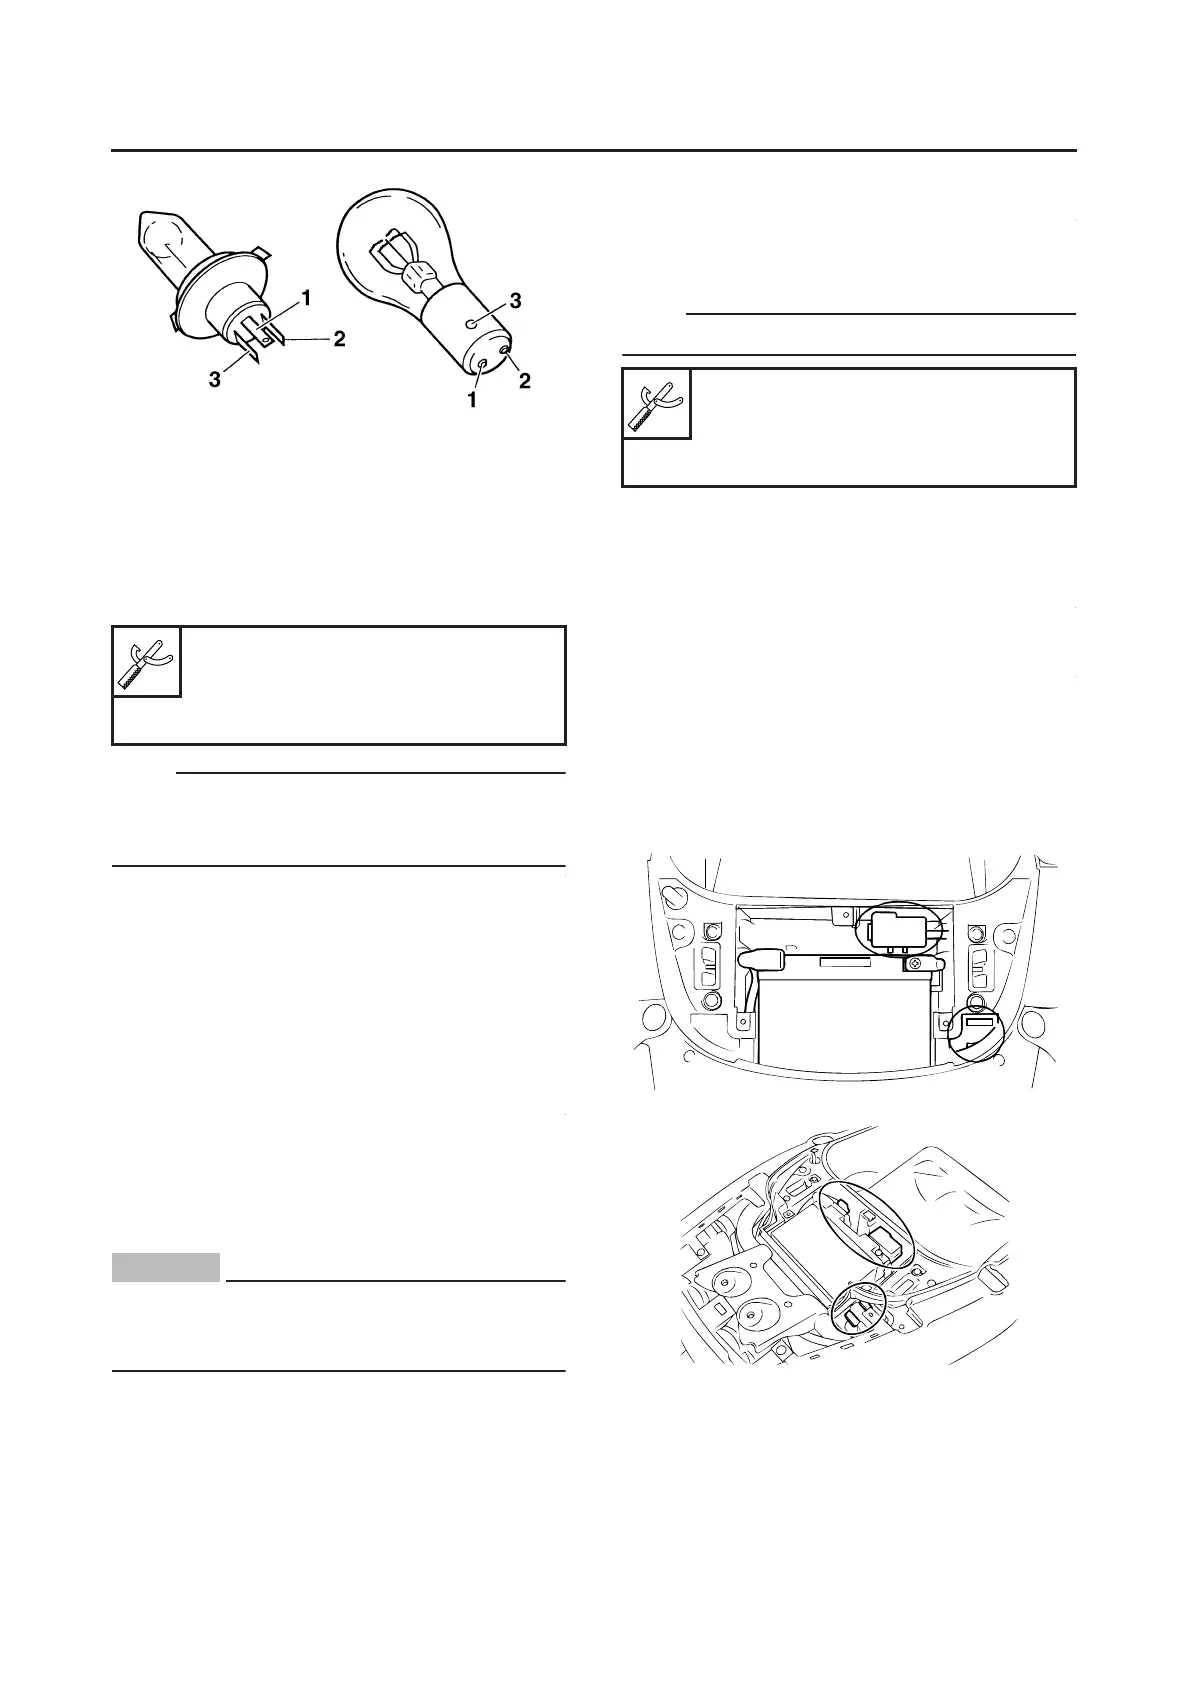
Checking the condition of the bulb sockets
The following procedure applies to all of the bulb
sockets.
1. Check:
● Bulb socket (for continuity)
(with the pocket tester)
No continuity → Replace.
NOTE:
Check each bulb socket for continuity in the
same manner as described in the bulb section;
however, note the following.
▼▼▼▼▼▼▼▼▼▼▼▼▼▼▼▼▼▼▼▼▼
a. Install a good bulb into the bulb socket.
b. Connect the pocket tester probes to the re-
spective leads of the bulb socket.
c. Check the bulb socket for continuity. If any of
the readings indicate no continuity, replace
the bulb socket.
▲▲▲▲▲▲▲▲▲▲▲▲▲▲▲▲▲▲▲▲▲
EAS28000
CHECKING THE FUSES
The following procedure applies to all of the fus-
es.
CAUTION:
ECA13680
To avoid a short circuit, always set the main
switch to “OFF” when checking or replacing
a fuse.
1. Remove:
● Grab bar
● Rear cover
● Battery cover
Refer to “GENERAL CHASSIS” on page 4-1.
2. Check:
● Fuse
▼▼▼▼▼▼▼▼▼▼▼▼▼▼▼▼▼▼▼▼▼
a. Connect the pocket tester to the fuse and
check the continuity.
NOTE:
Set the pocket tester selector to “Ω × 1”.
b. If the pocket tester indicates “∞”, replace the
fuse.
▲▲▲▲▲▲▲▲▲▲▲▲▲▲▲▲▲▲▲▲▲
3. Replace:
● Blown fuse
▼▼▼▼▼▼▼▼▼▼▼▼▼▼▼▼▼▼▼▼▼
a. Set the main switch to “OFF”.
b. Install a new fuse of the correct amperage
rating.
c. Set on the switches to verify if the electrical
circuit is operational.
d. If the fuse immediately blows again, check
the electrical circuit.
Pocket tester
90890-03112
Analog pocket tester
YU-03112-C
Pocket tester
90890-03112
Analog pocket tester
YU-03112-C
A. XP500
B. XP500A
A
B

 Loading...