CRANKCASE AND CRANKSHAFT
5-68
connecting rod bolt and nut with a new one
and perform the procedure again.
CAUTION:
ECA15B1028
● Tighten the nut until it is at the specified an-
gles.
● Do not use a torque wrench to tighten the
connecting rod nut to the specified angle.
NOTE:
On a hexagonal nut, note that the angle from
one corner to another is 90°.
▲▲▲▲▲▲▲▲▲▲▲▲▲▲▲▲▲▲▲▲▲
5. Install:
● Balancer connecting rod
● Connecting rod cap
CAUTION:
ECA15B1043
● When tightening the nuts be sure to use an
F-type torque wrench.
● Without pausing, tighten to full torque
specification. Apply continuous torque
57–63 Nm (5.7–6.3 m•kg, 41–45 ft•lb). Once
you reach 57 Nm (5.7 m•kg, 41 ft•lb) DO
NOT STOP TIGHTENING until final torque is
reached. If the tightening is interrupted
57–63 Nm (5.7–6.3 m•kg, 41–45 ft•lb) loosen
the nut to less than 57 Nm (5.7 m•kg, 41
ft•lb) and start again.
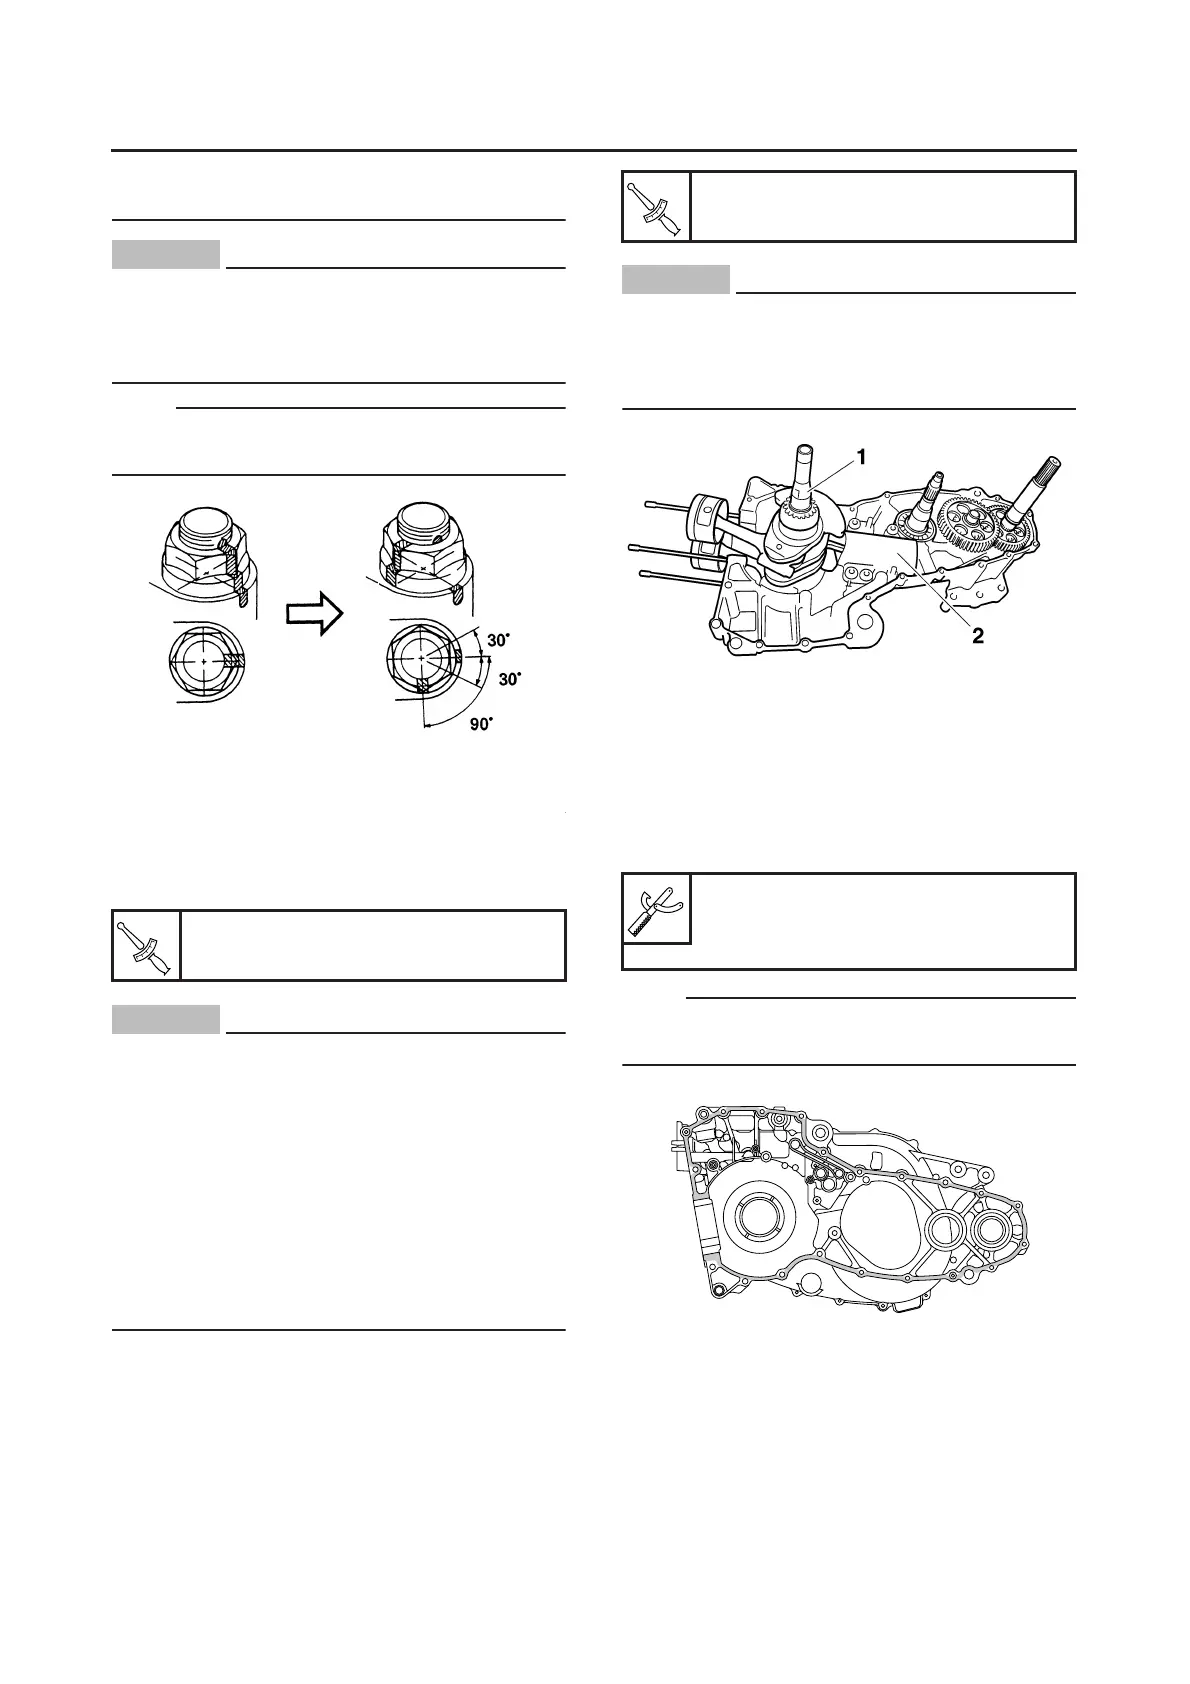
EAS15B4004
INSTALLING THE CRANKSHAFT
1. Install:
● Crankshaft assembly “1”
● Balancer piston cylinder “2”
CAUTION:
ECA15B1003
To avoid scratching the crankshaft and to
ease the installation procedure, apply grease
onto the oil seal lips and apply engine oil
onto each bearing.
EAS25700
ASSEMBLING THE CRANKCASE
1. Thoroughly clean all the gasket mating sur-
faces and crankcase mating surfaces.
2. Apply:
● Sealant
(onto the crankcase mating surfaces)
NOTE:
Do not allow any sealant to come into contact
with the oil gallery.
3. Install:
● Dowel pins
● Left crankcase
Connecting rod cap
60 Nm (6.0 m•kg, 43 ft•lb)
T
R
.
.
Balancer piston cylinder bolt
58 Nm (5.8 m•kg, 42 ft•lb)
Yamaha bond No. 1215 (Three
Bond No.1215®)
90890-85505
T
R
.
.
 Loading...